13. Outbound Asynchronous Interface: Salesforce Account to SAP CPI
1. Overview
This document describes how to create an outbound asynchronous interface from Salesforce to SAP CPI. In Salesforce, the Skyvva SAP BTP Integration Suite Adapter is configured with the CPI endpoint details so that Salesforce pushes data directly to a CPI-side integration flow.
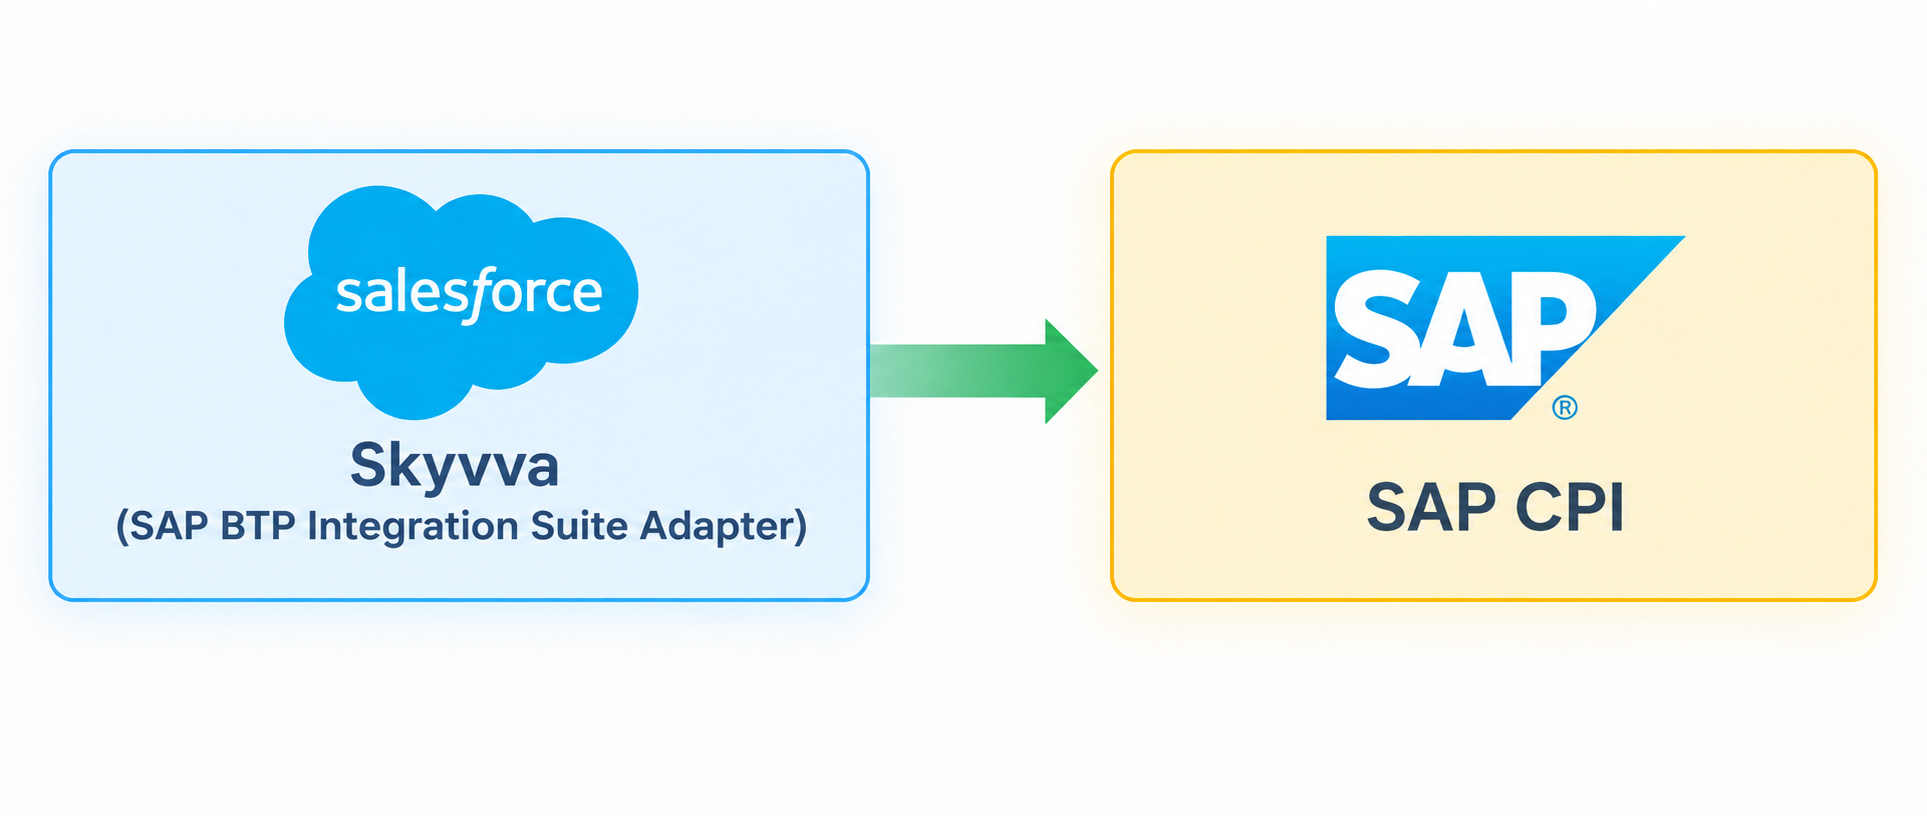
Figure 1: Salesforce Account pushed asynchronously to SAP CPI as JSON — end-to-end flow.
1.1 Business Context
Salesforce is often where a business transaction is created — a new Account, Order, or Case — but SAP needs to know about it too, for invoicing, credit checks, or order fulfillment. The SAP BTP Integration Suite Adapter gives Salesforce a declarative way to push that change into SAP CPI, which then owns routing and delivery into SAP on its own side.
This tutorial uses Asynchronous, fire-and-forget processing: Salesforce pushes the change and moves on without waiting for SAP's response. Use this when nobody needs SAP's answer back inside the same transaction — a new Account, an Opportunity marked Closed Won, or any other master-data sync. If SAP is slow or briefly unavailable, the Salesforce save still succeeds; SAP simply catches up once it's back. Reach for Synchronous processing instead only when a user's next action genuinely depends on SAP's immediate answer (e.g. a live credit check that must complete before the record can save).
1.2 Tutorial Scenario
This tutorial builds a single Account (Nordwind Fahrzeugteile GmbH, §4.1) pushed Asynchronously to SAP CPI as JSON, end to end. To keep the walkthrough self-contained, the push is triggered by hand with a short Apex script (invokeCalloutV3, §4.1) instead of waiting on a real sales rep to close a real deal — in production, that same interface gets wired to a Salesforce Trigger, Flow, or scheduled job instead of being run by hand. It's the foundational reference pattern, not a finished production trigger.
It also configures only one side of the integration: the Salesforce-side outbound adapter (Adapter__c.Type__c = 'SAP CPI'), where Salesforce is the caller — not the CPI-side adapter used when CPI needs to call into Salesforce as a Sender or Receiver.
Pre-requisites:
- Skyvva Package installed on Salesforce
- SAP CPI user with the required authorizations for message processing
2. Salesforce Interface Development
2.1 Create Integration in Salesforce
Create a SKYVVA Outbound Interface under Integration in Salesforce — create the parent Integration record first if you don't already have one (Integration tab → New, name it, save).
Once the Integration exists, go to its Interfaces related list, click New Interface, and provide the following details to create the outbound interface:
| Field | Value |
|---|---|
| Name | Account_CPI_Interface_OB |
| Source/Target Name | Account |
| Status | Deployed |
| Interface Direction | Outbound |
| Processing Mode | Asynchronous |
| Interface API Version | V3 — required, so the interface runs on the current outbound engine. |
| Operation Type | Upsert (or as required) |
Note — MetaData Provider / Repository / Source-Target Message Type: this tutorial uses
MessageType-less mapping — leave these three fields blank and skip straight to §2.3;
the Mapping Tool builds the source tree directly from the liveAccountschema. See §2.2
below only for why you'd reach for a Message Type instead on a different interface — it
isn't part of this tutorial's own walkthrough.
Save the interface.
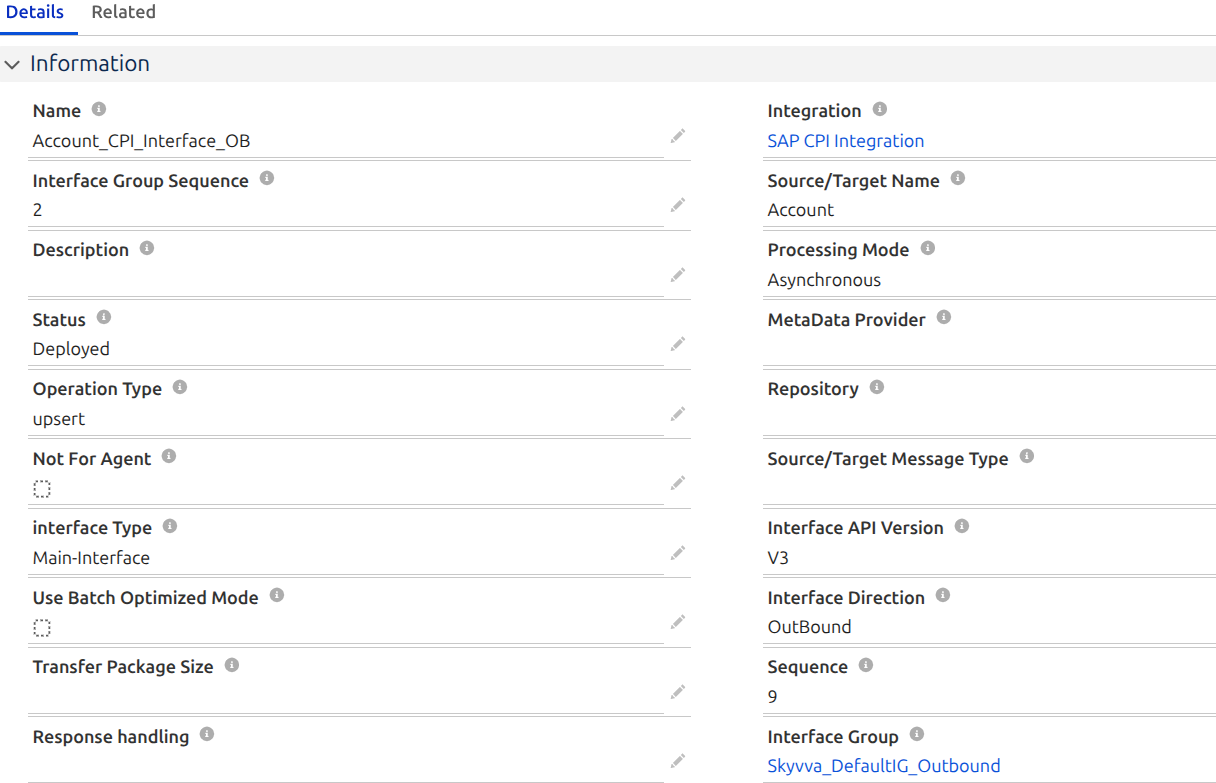
Figure 2: Interface detail/edit layout.
2.2 Why a Message Type instead of MessageType-less mapping (background)
This section explains when you'd reach for a Message Type on an interface, for context alongside §2.1's note. Skip straight to §2.3 to keep building this tutorial's example.
A MetaData Provider + Repository + Message Type together define a Skyvva standard REST template that reshapes the outgoing JSON into a specific envelope (e.g. wrapping the payload in Body > Account) instead of sending the raw SObject field shape.
A real business case: say the target isn't a CPI iFlow you control, but SAP's own Account/Customer Master API (a published OData/REST service, e.g. API_BUSINESS_PARTNER), already in production use by other systems — a middleware team, a billing platform, an EDI gateway. That API has a fixed, versioned request contract it will not bend to match Salesforce's Account object field-for-field: it expects a specific envelope, its own field names (BusinessPartner, BusinessPartnerName, Country and so on, not Name/BillingCountry), and a nesting shape Salesforce doesn't naturally produce. In that situation you don't get to reshape the wire payload downstream — the contract is owned by SAP, published as an OpenAPI/EDMX spec, and every caller has to match it exactly. Importing that spec as a Message Type (via §2.2's OpenAPI-import path) captures the required shape as real, individually-mappable nodes, so the Mapping Tool can map Salesforce's fields onto SAP's actual contract instead of sending Salesforce's own field shape and hoping the receiver tolerates it.
This tutorial's own Account push has no such external contract to match — the receiving CPI iFlow (§3) is one you also control, and it reshapes the payload itself (JSON→XML, XSLT, Message Mapping). So the Mapping Tool here builds the source tree directly from the live SObject schema (§2.3) instead.
2.3 Mapping
Open the interface's Open Mapping action to map the fields to be sent from the Account SObject onto the Source structure.
Both the source and target structures appear side by side. Map the required fields and save. With MessageType-less mapping, the Target tree here is built directly from the live Account schema too — there's no Request > URL/Header/Body envelope wrapper, since that shape only appears when a Message Type built one (§2.2's alternate path). Expect a flat Account node with its own fields directly underneath.
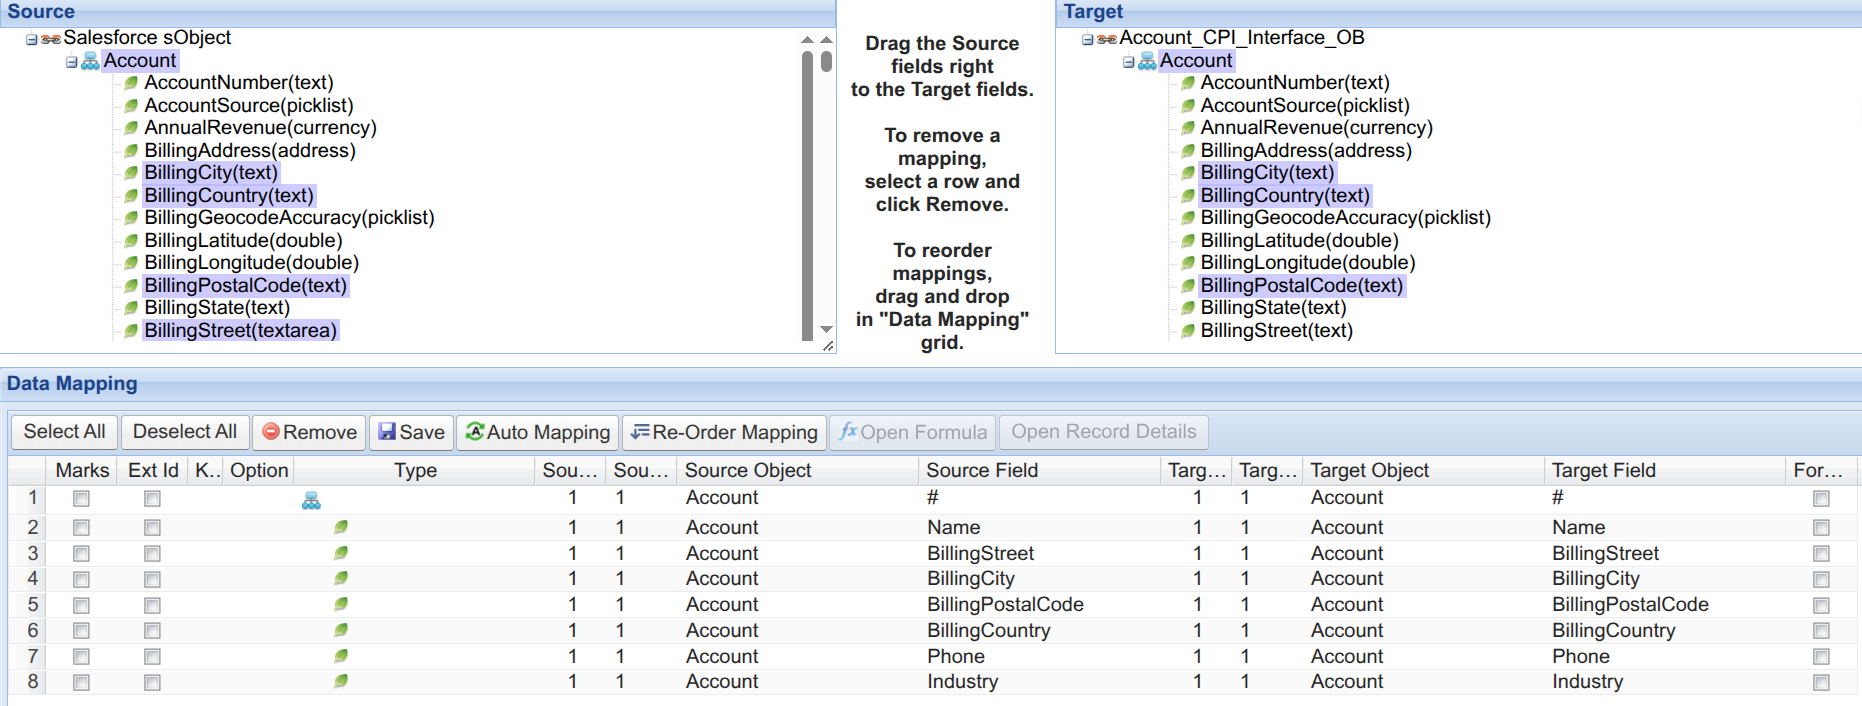
Figure 3: Source-to-target field mapping in the Mapping Tool, MessageType-less .
2.4 Create the Skyvva SAP BTP Integration Suite Adapter
Open the Integration record's Details page and, in the Custom Links section, click SAP Control Board. On the SAP Control Board, select the Adapter tab, then click New to create the adapter.
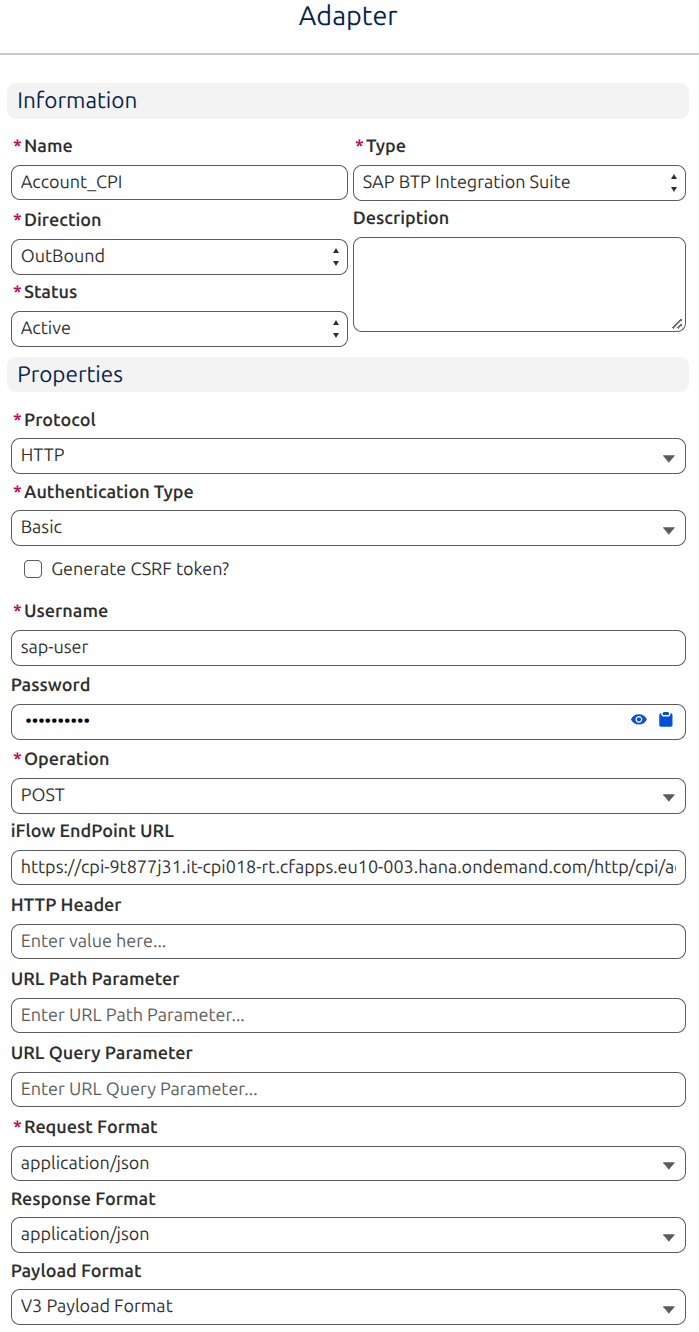
Figure 4: New Adapter dialog — Type shows "SAP BTP Integration Suite," Direction is set to OutBound, and the Properties section shows Protocol, Authentication Type, and "iFlow EndPoint URL."
Selecting "SAP BTP Integration Suite" in the Type dropdown stores
Type__c = 'SAP CPI'.
Core fields
| Field | Value for this tutorial | Notes |
|---|---|---|
| Adapter Name | Account_CPI | Free text — any name that fits your project's naming convention. |
| Type | "SAP BTP Integration Suite" in the dropdown (stores SAP CPI) | Selecting it is what makes every property below appear. |
| Direction | Outbound — used in this tutorial | |
| Status | Active | Must be Active for the adapter to be usable by outbound processing at all — an inactive Outbound adapter is skipped before Salesforce even attempts a callout. |
Authentication Type
For this tutorial, set Authentication Type = Basic, which reveals the username/password and request/response fields configured below.
Fields shown under Basic authentication
| Field | Value for this tutorial |
|---|---|
| Generate CSRF token? | checked, if the CPI sender requires CSRF protection |
| Protocol | HTTP |
| Operation | POST |
| API Service Endpoint URL | the CPI interface endpoint URL — shown as "iFlow EndPoint URL" on the actual form |
| Payload Format | V3 Payload Format (default) — leave as default. This field is only actually read by the legacy V2 outbound engine; because this tutorial's interface has Interface API Version = V3 (§2.1), the V3 engine that runs it never looks at this property at all — it has no effect here regardless of what it's set to. |
| Request Format | application/json |
| Response Format | application/json — present on the form but functionally inert here: this is an Asynchronous interface (§1.1), so nothing is ever done with what CPI returns. It matters for a Synchronous interface instead (see Tutorial_13.md), where the response is parsed and routed back into Salesforce. |
| Header | (leave blank unless needed) |
| URL Path Parameter | (leave blank unless needed) |
| URL Query Parameter | (leave blank unless needed) |
Save the adapter, then add it to the interface's Outbound Setup.

Figure 5: Adapter linked to the Interface's Outbound Setup.
3. SAP CPI Development
Log on to the CPI tenant, navigate to Design → Packages → Artifacts → Create new integration flow.
Step 1 — create the sender HTTPS communication channel and provide the connection parameters.

Figure 6: SAP CPI iFlow — HTTPS sender communication channel configuration.
Step 2 — build the CPI-side source structure for the Message Mapping step without importing any XSD from Salesforce. This tutorial's own example is MessageType-less (§2.1/§4.1), so there's no Skyvva-exported schema to bring over in the first place — derive the source structure directly in CPI instead, e.g. via the Message Mapping editor's own "generate structure from an example payload" option, using the §4.1 sample JSON as the example. Then import the target structure in whatever format the downstream system requires.
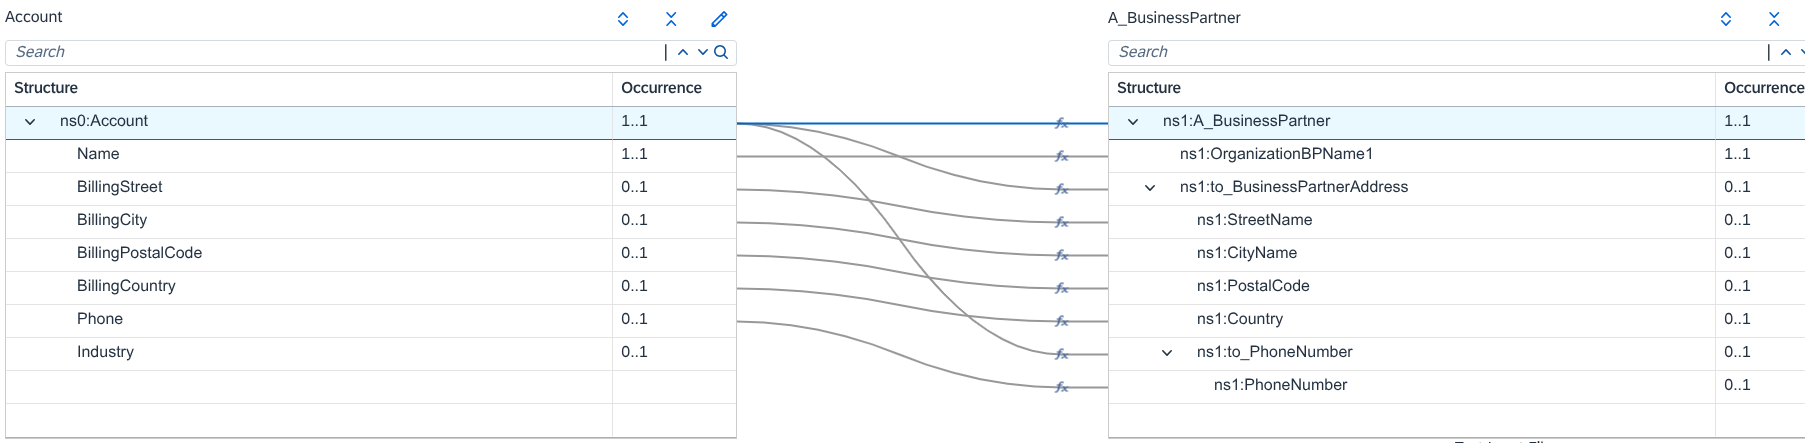
Figure 7: CPI Message Mapping — source structure derived from an example payload.
Below is the resulting integration flow:
- Payload Script — logs the source payload (JSON)
- JSON to XML Converter — converts the received JSON payload to XML
- Payload Script XML — logs the converted XML
- XSLT Mapping — adds the prefix and namespace to the converted XML
- Payload Script XSLT — logs the XSLT-transformed payload
- Message Mapping — source-to-target transformation
- Payload script after mapping — logs the payload after mapping
HTTPS, which is
sender-only) on that connector, pointed at your real SAP system.
⚠️ [SCREENSHOT NEEDED] CPI iFlow — Receiver participant with an HTTP channel attached to
the End event connector.
Figure 8: Receiver HTTP channel added after the End event (screenshot to be added).
| Field | Example value | Notes |
|---|---|---|
| Adapter Type | HTTP | General tab |
| Address | (your SAP endpoint's path) | Connection tab — get the exact path from the target system's own API/service documentation |
| Proxy Type | On-Premise or Internet | Connection tab — On-Premise routes through Cloud Connector when the SAP system isn't directly internet-reachable; Internet for a public/BTP-hosted endpoint |
| Authentication | (per your SAP endpoint) | Connection tab — typically Basic, Client Certificate, or OAuth2 Client Credentials; the credential comes from whoever owns that SAP system, not from this tutorial |
4. Testing
4.1 Push data from Salesforce to CPI using Apex
This is the Nordwind Fahrzeugteile GmbH Account from §1.1's story — the new customer that needs to exist in SAP for billing and order fulfillment. Create (or reuse) an Account with this shape:
| Field | Example value |
|---|---|
| Name | Nordwind Fahrzeugteile GmbH |
| BillingStreet | Industriestraße 12 |
| BillingCity | Frankfurt |
| BillingPostalCode | 60311 |
| BillingCountry | DE |
| Phone | +49-69-2867825 |
| Industry | Automotive Parts Distribution |
⚠️ [SCREENSHOT NEEDED] Salesforce Account record namedNordwind Fahrzeugteile GmbH,
matching the field values in the table above.
Figure 9: Salesforce Account record used as test data (screenshot to be added).
With MessageType-less mapping (the default, §2.1) mapping these fields straight through, this is roughly the JSON payload SAP CPI's sender channel receives:
{
  "Name": "Nordwind Fahrzeugteile GmbH",
  "BillingStreet": "Industriestraße 12",
  "BillingCity": "Frankfurt",
  "BillingPostalCode": "60311",
  "BillingCountry": "DE",
  "Phone": "+49-69-2867825",
  "Industry": "Automotive Parts Distribution"
}
Navigate to Developer Console → Debug → Open Execute Anonymous Window.

Figure 10: Opening the Developer Console in Salesforce.

Figure 11: Execute Anonymous Apex window.
Use the following Apex to trigger the data push:
//Account_CPI_OB --Interface
skyvvasolutions.CallOutControl c = new skyvvasolutions.CallOutControl();
c.returnJSONComplete = true;
c.actionDoIntegrate = true;
c.isCreateMessage = true;
String ids = new String[]{'0011j00001FbXAnAAN'};
skyvvasolutions.Iservices.invokeCalloutV3('CPI Integrate', 'Account_CPI_Interface_OB', ids, 'SYNC', c);
Click Execute Highlighted to push the data, then monitor the message in Salesforce and CPI.

Figure 12: Running the Apex script to trigger the outbound push.
4.2 Salesforce Message Monitor
Navigate to Message Monitoring and search using the interface/integration details.

Figure 13: Salesforce Message Monitoring search filters.
The message triggered to CPI should show a green flag status.

Figure 14: Message Monitoring result — green flag (successful) status.
4.3 CPI Monitoring
Navigate to Message Monitoring in CPI to find the corresponding message with its full log, confirming the Account data was processed.

Figure 15: SAP CPI Message Monitoring showing the processed message.
5. Summary
This tutorial pushed a single Salesforce Account to SAP CPI asynchronously, end to end — Salesforce fires and moves on without waiting for a response, and SAP CPI owns delivery into SAP from there.
| Step | Configuration Area | Purpose |
|---|---|---|
| 1 | Salesforce Interface (§2.1–§2.3) | Defines the outbound interface (Account_CPI_Interface_OB), its Processing Mode (Asynchronous) and Interface API Version (V3), and maps the Account fields to send. |
| 2 | Salesforce SAP BTP Integration Suite Adapter (§2.4) | Configures where and how Salesforce calls out — endpoint, authentication, and request/response format — and is linked to the interface's Outbound Setup. |
| 3 | SAP CPI iFlow (§3) | Receives the call over HTTPS, converts and maps the payload, and forwards it to a Receiver channel pointed at the target SAP system. |
| 4 | Testing (§4) | Triggers the push (by hand via Apex, or directly against CPI via Postman) and confirms success in both Salesforce Message Monitoring and CPI Message Monitoring. |