5. Running in pure bulk and auto-switch mode
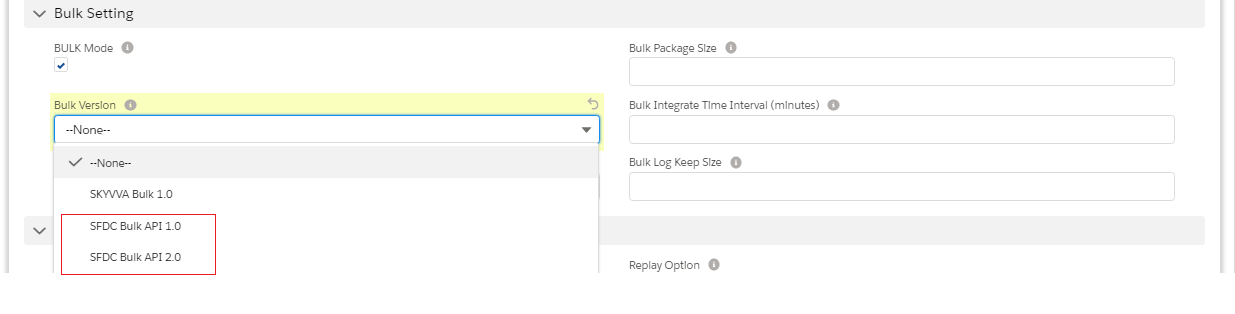
Bulk API allows you to load and export bigger batches and has features like parallel processing that helps with performance. On top of that, the Bulk API uses much less API calls than the Batch API when dealing with batches bigger than 5,000 records. On the other hand, related queries are not supported by the Bulk API. SKYVVA support SFDC Pure bulk mode in version 2.0. that is very fast. Shortcomings with the SFDC pure bulk mode are that we cannot use the SKYVVA mapping tool to do business data mapping. On the other hand, SFDC Bulk requires the data has to be mapped already on the sender side and doing the additional mapping to enrich the business logic is not possible using SKYVVA mapping. This mode will work with both processing mode, Parallel and Serial, for version 1.0. Version 2.0, you can only use with Serial mode processing. There are two API in Pure bulk Version:
- SFDC Bulk API 1.0
- SFDC Bulk API 2.0

We should know some terms
- BULK Mode: We have to set this flag to run our interface in bulk mode using salesforce bulk API.
- SKYVVA Bulk: SKYVVA Bulk is slow but very powerful, it allows you to do business mapping using our mapping tool and formula. Likewise, you can use the SKYVVA workflow to validate the data before posting. You can use SKYVVA Bulk mode (SKYVVA Bulk 1.0) with both Bulk-processing modes, which is Parallel and Serial. The default value is Serial.
- SFDC Bulk: We support SFDC pure bulk mode in version 2.0 since it is faster and scales better. but cannot use the SKYVVA mapping tool to do business data mapping. On the other hand, SFDC Bulk requires the data has to be mapped already on the sender side and doing the additional mapping to enrich the business logic is not possible using SKYVVA mapping. Version 2.0, you can only use with Serial mode processing.
- Bulk Version: SKYVVA support SFDC pure bulk mode in version 2.0 then we have our own SKYVVA bulk mode. This uses Skyvva workflow and mapping and thus it is more powerful but slower than pure bulk API technique from salesforce.
- Bulk Processing Mode: These fields indicate two modes which are support with bulk version 1.0 and bulk version 2.0 only parallel mode is supported. So the value depends here on the selection of field bulk version. For example, When we want to use "serial" we should select bulk 1.0.
- Parallel: When you select this processing mode, it will run parallel.
- Serial: When you select this mode, it will not run at the same time.
- Bulk Package Size: This parameter determines how many records are split into Bulk data size. If your Message contains 10.000 records and the value for this parameter is 1000 so you will get 10 bulk data set in Salesforce.
- Bulk Monitor Keep Size: The number of bulk execute logs to be kept.
- Bulk Sch Frequency: This is the schedule time-frequency for bulk scheduler on
- Bulk Integrate Time Interval (minute): The interval (minutes) used for integrating bulk job scheduler. For example, if its value is 10, then the integrate bulk scheduler will be run every 10 minutes.
In SFDC Bulk Mode user can create update, or delete a large volume of records with the Bulk API, which is optimized for processing large sets of data. It makes it simple to load, update, or delete data from a few thousand to millions of records.
Usecase Step1: We have to create an integration. Please refer to our tutorial to create integration.

Step2: We have to create an interface.
How to use "Real SFDC bulk mode for SAP PI?"
To generate a WSDL file for some Interfaces, we have to follow the given steps:- Step 3: We have to go to our created interface detail page. We can post data from SAP or Skyvva Agent into Skyvva/Salesforce with bulk mode: Bulk Version: -SFDC Bulk API 1.0-SFDC Bulk API 2.0
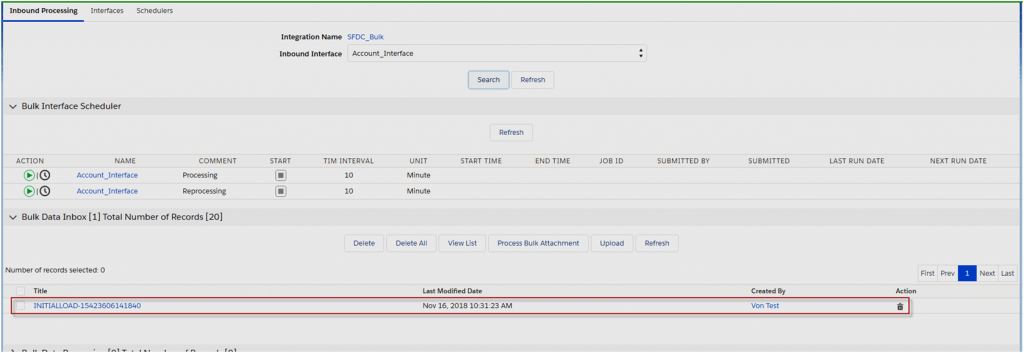
Step 2: We can see the result on the bulk control board after post data with Agent.
We can use the bulk version = SFDC Bulk API 1.0 the data will be posted into Salesforce database directly the SFDC Bulk API 1.0 is processed base on Bulk Processing Mode = Parallel and Serial. Default value is parallel.

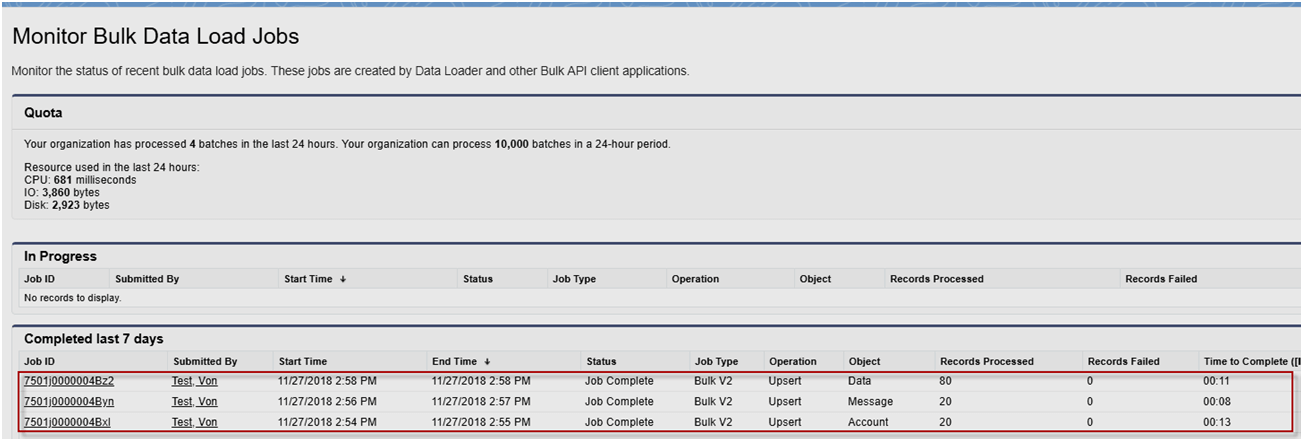
With this case when user posts data from Agent successfully the user can see of transaction data processing in Bulk Data Load Jobs Note: SFDC Bulk API 1.0 process data with sObject Job Type= Bulk V1, For Data and Message object process with Job Type=Bulk V2 please see screenshot below

We can use bulk version = SFDC Bulk API 2.0 the data will be posted into Salesforce database directly the SFDC Bulk API 2.0 works with Bulk Processing Mode = Parallel only (no work with Serial) Please see the screen below after posted data from Agent
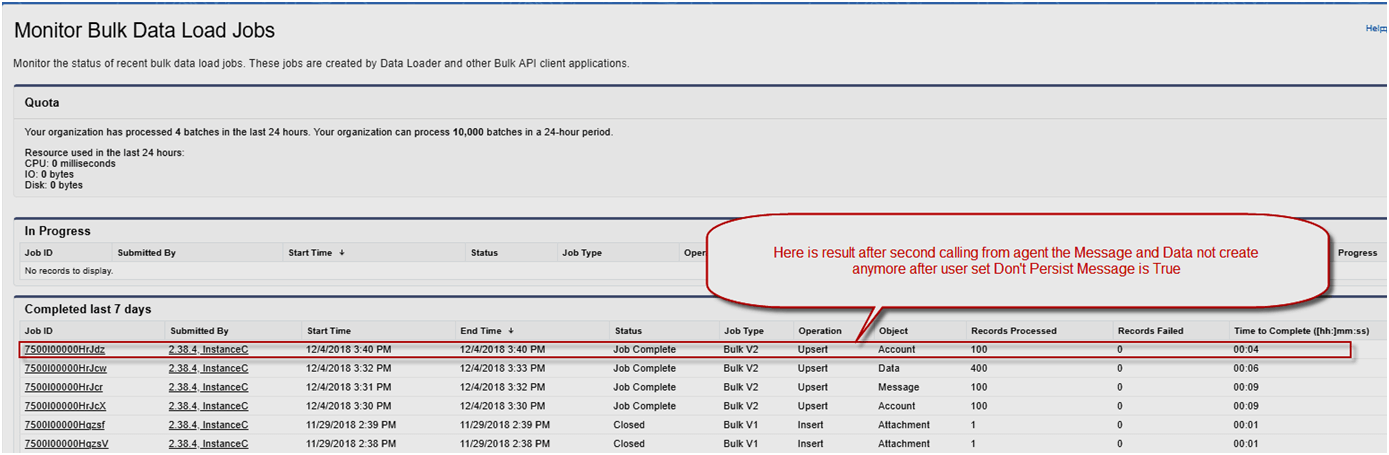
Message Monitoring All data call from Agent or other systems to the salesforce via SFDC Bulk API 1.0 and SFDC Bulk API 2.0 Always create the messages Pending, Failed, Completed,…….. Don’t Create Message Completed Because of the SFDC Bulk API feature can work with big data so we check the flag Don’t Created Message Completed = true mean that not allow all completed messages or Idatacreate into database
Auto-switch mode:
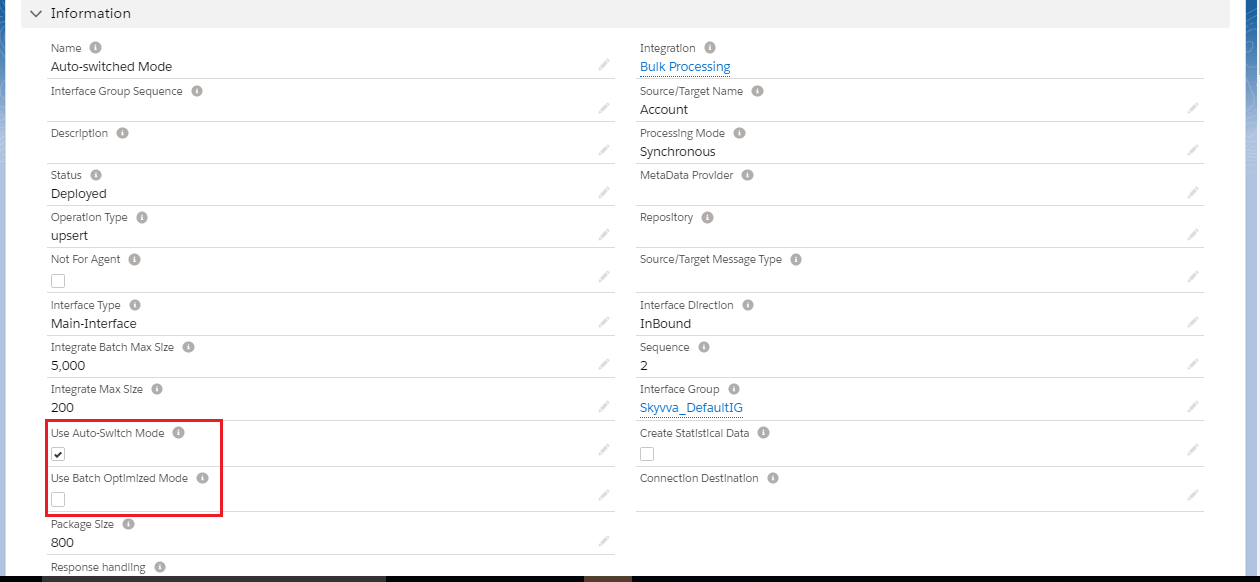
SKYVVA providing different data processing modes like immediately processing, Batch processing, Bulk processing modes. where Auto-Switch mode is a combination of all three modes. When data processing is in the auto-switch mode it means processing is based on the number of records and IntegrateMaxSize, IntegrateBatchMaxSize When the auto-switch mode flag is selected, It describes that Agent automatically switched to SKYVVA API which is based on the number of records and IntegrateMaxSize, IntegrateBatchMaxSize. And when the flag is unchecked it signifies that data is integrated with normal mode (no batch or bulk) no matter what is the size of records.
- Integrate Max Size → Maximum number of records that SKYVVA Integration Agent can integrate using method integrate. The default value is 200. If the number of records to be integrated is bigger than this value, Agent will switch the API method automatically.
- Integrate Batch Max Size → Maximum number of records that the SKYVVA Integration using method integrates Batch. The default value is 5000. If the number of records to be integrated is bigger than this value, Agent will switch to use the Bulk API method automatically.
Usecase
- We have to create Integration
- Creating integration next step is to create Interface
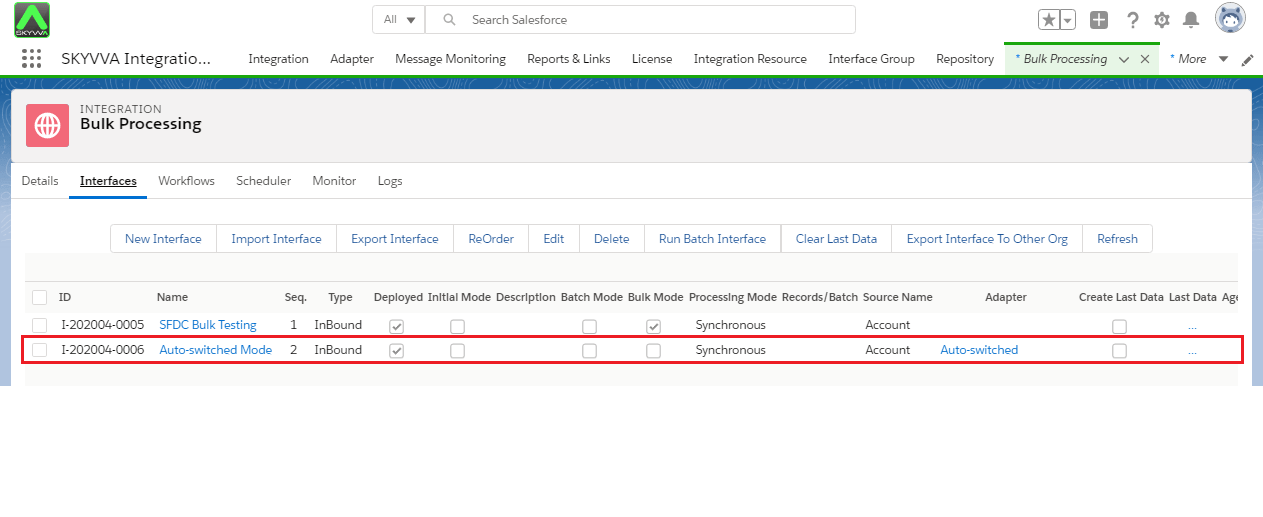
Configuration
We click on the 'Account Interface' link and see the Interface Details and scroll down to Runtime Configuration-Inbound section then checkbox on Use Auto-Switch Mode.
Assuming you already have created interface since this part will be the focus on integrating from Agent as an example. To integrate from Agent, please run Agent-UI and more steps as following:
- After running the Agent-UI, the Integration Control Board will popup then you have to click on Integration Wizard.
- Select your agent the Property File.
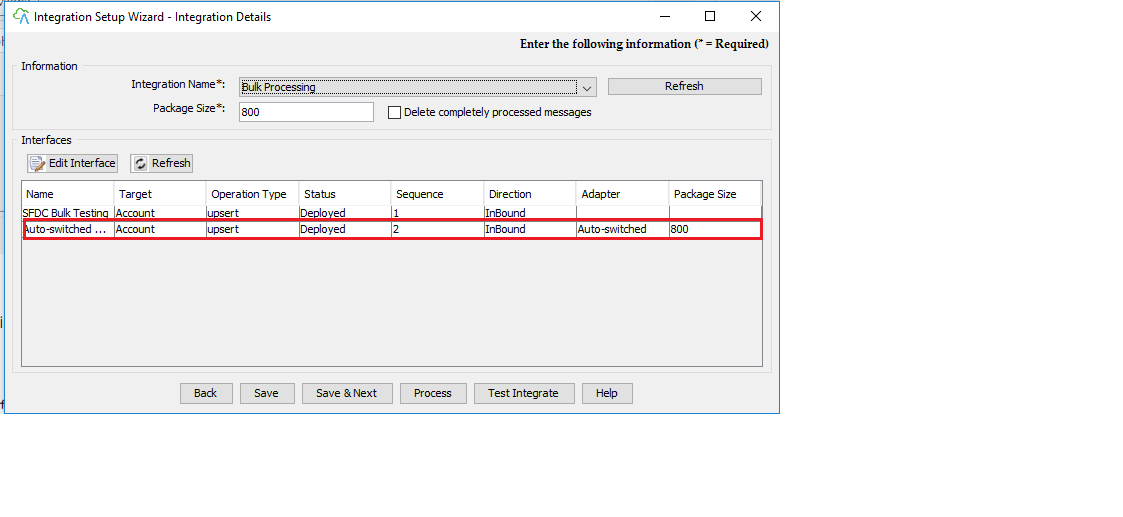
- We have to select the existing integration and interface on which we have to process data.
Go to SKYVVA Agent configure with your Salesforce Org. Which is obivious
- Select Integration Name & Select AutoSwitch Interface
- Click on Edit Interface
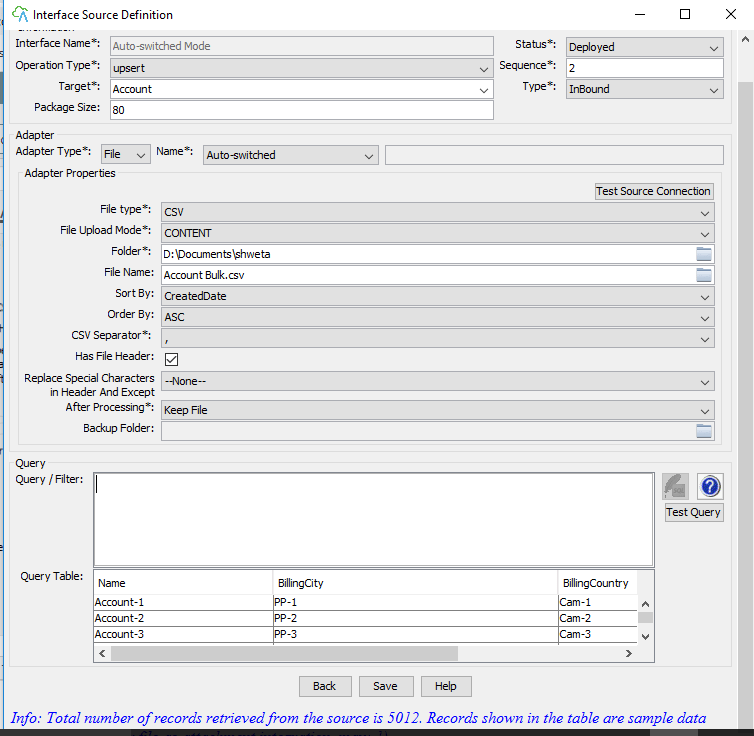
- Select File Folder
- Click on Test Query
- Save
Go to your Salesforce Org.
- Click on Open Mapping Button
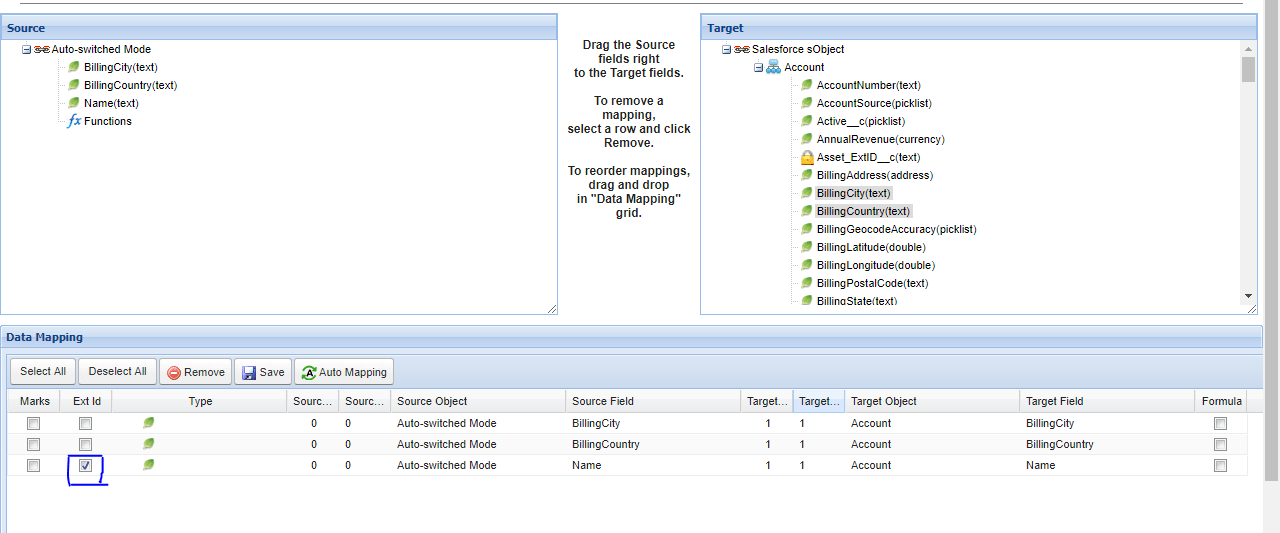
- Select Ext Id
- Save
Go to Agent
- Select your Interface Auto-SwitchMode Interface
- Click on the Process button
- Process Completed
- Click ok button
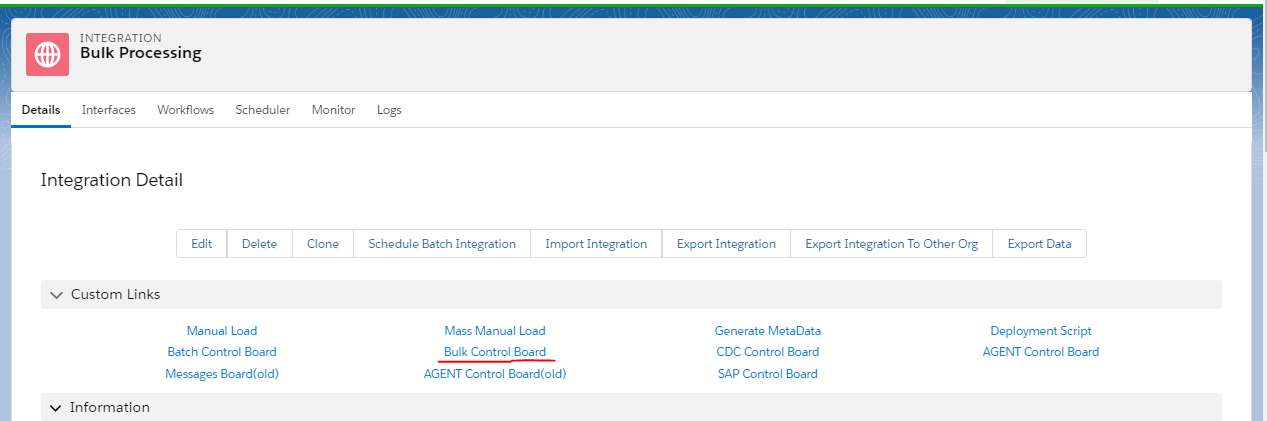
Go back to your Salesforce Org. Go to Integration Detail page
- Click on Bulk Control Board
