3.1 How to Install Agent 3.06.01 for Windows?
System Requirements

Approach
- User/Admin has bought a valid SSL certificate from the trusted vendors of Salesforce.
- User/Admin has got the deployment package and transferred it to the deployment server.
Installation New Agent 3.06.01
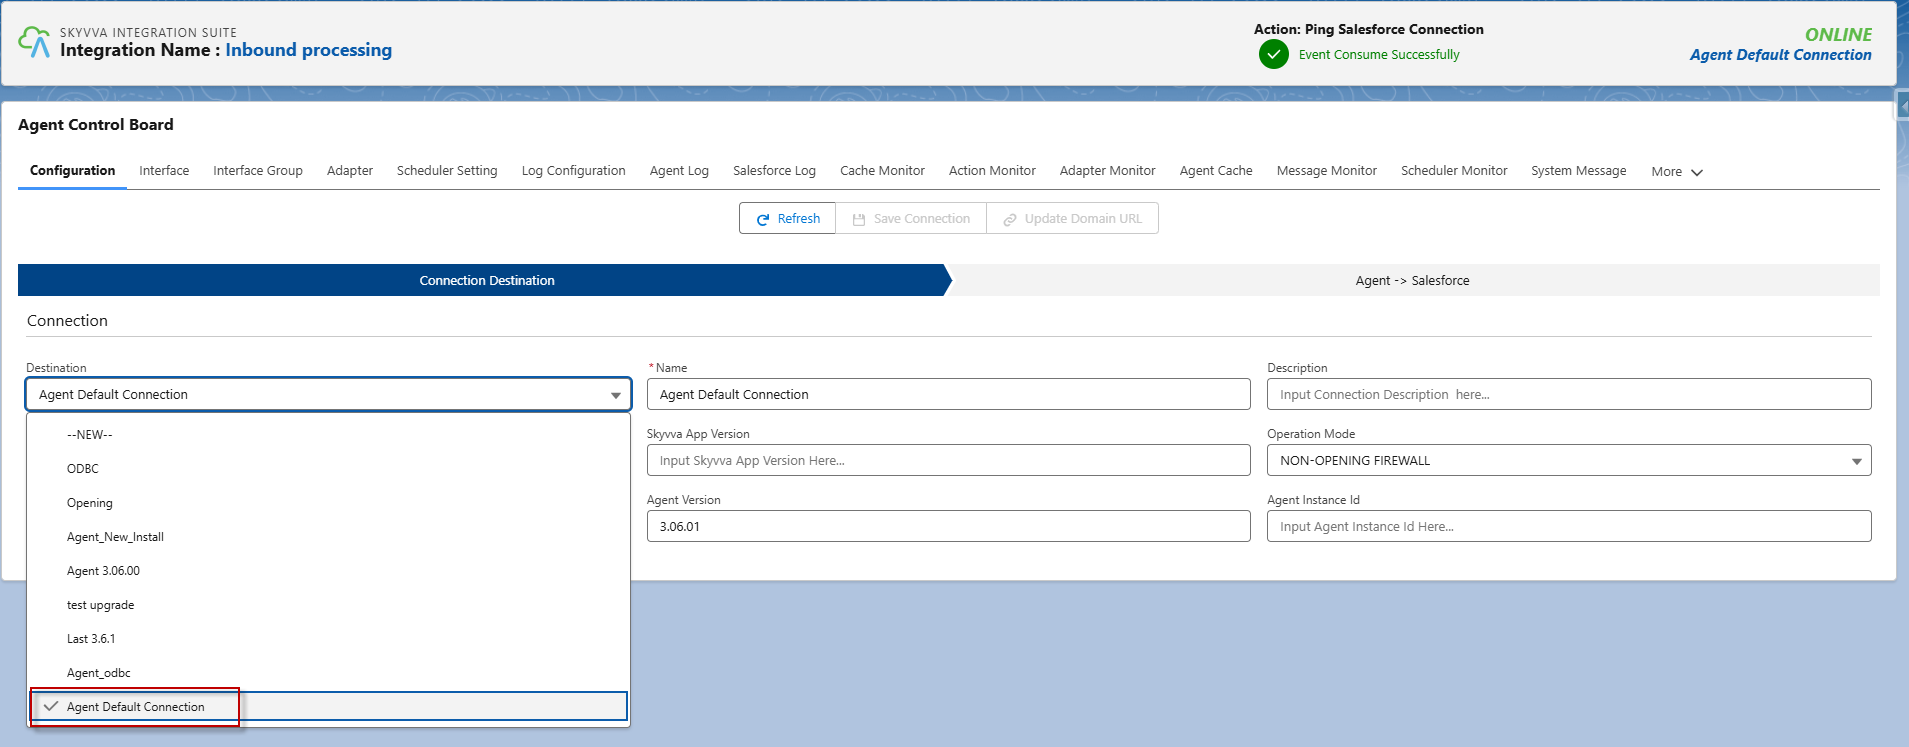
In Agent 3.06.01, the installation does not allow you to choose between the two modes: 'Opening-Firewall' and 'Non-Opening-Firewall'. After installation, a default connection with 'Non-Opening-Firewall mode' is automatically created and can be used for both modes.
- Once we have the Skyvva Integration Agent setup file available. We can execute it by double-clicking on it.
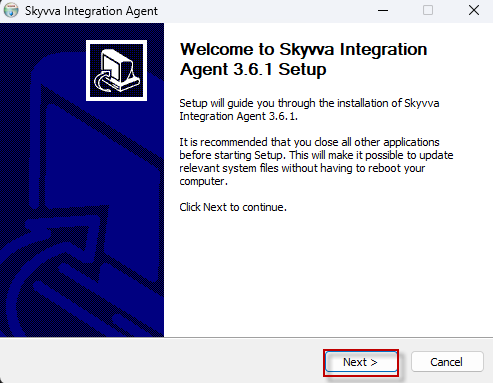
Then click Next.
- Hit Next, it will ask you to accept the License Agreement. Read the agreement and accept it. This is mandatory to proceed further with the installation.
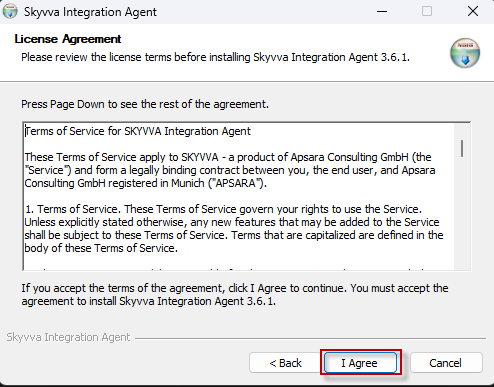 Then click I Agree.
- Please Select Agent Install Mode.
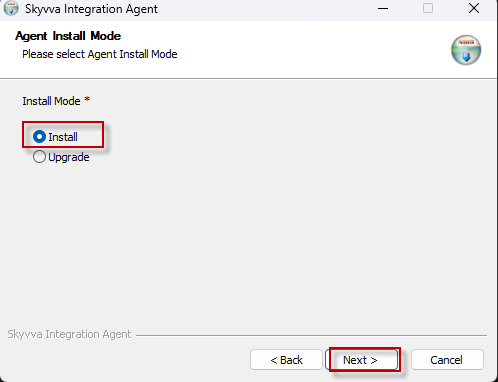
Then click Next.
- Hit I Agree, it will take you to choose the installation directory.
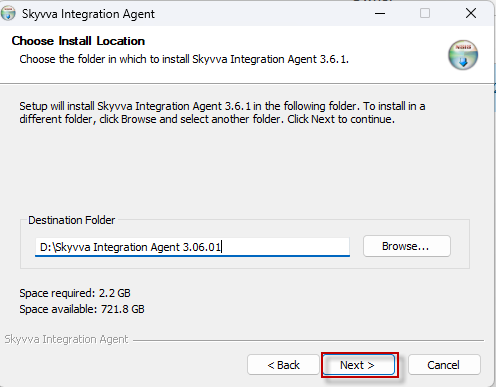
Then click Next.
- It will take you to choose the Start Menu Folder name, by default it will be Skyvva Integration Agent.
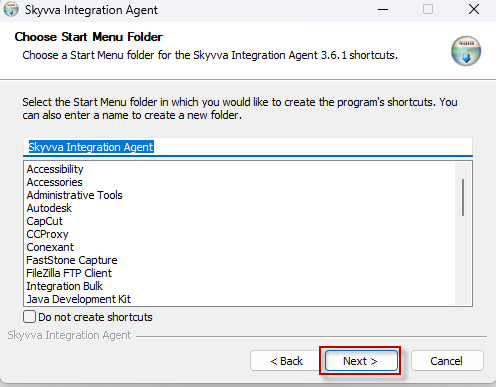
Them click Next.
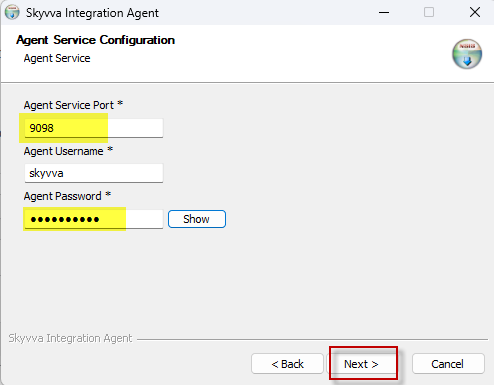
- Input Agent Service Port, Agent Username and Agent Password.
- Enter your database password, and you can rename the database schema following 'skyvva_9098' with the agent port.
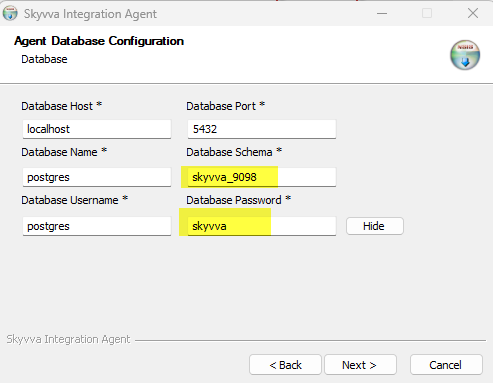
Then click Next.
- seclect with 'OAuth2 Username-Password' mode.
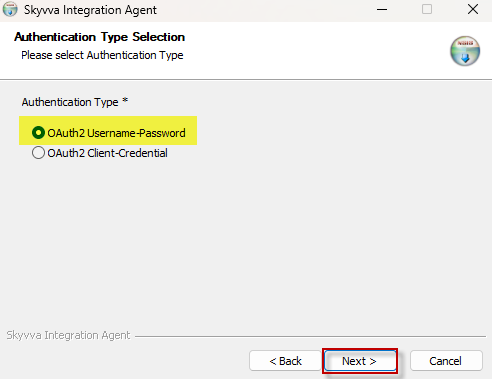
Then click Next.
- Enter the Salesforce org information. After installation, it will automatically create a default connection name with Non Opening Firewall mode.
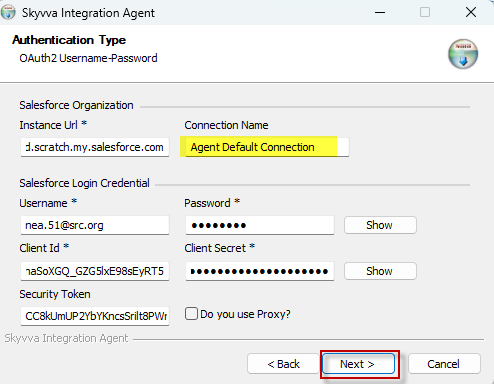
Then click Next.
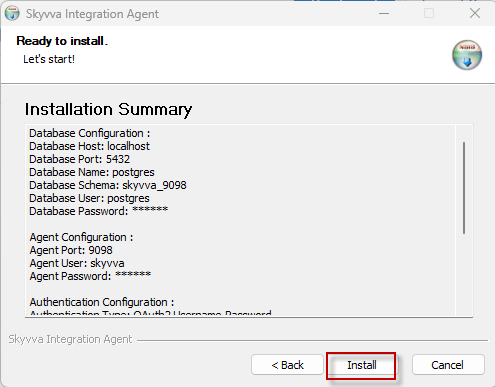
- This step shows a summary of the installation configuration. Then, click Install.
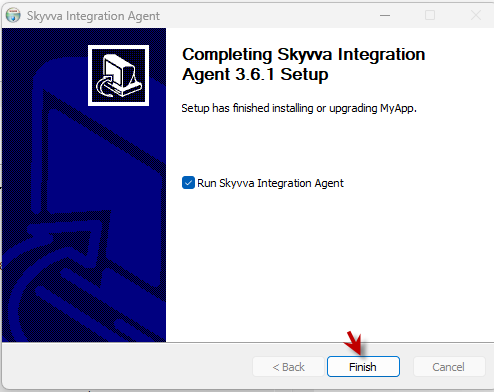
- When the installation is successful, click Finish.
- Go to the Agent Control Board and find the default connection. The user can then ping this connection and proceed with processing in Non-Opening Firewall mode.