3.3 How to Install SKYVVA Agent Version 3.06.08 or Later on a Linux Server?
Install SKYVVA Agent on Linux Server
This document provides the steps to install the SKYVVA Agent on a Linux Server. The SKYVVA Agent is used to run integration processes and connect with the required backend services. Before installing the Agent, PostgreSQL must be installed first, because the Agent uses PostgreSQL as the database for the Agent Cache.
1. System Requirements
The following diagram summarizes the Linux operating system options and required components for the Agent installation.
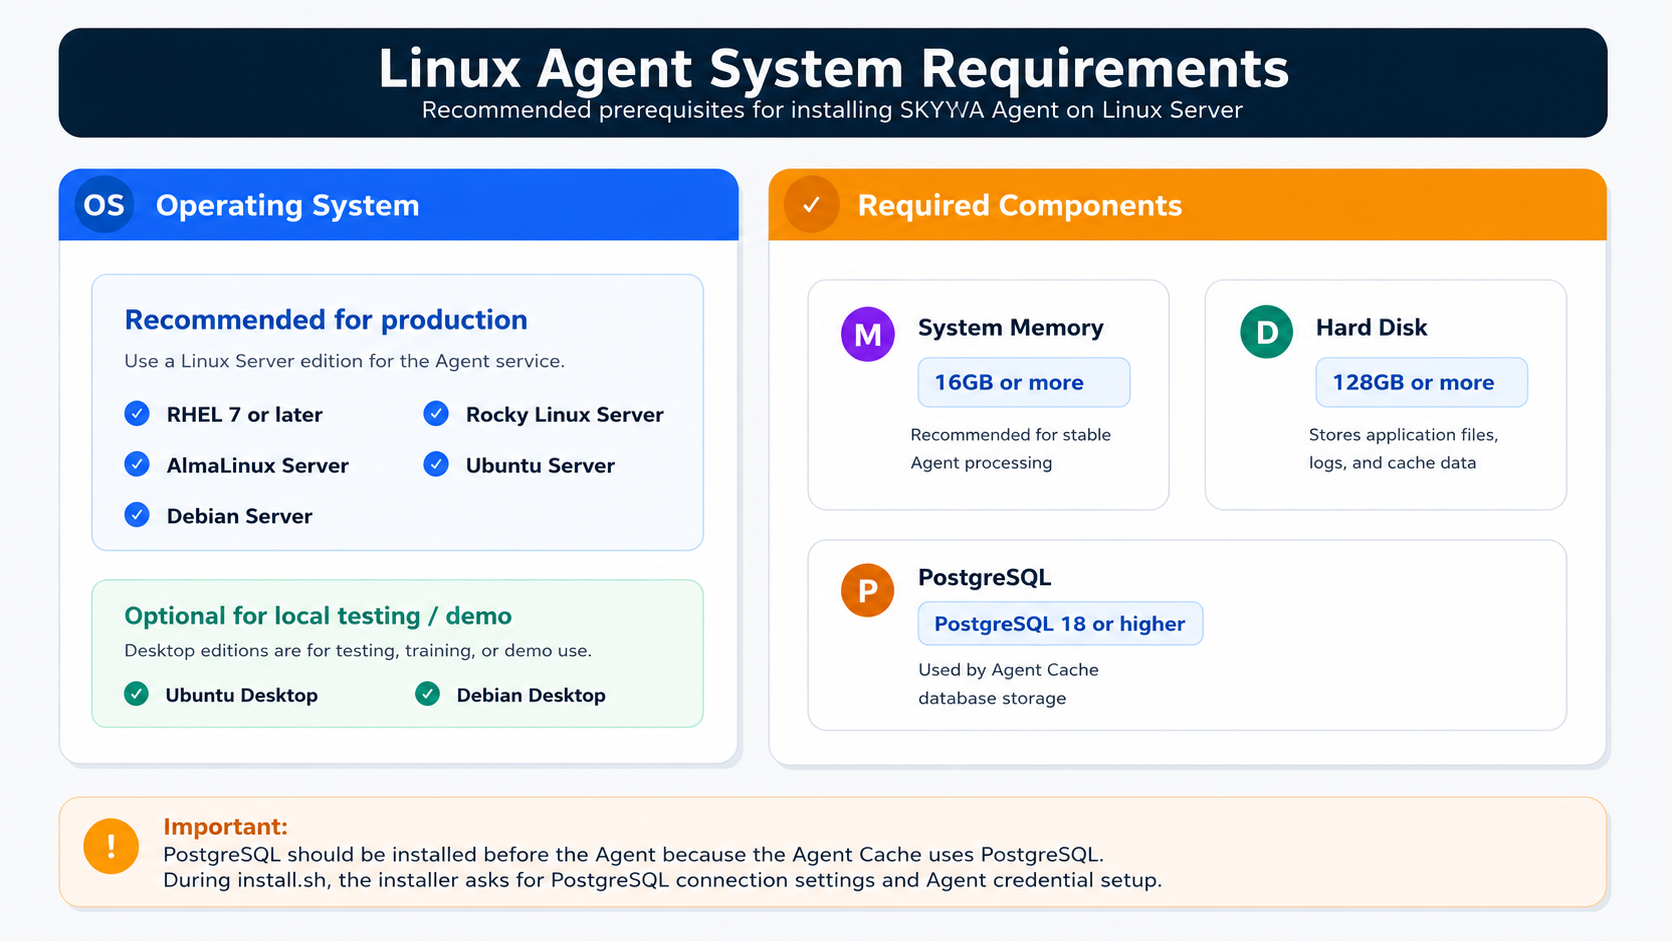
Figure 1: Linux Agent system requirements
1.1 Requirement Summary
| Component | Requirement |
|---|---|
| Operating System | Recommended for production: RHEL 7 or later, Rocky Linux Server, AlmaLinux Server, Ubuntu Server, Debian Server. Optional for local testing or demo: Ubuntu Desktop, Debian Desktop. |
| System Memory | 16GB or more |
| Hard Disk | 128GB or more |
| PostgreSQL | PostgreSQL 18 or higher can be used for Agent Cache |
2. PostgreSQL Before Agent Installation
The Agent requires PostgreSQL because the Agent Cache stores data in PostgreSQL. Install PostgreSQL first, then run the Agent installer.
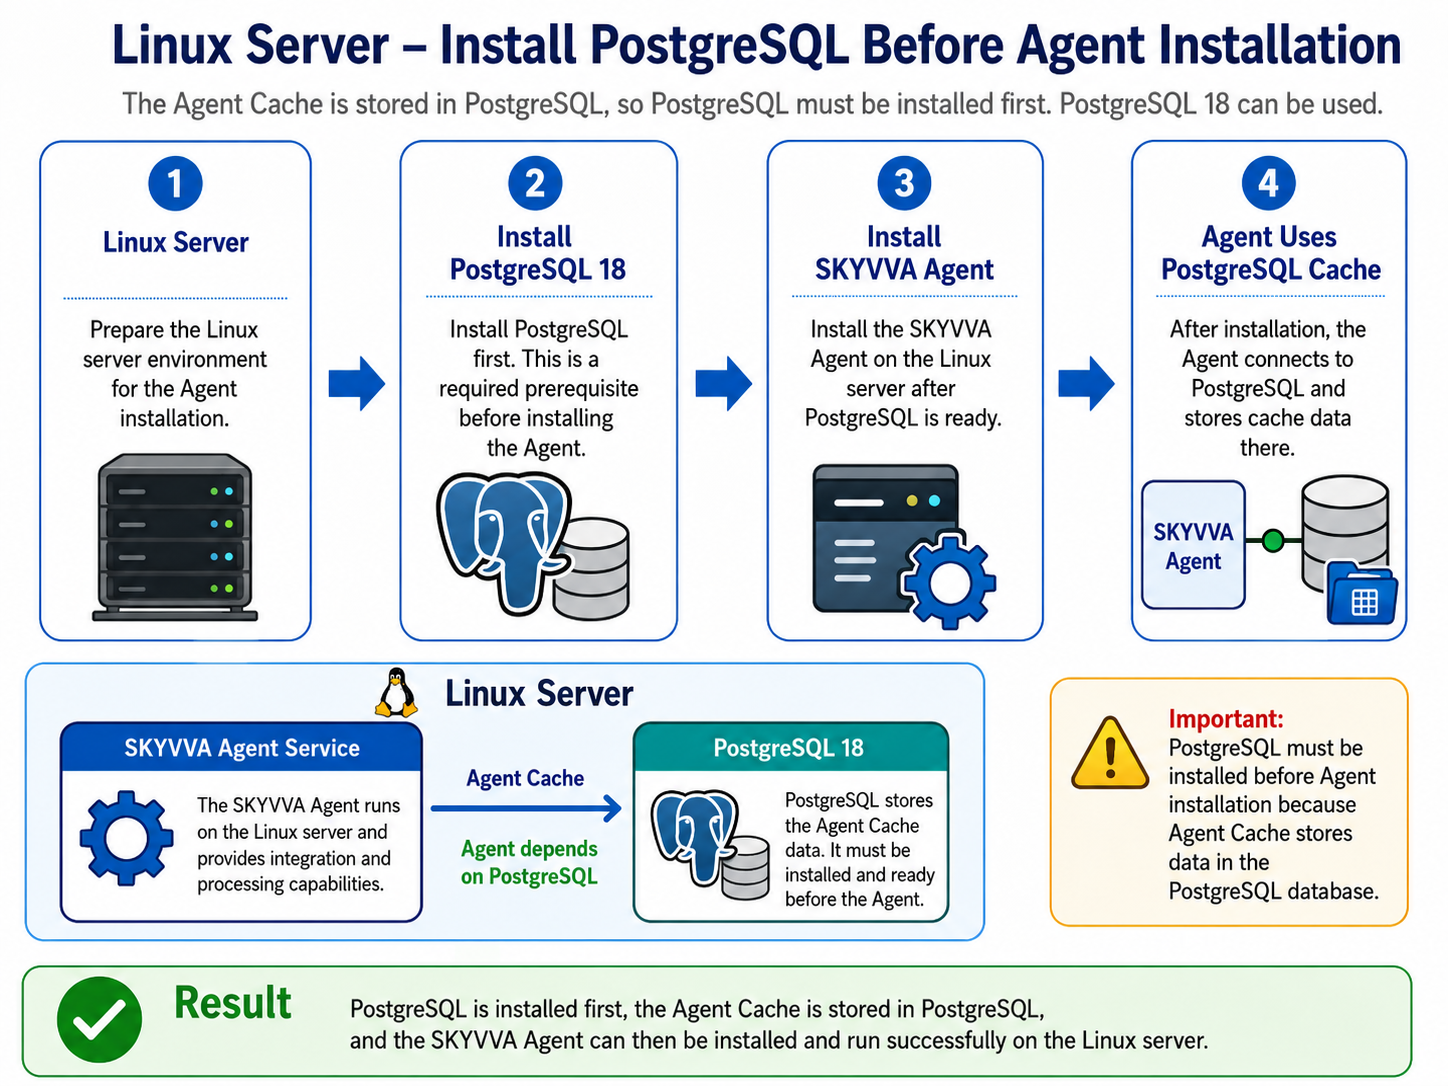
Figure 2: PostgreSQL must be available before installing the Agent
2.1 Verify the Linux Distribution and System Information
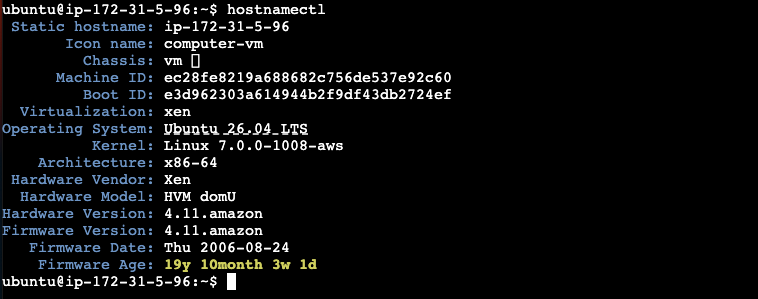
Before installing PostgreSQL and the SKYVVA Agent, verify the Linux distribution, operating system version, kernel version, and system architecture. This information helps confirm that the server is supported and that the correct installation commands and packages are used.
Note: You can skip this section if you already know your Linux distribution, operating system version, kernel version, and system architecture.
Run the following commands:
cat /etc/os-release
hostnamectl
uname -a
The commands provide the following information:
- cat /etc/os-release — Displays the Linux distribution name and version.
- hostnamectl — Displays the hostname, operating system, virtualization environment, and system architecture.
- uname -a — Displays the Linux kernel version and processor architecture.
cat /etc/os-release
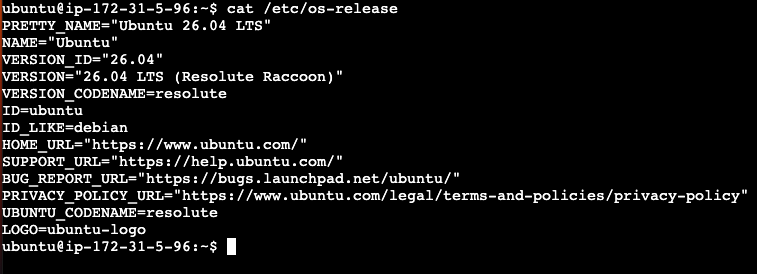
hostnamectl
uname -a

2.2 Install PostgreSQL on Ubuntu Server 26.04 LTS
Section 2.1 confirmed that the server is running Ubuntu Server 26.04 LTS. Therefore, the following steps explain how to install PostgreSQL on this operating system.
Use the PostgreSQL package available from the Ubuntu distribution repository or from your company-approved PostgreSQL repository. PostgreSQL 18 or later can be used as the database for the SKYVVA Agent Cache.
Before continuing, check whether PostgreSQL is already installed by running:
psql --version
If PostgreSQL is installed, the command displays the installed version. In this case, you can skip the PostgreSQL installation steps and continue with the SKYVVA Agent installation.
If PostgreSQL is not installed, the command may return:
Command 'psql' not found

In this case, follow the PostgreSQL installation steps in this section before installing the SKYVVA Agent.
The example below shows how to install PostgreSQL and start the PostgreSQL service on Ubuntu Server. For additional information, refer to the official PostgreSQL documentation: https://www.postgresql.org/download/linux/ubuntu/
Summarize the shell script
sudo apt update
apt-cache search postgresql- | grep '^postgresql-[0-9]'
sudo apt install -y postgresql-18
psql --version
sudo systemctl enable --now postgresql
sudo systemctl status postgresql
sudo -u postgres psql
ALTER USER postgres WITH PASSWORD 'YourStrongPassword';
\q
psql -h localhost -p 5432 -U postgres -d postgres
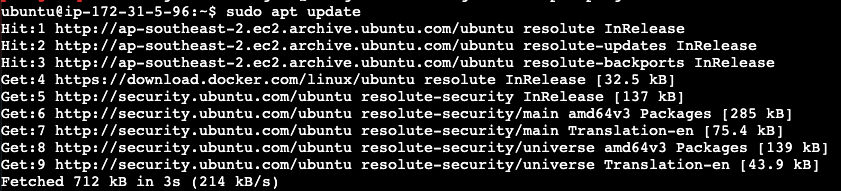
Update the package list
sudo apt update
List available PostgreSQL versions
Run this command to check which PostgreSQL versions are available on the Ubuntu server:
apt-cache search postgresql- | grep '^postgresql-[0-9]'
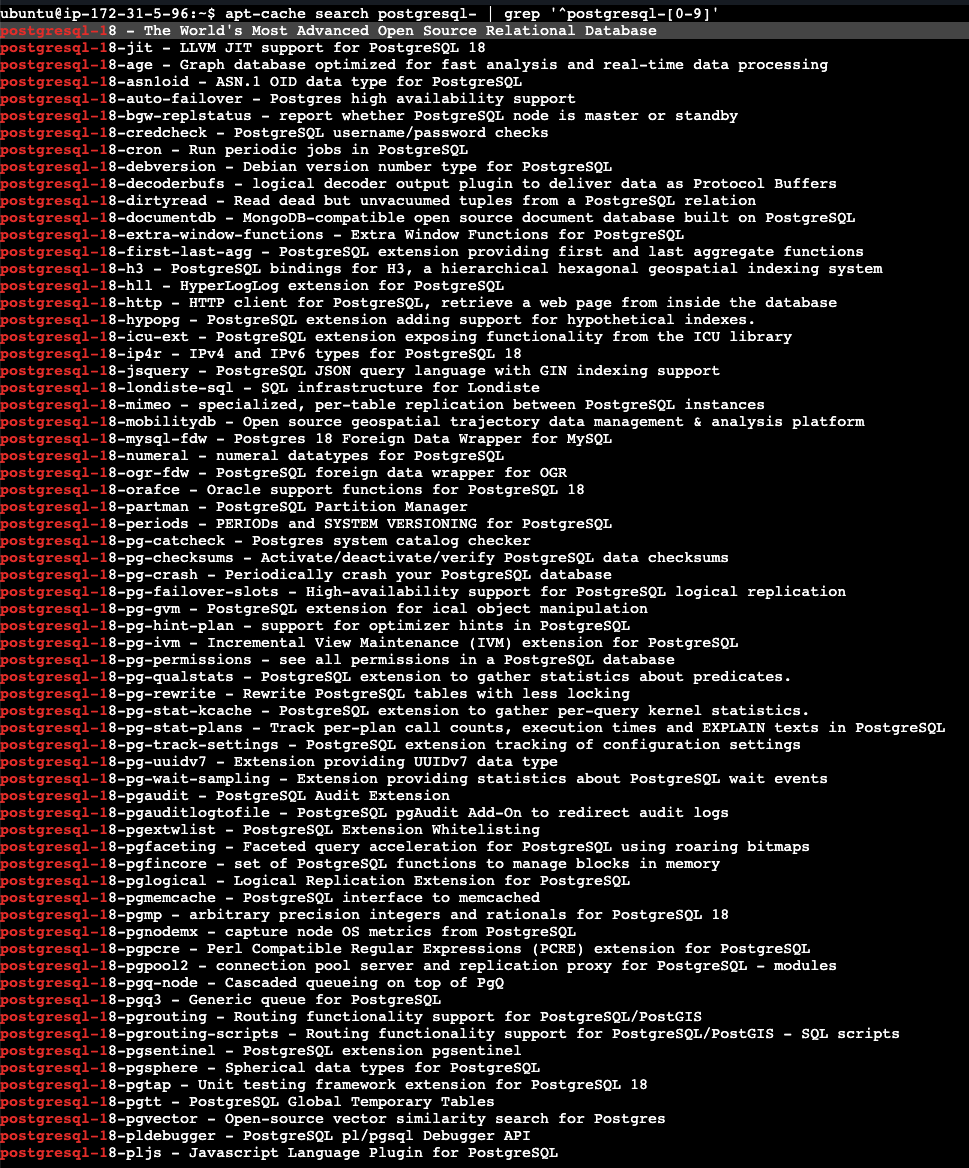
If you see this result, it means PostgreSQL 18 is available:
postgresql-18 - The World's Most Advanced Open Source Relational Database
Note: The other packages, such as postgresql-18-cron, postgresql-18-postgis-3, postgresql-18-pgvector, etc., are optional PostgreSQL extensions. They are not required for the SKYVVA Agent installation.
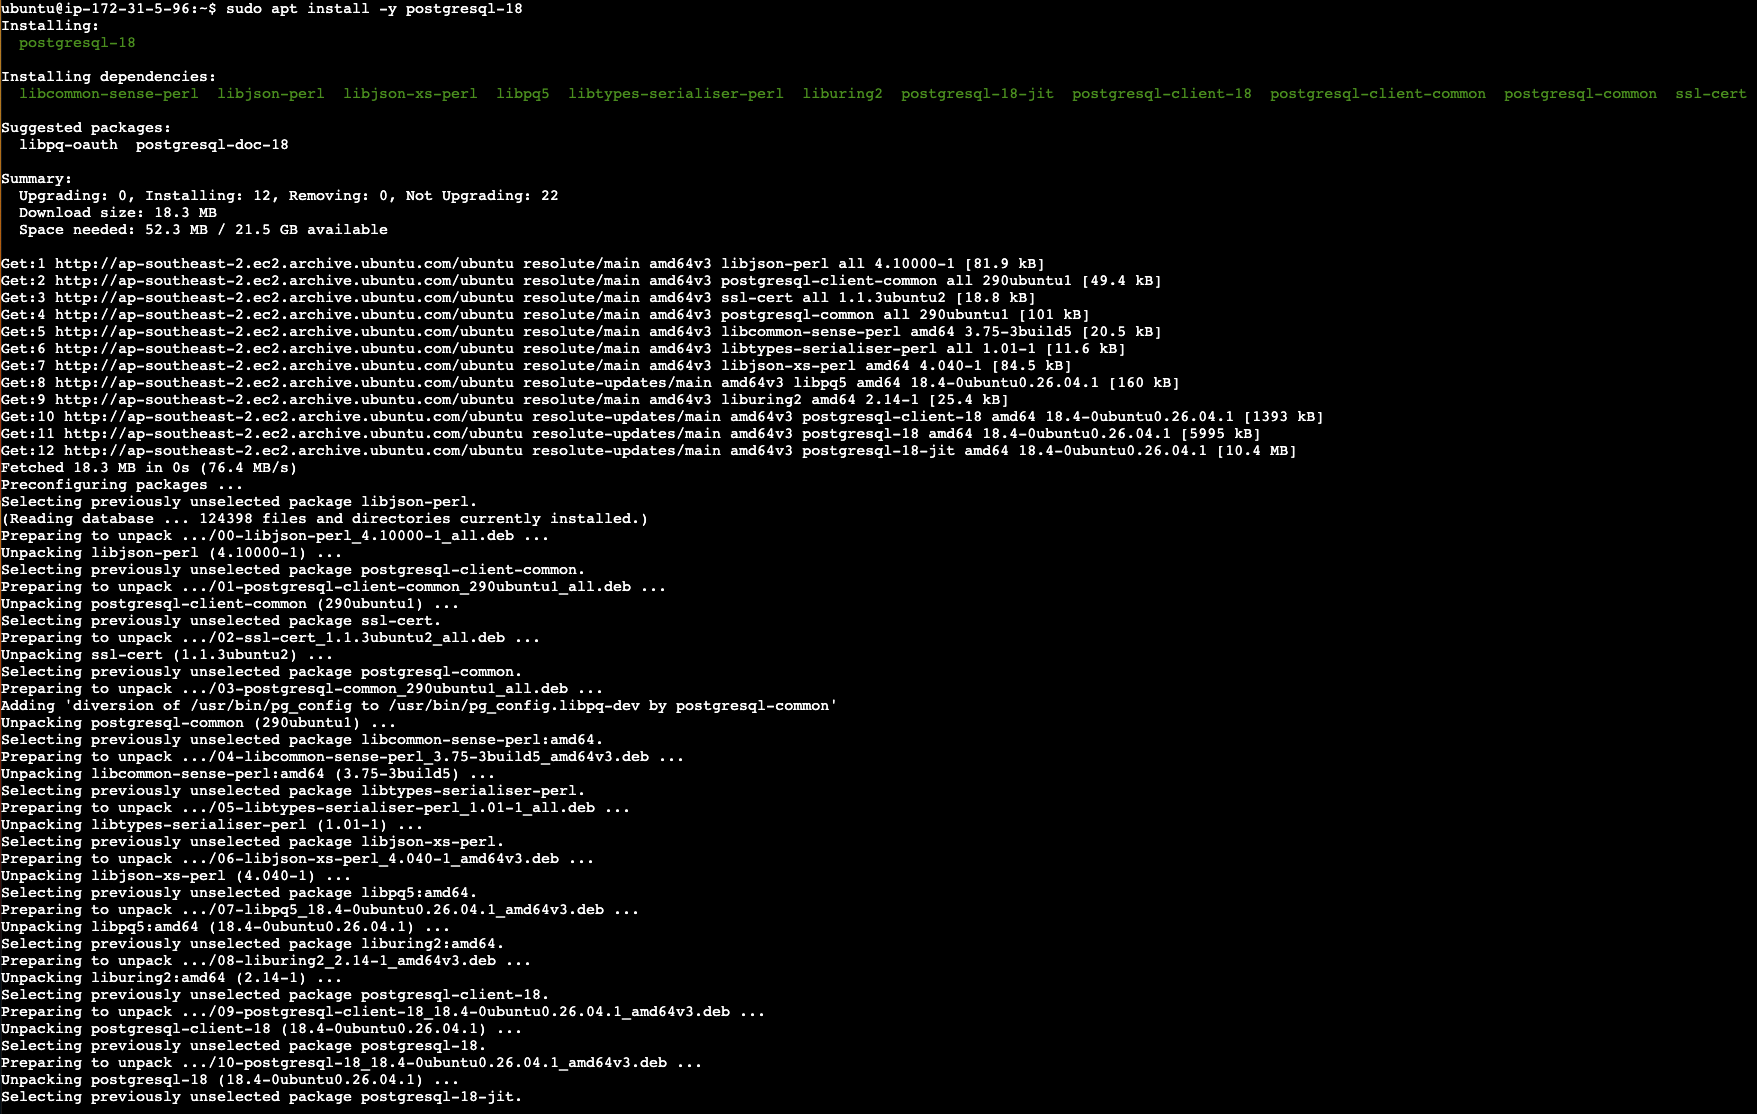
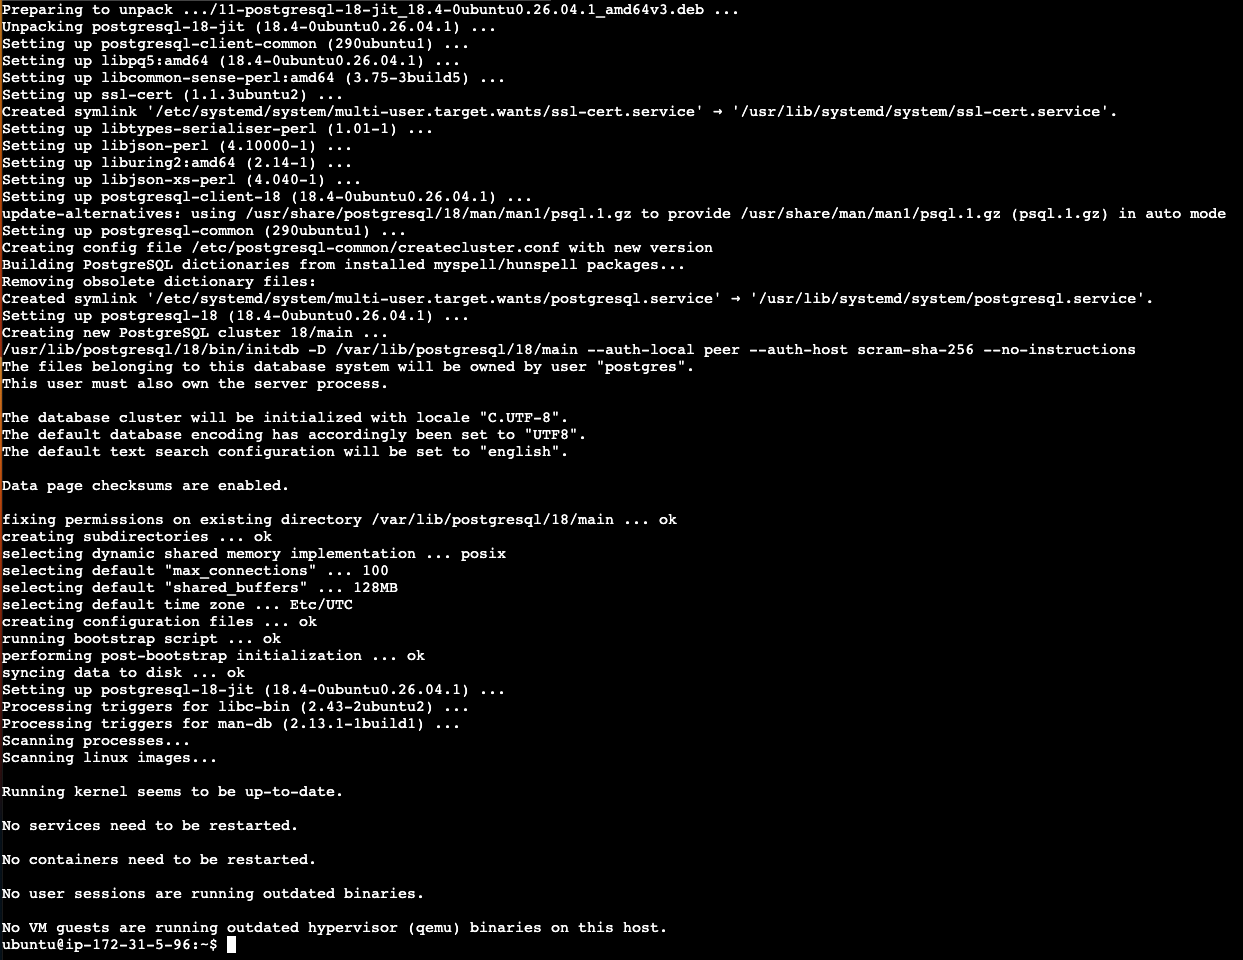
Install PostgreSQL 18
sudo apt install -y postgresql-18
Check the PostgreSQL version after installation
psql --version

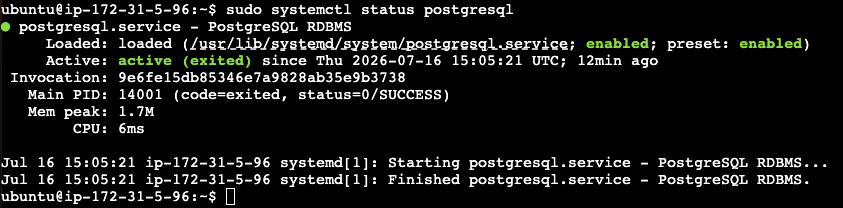
Start and enable the PostgreSQL service:
sudo systemctl enable --now postgresql

Check the PostgreSQL service status:
sudo systemctl status postgresql
2.3 Set the PostgreSQL Password
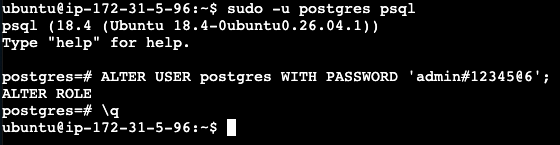
Use the default PostgreSQL database user postgres. Set the password that you want to use during Agent installation.
sudo -u postgres psql

-- Run inside psql. Replace YourStrongPassword with your real password.
ALTER USER postgres WITH PASSWORD 'YourStrongPassword';
\q
2.4 Verify PostgreSQL Login
This command connects to a PostgreSQL database:
psql -h localhost -p 5432 -U postgres -d postgres
Password for user postgres:

-- Optional check inside psql
SELECT version();
\q

Finally, you can connect to PostgreSQL using the password you configured.
3. Download and Install the Agent on Linux
After PostgreSQL has been installed and the database connection has been verified, you can proceed with the SKYVVA Agent installation.
This section explains how to:
- Download the Linux Agent installation package.
- Copy the package to the Linux server.
- Extract the installation package.
- Run the Agent installer.
- Configure and start the Agent service.
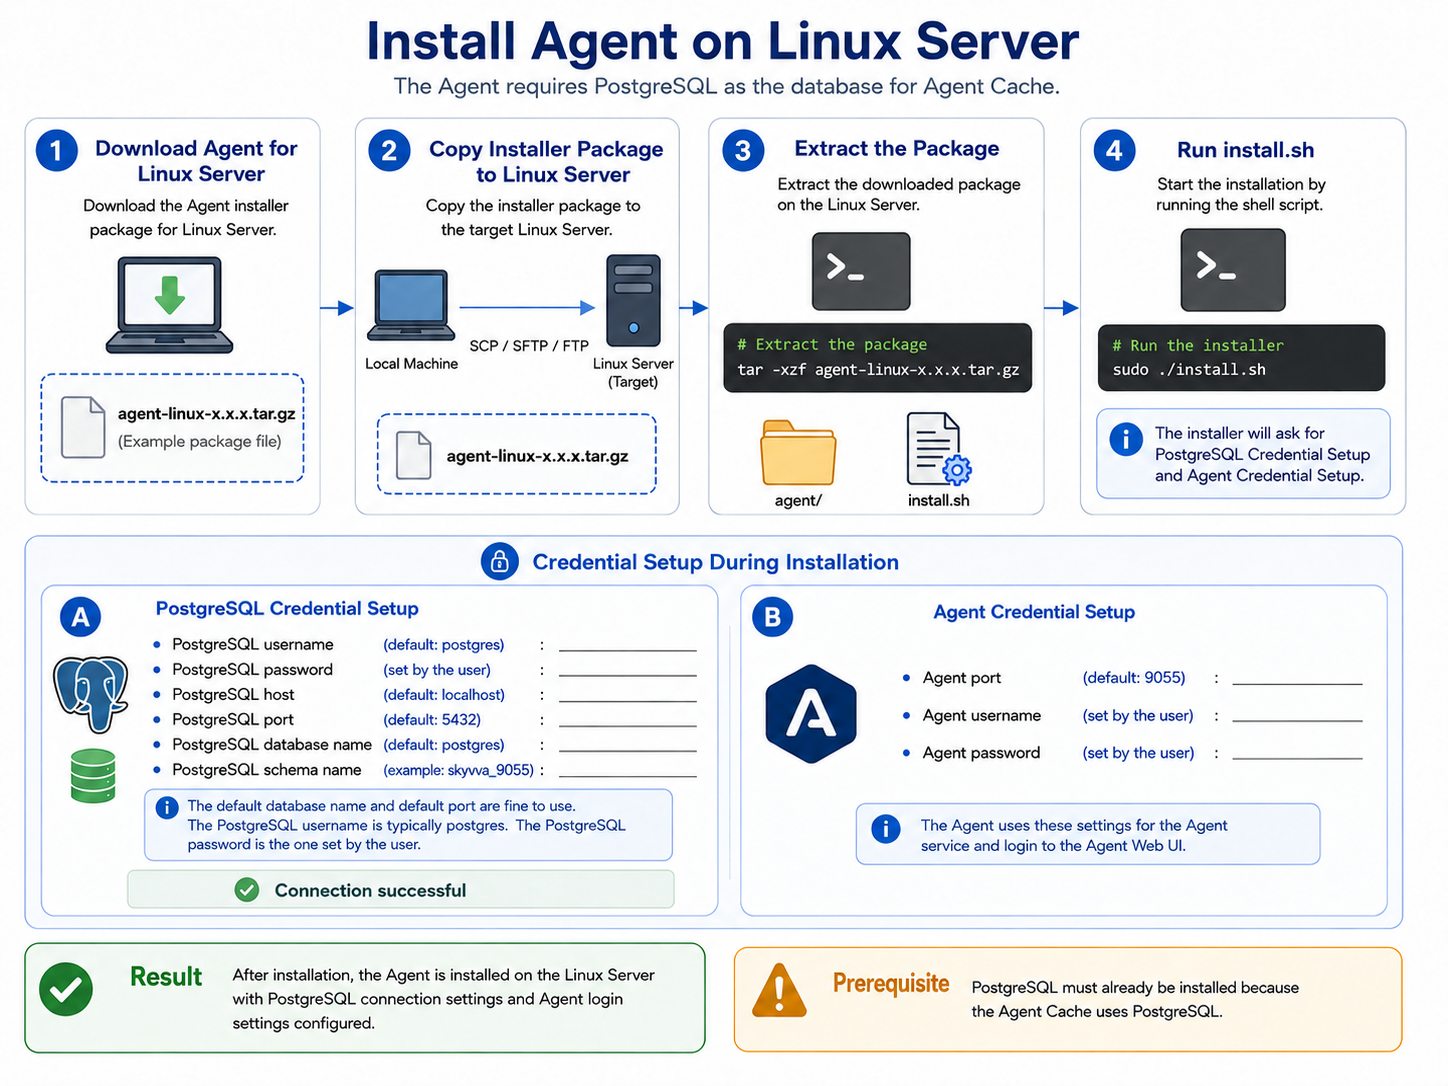 Figure 3: Agent installation flow on Linux Server
3.1 Download the Agent Linux Package
Download the required SKYVVA Agent Linux installation package from the official SKYVVA source. Make sure that you download the correct Agent version for your environment.
You can download the SKYVVA Agent Linux installation package using the link below:
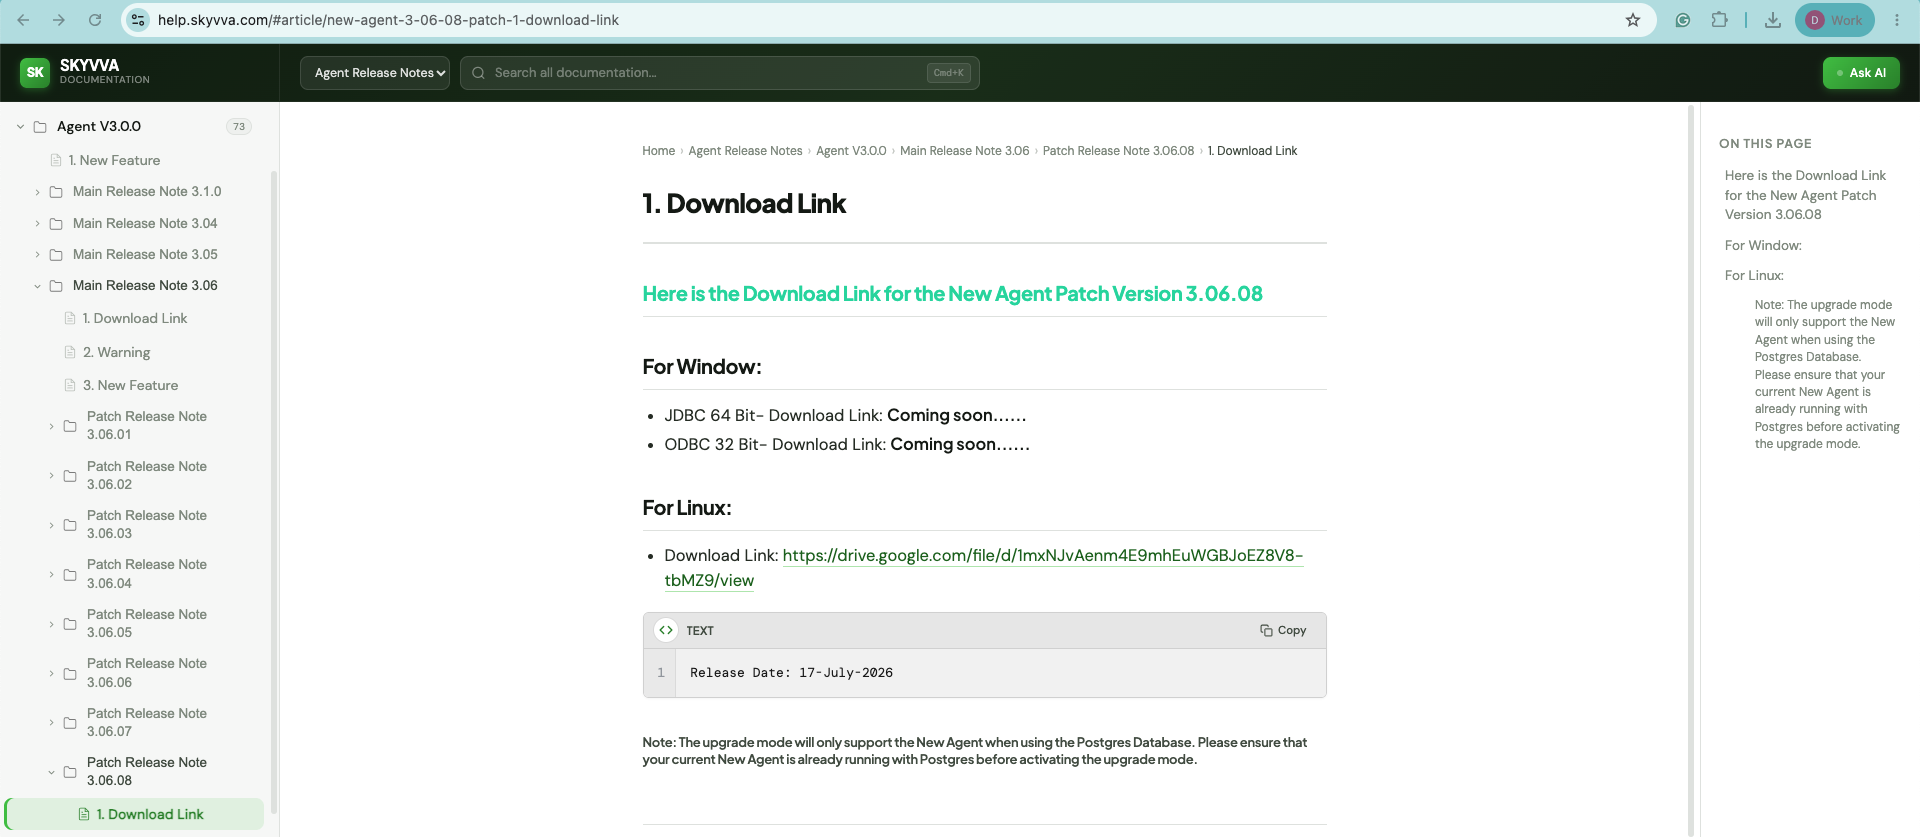
Click the Download Link in the For Linux section. You will be redirected to Google Drive, where you can download the SKYVVA Agent Linux installation package.
Agent-Linux-Installation-x-xx-xx.zip

3.2 Copy the Installer Package to the Linux Server
Script Summary
# Example using SCP from your local machine
scp -i ~/.ssh/id_xxxxxxxx /folderpath/Agent-Linux-Installation-x-xx-xx.zip username@<linux-server-ip>:/tmp/

# Example using SFTP
sftp username@<linux-server-ip>
put Agent-Linux-Installation-x-xx-xx.zip /tmp/
exit
After downloading the SKYVVA Agent Linux installation package to your local computer, copy the ZIP file to the target Linux server.
Example local download folder on macOS:
/Users/deabdahuy-sk-backup-pc/Downloads
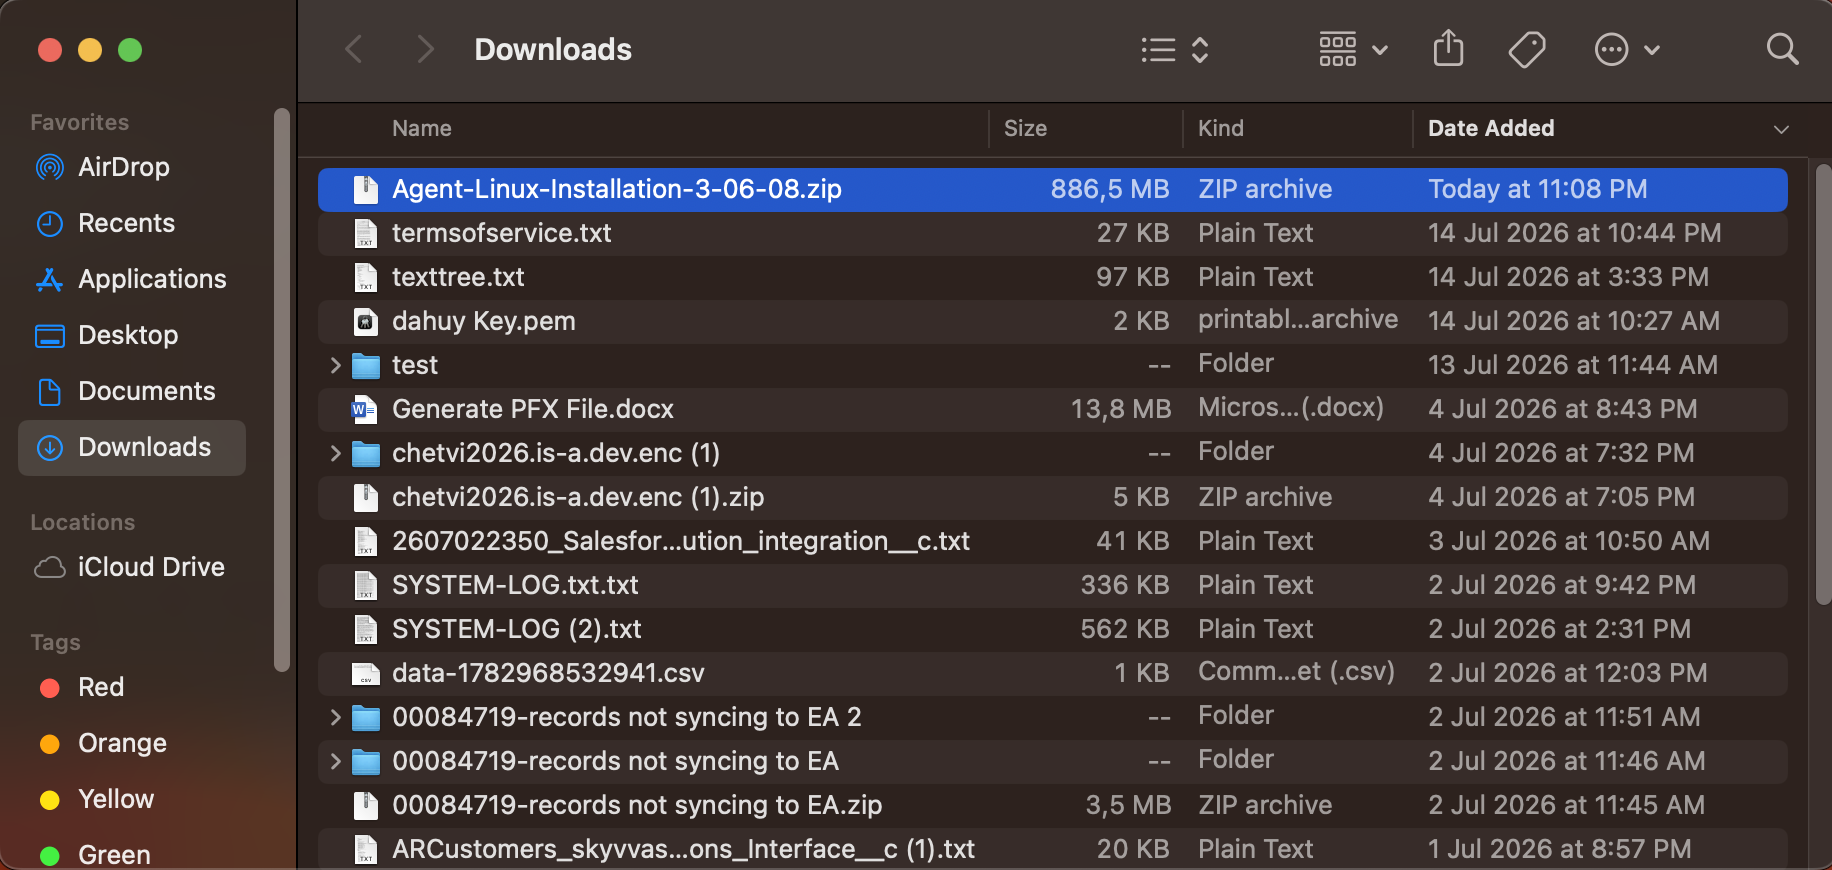
You can use SCP or SFTP to transfer the package securely. Before running the command, confirm the local file location, Linux server IP address, login username, SSH key path, and destination folder.
Example destination folder on the Linux server:
/home/ubuntu/Agent-Installer
Example: Copy the Agent installation package to the Linux server using SCP:
scp -i ~/.ssh/id_ed25519 /Users/deabdahuy-sk-backup-pc/Downloads/Agent-Linux-Installation-3-06-08.zip ubuntu@32.236.220.72:/home/ubuntu/Agent-Installer
Enter passphrase for key '/Users/deabdahuy-sk-backup-pc/.ssh/id_ed25519':

Wait until the file transfer is complete. Then connect to the Linux server and verify that the ZIP file exists in the destination folder before proceeding to the extraction step.
3.3 Extract the Agent Package
Script Summary
ssh username@<linux-server-ip>
cd /home/ubuntu/Agent-Installer
Ls
unzip Agent-Linux-Installation-3.06.08.zip
ls
Connect locally to the Linux server
ssh ubuntu@32.236.220.72
Enter passphrase for key '/Users/deabdahuy-sk-backup-pc/.ssh/id_ed25519':
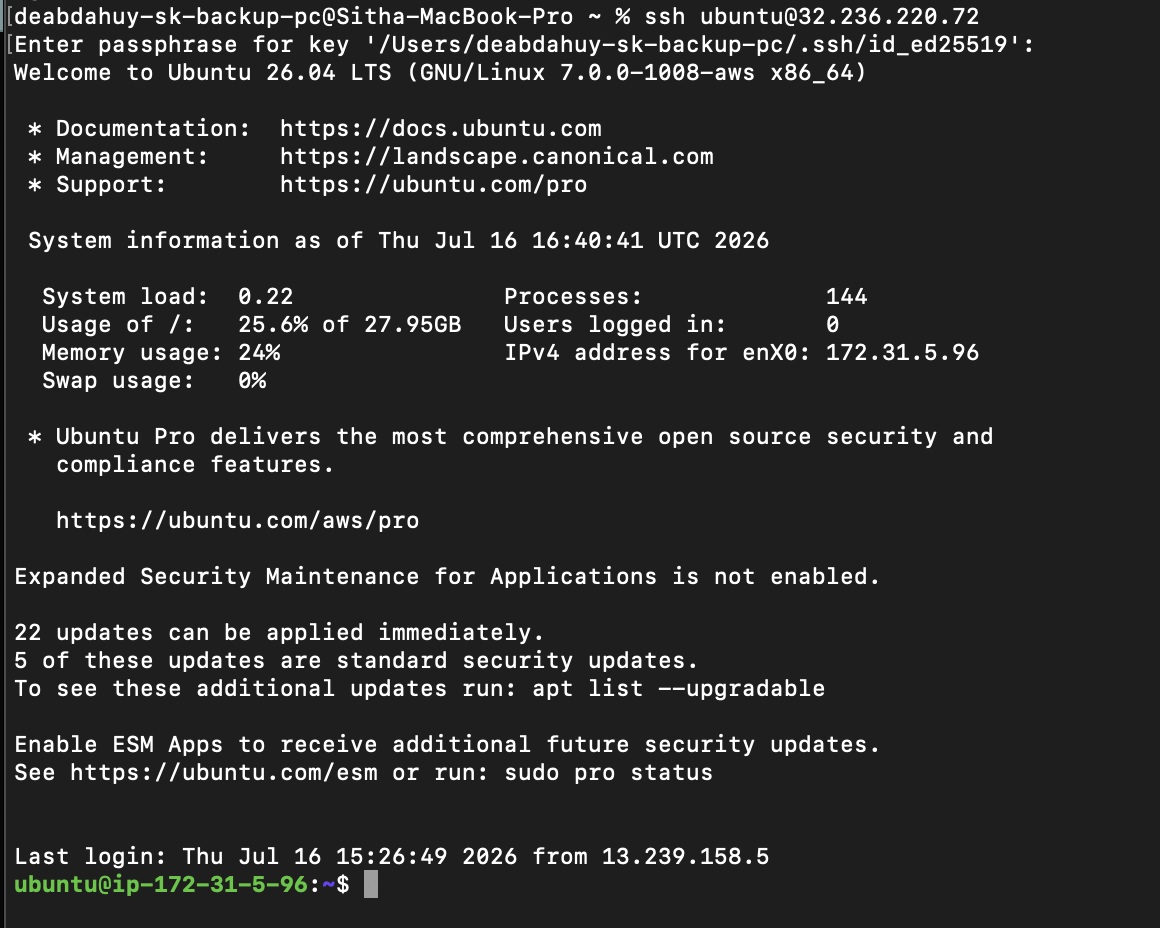
Go to the folder where the Agent installation package was copied:
cd /home/ubuntu/Agent-Installer
ls

Unzip the file for the Agent-Linux-Installation-3-xx-xx.zip:
unzip Agent-Linux-Installation-3-06-08.zip

If unzip is not installed, install it using the command below:
sudo apt install unzip
Note: Skip this step if unzip is already installed.
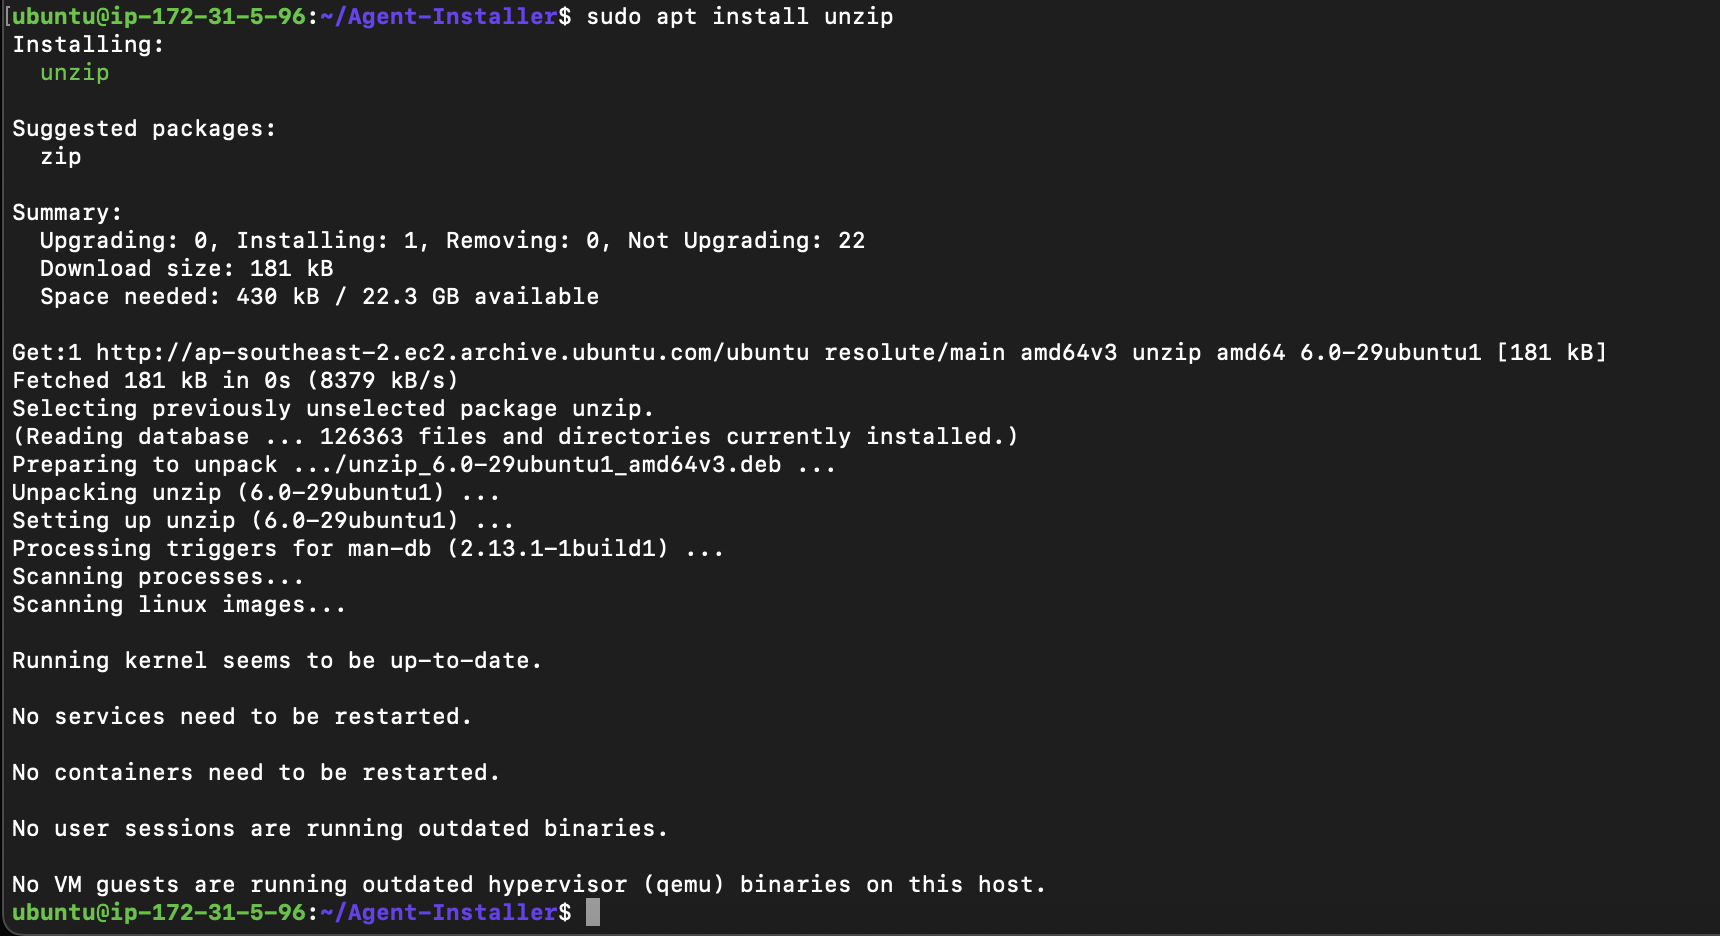
After installing unzip, retry extracting the installation package:
unzip Agent-Linux-Installation-3-06-08.zip
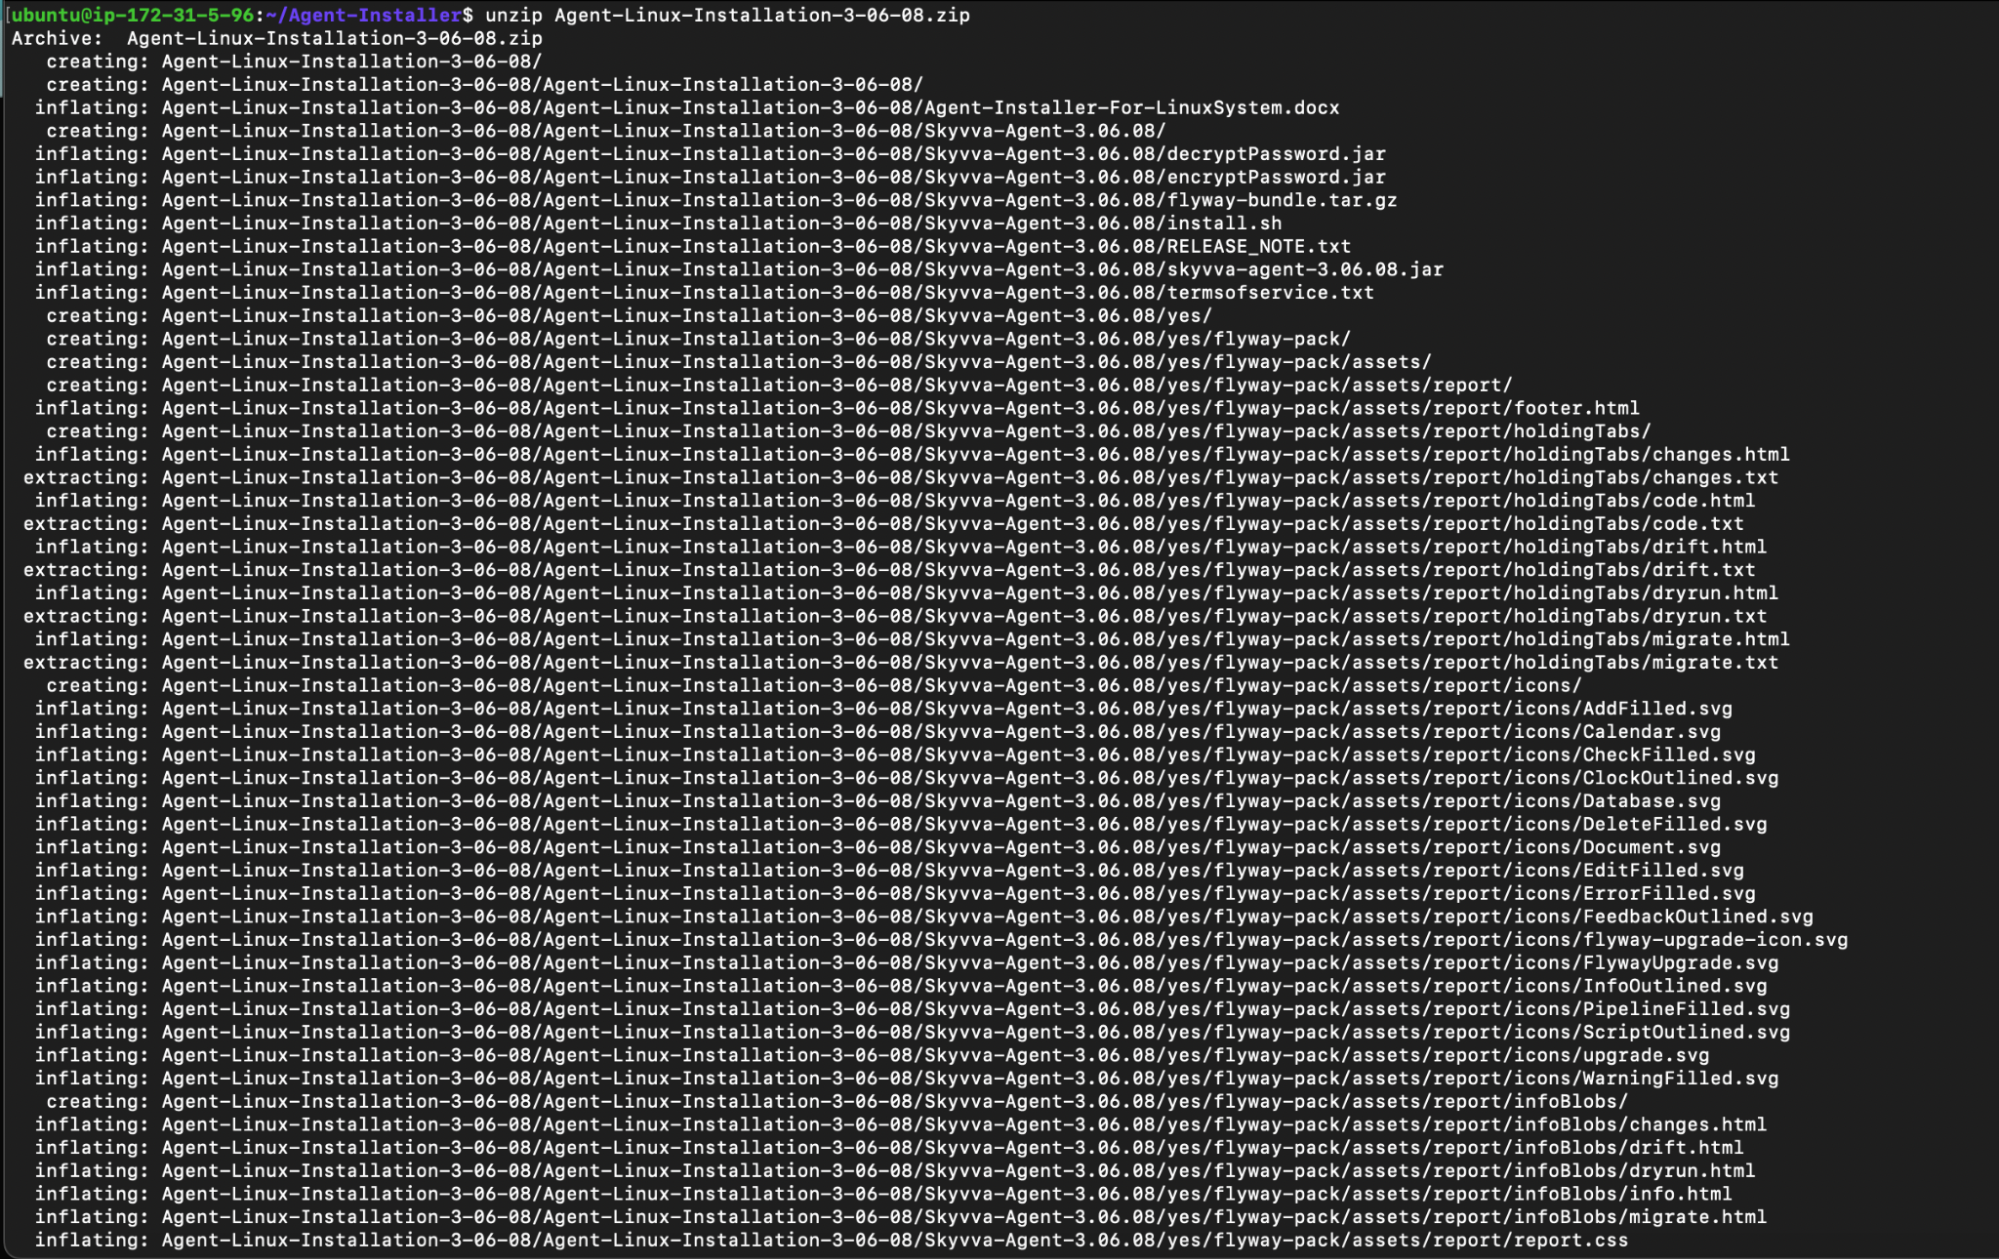
3.4 Run the Installer Shell Script
After extracting the ZIP package, open the SKYVVA Agent installation folder:
cd Agent-Linux-Installation-3-06-08
ls

cd cd Skyvva-Agent-3.06.08
ls
The folder should contain the install.sh script and the other Agent installation files.

Helpful Tips During Installation
You may find the following tips useful while completing the installation:
💡 Tip: type '<' at any prompt to go back and edit the previous field.
💡 Tip: press Enter to accept the value shown in (default: ...) without typing it.
💡 Tip: If an error occurs, you can retry your input up to three times. After the maximum number of attempts is reached, the SKYVVA Agent Installer will exit automatically.
Start the Installation
Run the installer with administrator privileges:
sudo ./install.sh
Note: If the installer starts successfully and no permission error appears, skip the permission setup steps below and continue with the installation.
Troubleshooting: Permission Denied
The installer may display the following error if install.sh does not have execute permission:
sudo: cannot execute './install.sh': Permission denied

Check the current file permissions:
ls -l install.sh
Grant execute permission to the script:
sudo chmod +x install.sh
Verify that execute permission was added:
ls -l install.sh
The permissions should now include x, for example:
-rwxr-xr-x 1 ubuntu ubuntu ... install.sh
Run the installer again:
sudo ./install.sh
Note: The x permission allows Linux to execute the file as a shell script.
4. Installer Input Values
During installation, the shell script asks for PostgreSQL Credential Setup and Agent Credential Setup. Use the values below unless your environment requires a different host or port.
4.1 PostgreSQL Credential Setup
| Installer Prompt | Recommended Input | Note |
|---|---|---|
| PostgreSQL username | postgres | Default PostgreSQL user |
| PostgreSQL password | Password set by the user | |
| PostgreSQL host | localhost | Default is fine when PostgreSQL is installed on the same server |
| PostgreSQL port | 5432 | Default PostgreSQL port |
| PostgreSQL database name | postgres | Default database can be used |
| PostgreSQL schema name | skyvva_9055 | Example only. Agent installer creates the schema automatically |
4.2 Agent Credential Setup
| Installer Prompt | Recommended Input | Note |
|---|---|---|
| Agent port | 9055 | Default Agent port |
| Agent username | User defines this login name | |
| Agent password | User defines this login password |
4.3 Example Installer Input
In this step, the user must accept the SKYVVA Integration Agent Terms of Service before continuing with the installation.
_____ _                               ___                   _    ______
_____ _                               ___                   _    ______
/  ___| |                             / _ \                 | |   \ \ \ \
\ `--.| | ___   ___   ____   ____ _  / /_\ \ __ _  ___ _ __ | |_   \ \ \ \
 `--. \ |/ / | | \ \ / /\ \ / / _` | |  _  |/ _` |/ _ \ '_ \| __|   > > > >
/\__/ /   <| |_| |\ V /  \ V / (_| | | | | | (_| |  __/ | | | |_   / / / /
\____/|_|\_\\__, | \_/    \_/ \__,_| \_| |_/\__, |\___|_| |_|\__| /_/_/_/
             __/ |                           __/ |
            |___/                           |___/


Starting installer..........

============================================================
        SKYVVA INTEGRATION AGENT LICENSE AGREEMENT
============================================================

Terms of Service for SKYVVA Integration Agent

These Terms of Service apply to SKYVVA, a product of
Apsara Consulting GmbH (the "Service"), and form a legally
binding contract between you, the end user, and Apsara
Consulting GmbH, registered in Munich ("APSARA").

A short preview is shown above. You can accept and continue
without reading the complete agreement, or view the full text
before making your decision.

------------------------------------------------------------
  [A] Accept and continue
  [V] View the complete license agreement
  [D] Decline and exit
------------------------------------------------------------

Select an option [A/V/D]:
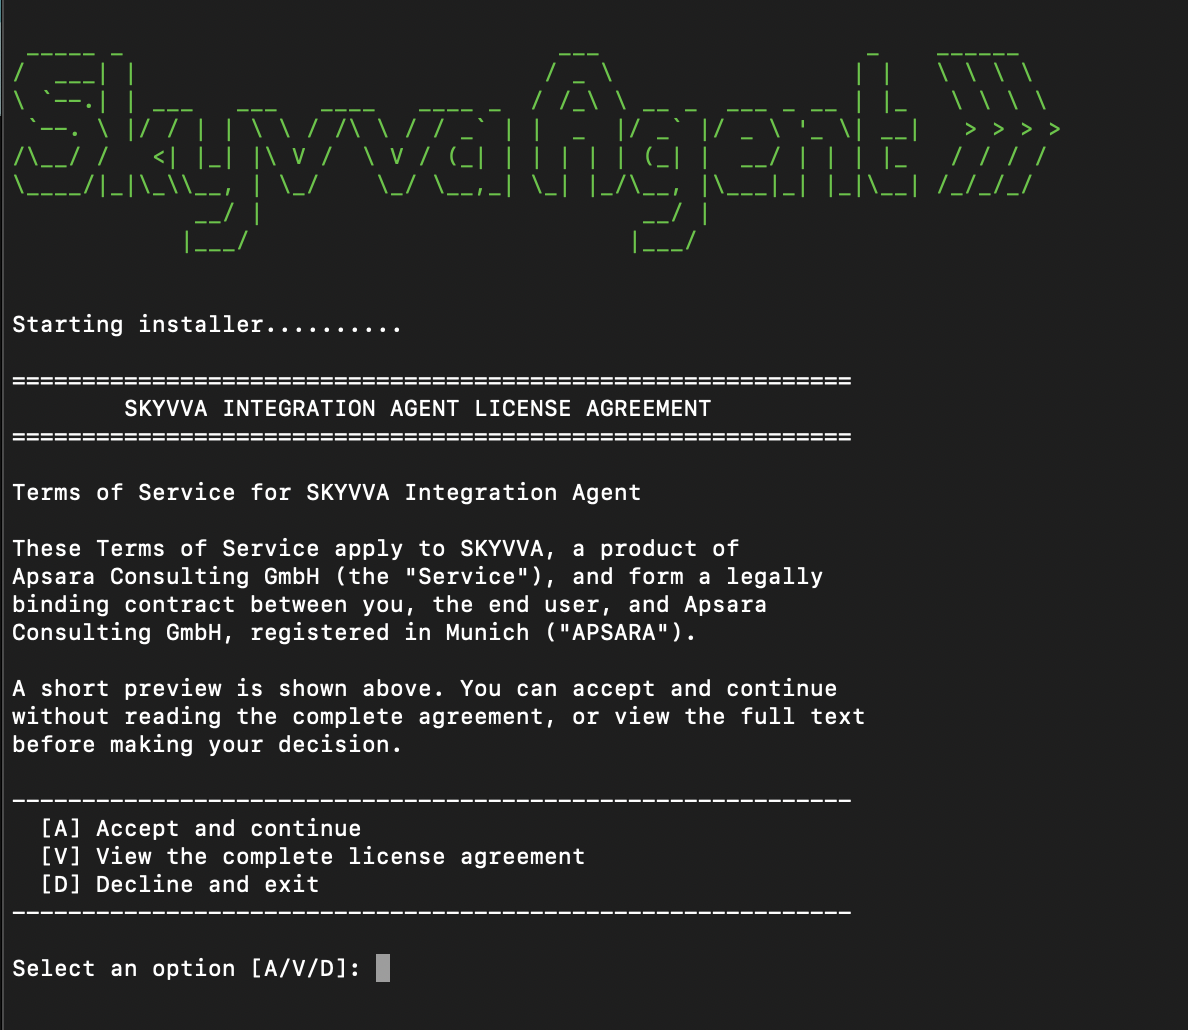
If you select A, you accept the SKYVVA Integration Agent Terms of Service and proceed to the next step, where you will enter the PostgreSQL credentials.
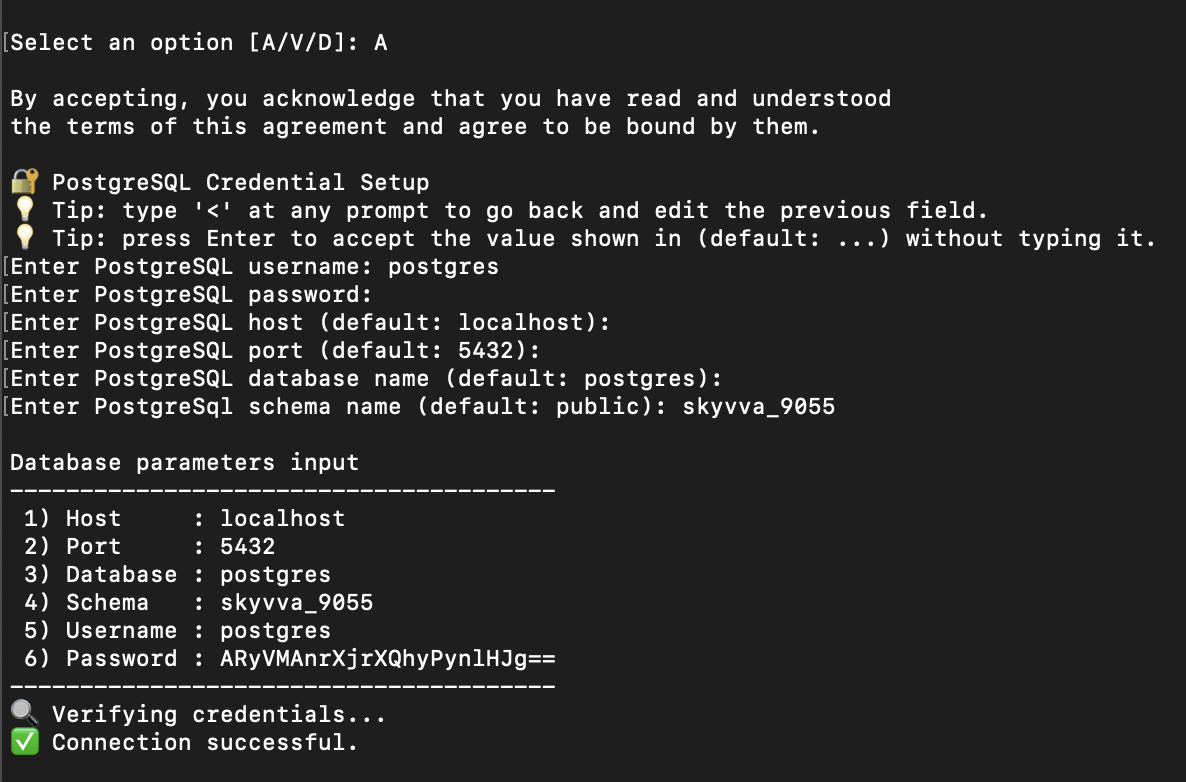
🔐 PostgreSQL Credential Setup
Enter the PostgreSQL connection information that the SKYVVA Agent will use for its cache database. This includes the PostgreSQL username, password, host, port, database name, and schema name.
The installer verifies the connection before continuing. Make sure PostgreSQL is installed, running, and accessible with the credentials you provide.
Select an option [A/V/D]: A
By accepting, you acknowledge that you have read and understood
the terms of this agreement and agree to be bound by them.
🔐 PostgreSQL Credential Setup
💡 Tip: type '<' at any prompt to go back and edit the previous field.
💡 Tip: press Enter to accept the value shown in (default: ...) without typing it.
Enter PostgreSQL username: postgres
Enter PostgreSQL password:
Enter PostgreSQL host (default: localhost):
Enter PostgreSQL port (default: 5432):
Enter PostgreSQL database name (default: postgres):
Enter PostgreSql schema name (default: public): skyvva_9055
Database parameters input
---------------------------------------
 1) Host     : localhost
 2) Port     : 5432
 3) Database : postgres
 4) Schema   : skyvva_9055
 5) Username : postgres
 6) Password : ARyVMAnrXjrXQhyPynlHJg==
---------------------------------------
🔍 Verifying credentials...
✅ Connection successful.
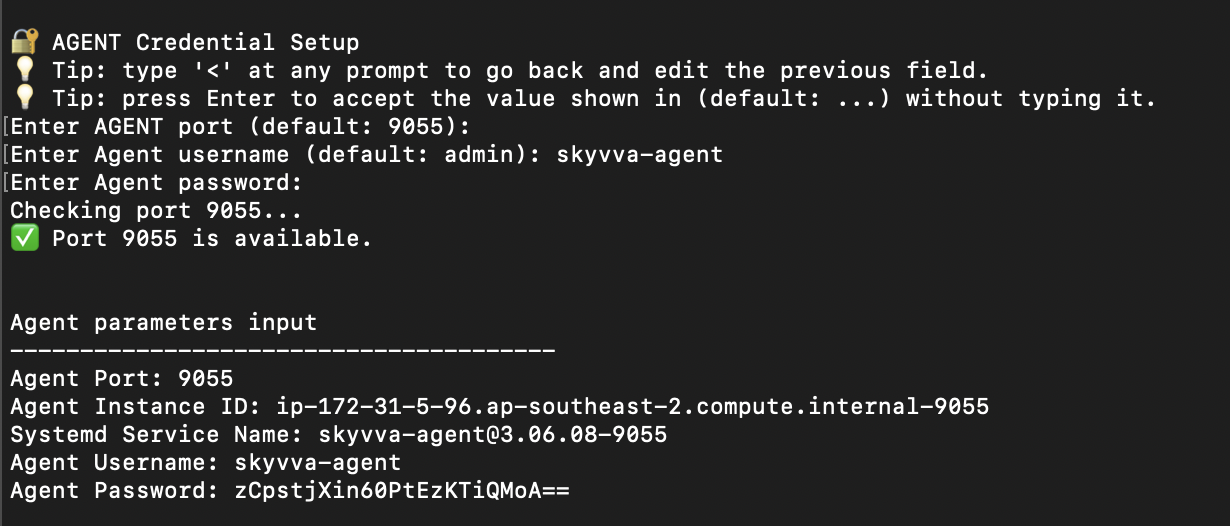
🔐 AGENT Credential Setup
Configure the login information for the SKYVVA Agent. Enter the Agent port, username, and password.
These credentials will be used to access the SKYVVA Agent Web UI/Agent Control Board in Salesforce after the installation is complete.
🔐 AGENT Credential Setup
💡 Tip: type '<' at any prompt to go back and edit the previous field.
💡 Tip: press Enter to accept the value shown in (default: ...) without typing it.
Enter AGENT port (default: 9055):
Enter Agent username (default: admin): skyvva-agent
Enter Agent password:
Checking port 9055...
✅ Port 9055 is available.


Agent parameters input
---------------------------------------
Agent Port: 9055
Agent Instance ID: ip-172-31-5-96.ap-southeast-2.compute.internal-9055
Systemd Service Name: skyvva-agent@3.06.08-9055
Agent Username: skyvva-agent
Agent Password: zCpstjXin60PtEzKTiQMoA==
📁 Choose the folder in which to install Agent
Select the directory where the SKYVVA Agent files will be installed.
Press Enter to use the default installation folder, or enter a different path when required.
Example: /opt/skyvva-agent-3-06-08
The installer will create the required folders, configuration files, logs, Java runtime, and service files in the selected directory.
📁 Choose the folder in which to install Agent (press Enter to use default: /opt/skyvva-agent): /opt/skyvva-agent-3-06-08
📦 Installation directory set to: /opt/skyvva-agent-3-06-08

Do you want to continue the installation?. Enter [yes/no] to continue. Enter 'yes' to continue. Enter 'no' to cancel the installation: yes

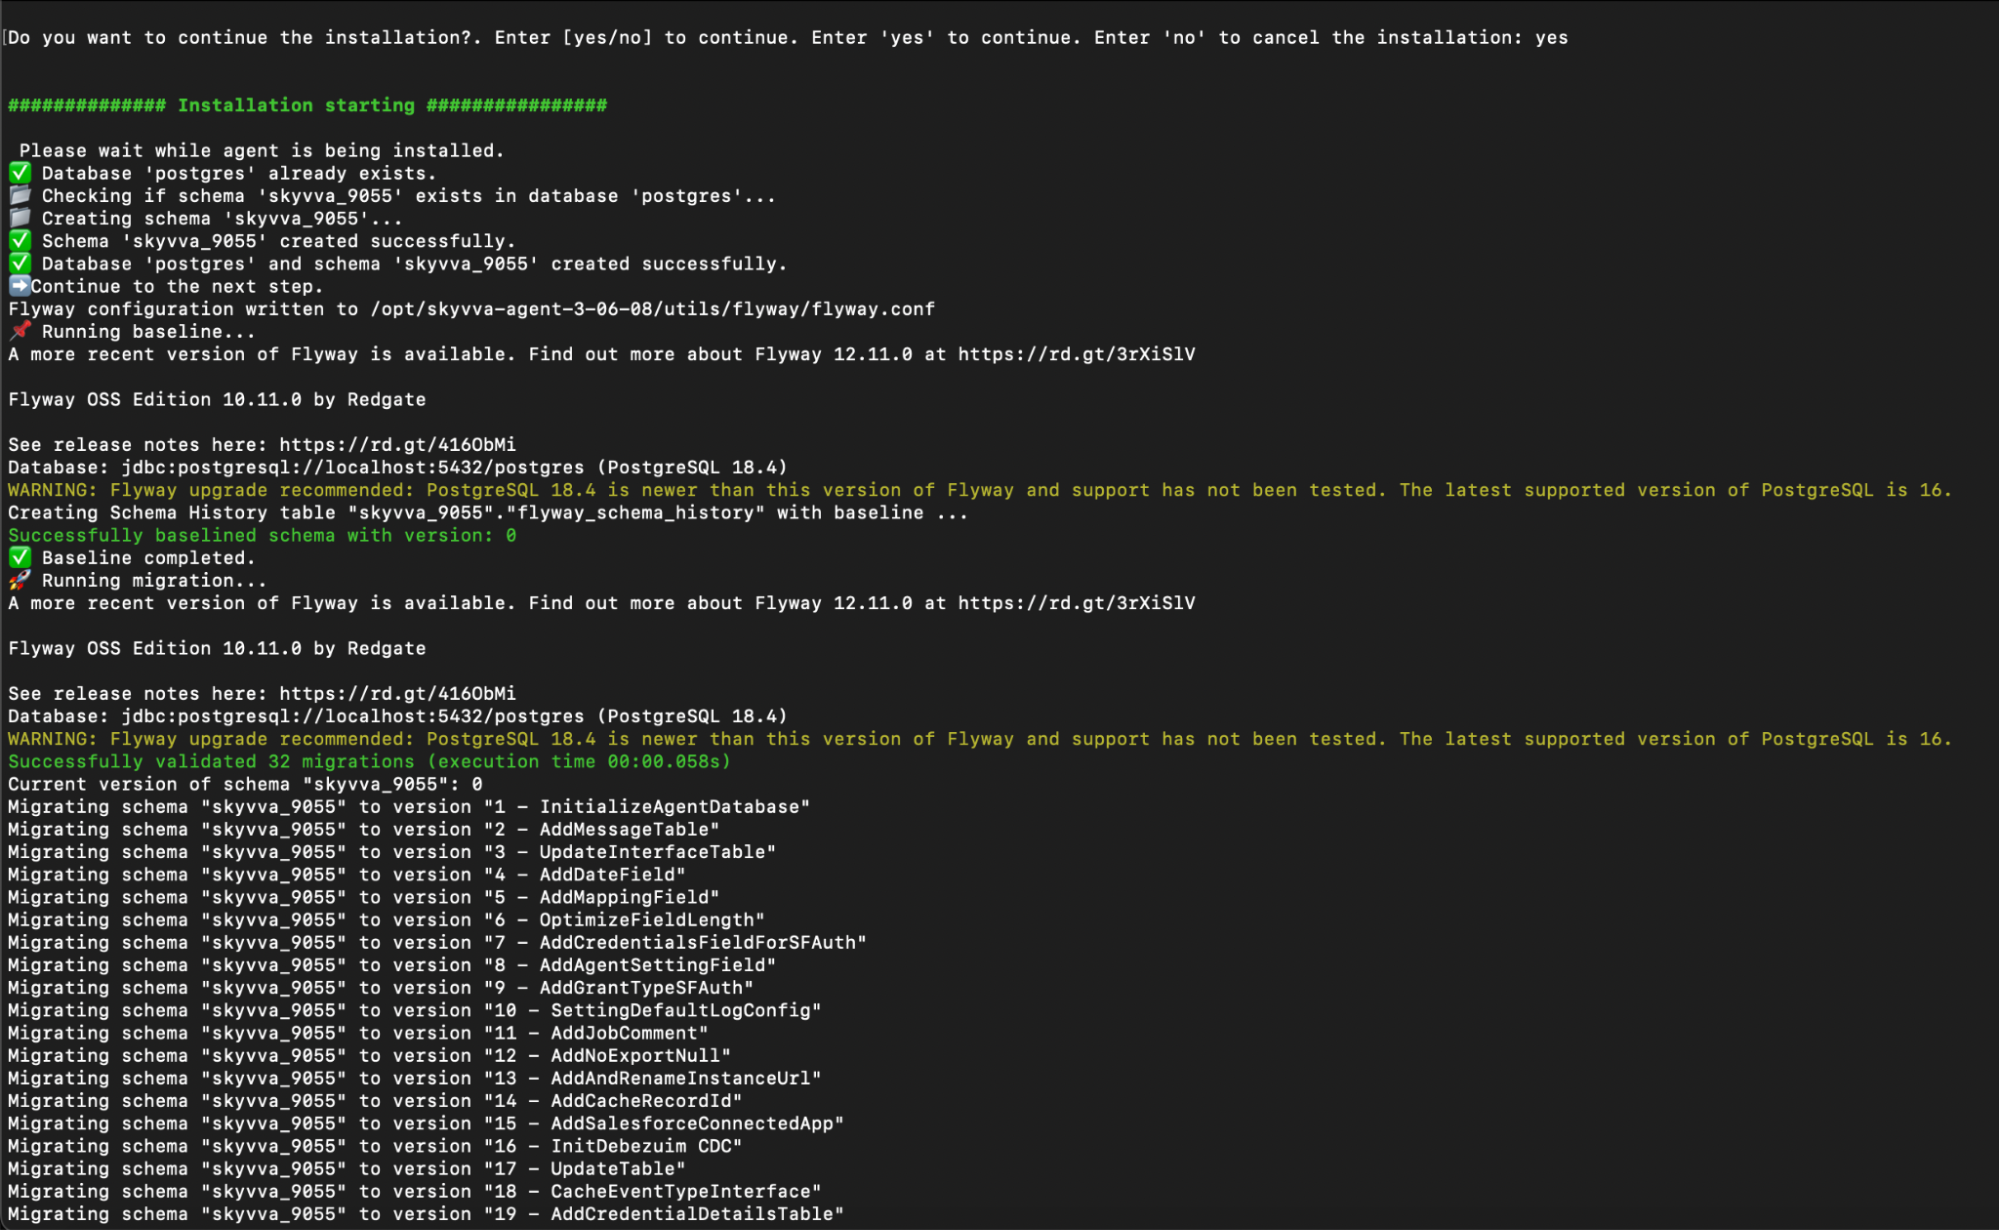
After you confirm (yes), the SKYVVA Agent installation begins:
The installer displays a summary of the configuration values and asks for confirmation:
############## Installation starting ################

 Please wait while agent is being installed.
✅ Database 'postgres' already exists.
📂 Checking if schema 'skyvva_9055' exists in database 'postgres'...
📁 Creating schema 'skyvva_9055'...
✅ Schema 'skyvva_9055' created successfully.
✅ Database 'postgres' and schema 'skyvva_9055' created successfully.
➡️ Continue to the next step.
Flyway configuration written to /opt/skyvva-agent-3-06-08/utils/flyway/flyway.conf
📌 Running baseline...
A more recent version of Flyway is available. Find out more about Flyway 12.11.0 at https://rd.gt/3rXiSlV

Flyway OSS Edition 10.11.0 by Redgate

See release notes here: https://rd.gt/416ObMi
Database: jdbc:postgresql://localhost:5432/postgres (PostgreSQL 18.4)
WARNING: Flyway upgrade recommended: PostgreSQL 18.4 is newer than this version of Flyway and support has not been tested. The latest supported version of PostgreSQL is 16.
Creating Schema History table "skyvva_9055"."flyway_schema_history" with baseline ...
Successfully baselined schema with version: 0
✅ Baseline completed.
🚀 Running migration...
A more recent version of Flyway is available. Find out more about Flyway 12.11.0 at https://rd.gt/3rXiSlV

Flyway OSS Edition 10.11.0 by Redgate

See release notes here: https://rd.gt/416ObMi
Database: jdbc:postgresql://localhost:5432/postgres (PostgreSQL 18.4)
WARNING: Flyway upgrade recommended: PostgreSQL 18.4 is newer than this version of Flyway and support has not been tested. The latest supported version of PostgreSQL is 16.
Successfully validated 32 migrations (execution time 00:00.058s)
Current version of schema "skyvva_9055": 0
Migrating schema "skyvva_9055" to version "1 - InitializeAgentDatabase"
Migrating schema "skyvva_9055" to version "2 - AddMessageTable"
Migrating schema "skyvva_9055" to version "3 - UpdateInterfaceTable"
Migrating schema "skyvva_9055" to version "4 - AddDateField"
Migrating schema "skyvva_9055" to version "5 - AddMappingField"
Migrating schema "skyvva_9055" to version "6 - OptimizeFieldLength"
Migrating schema "skyvva_9055" to version "7 - AddCredentialsFieldForSFAuth"
Migrating schema "skyvva_9055" to version "8 - AddAgentSettingField"
Migrating schema "skyvva_9055" to version "9 - AddGrantTypeSFAuth"
Migrating schema "skyvva_9055" to version "10 - SettingDefaultLogConfig"
Migrating schema "skyvva_9055" to version "11 - AddJobComment"
Migrating schema "skyvva_9055" to version "12 - AddNoExportNull"
Migrating schema "skyvva_9055" to version "13 - AddAndRenameInstanceUrl"
Migrating schema "skyvva_9055" to version "14 - AddCacheRecordId"
Migrating schema "skyvva_9055" to version "15 - AddSalesforceConnectedApp"
Migrating schema "skyvva_9055" to version "16 - InitDebezuim CDC"
Migrating schema "skyvva_9055" to version "17 - UpdateTable"
Migrating schema "skyvva_9055" to version "18 - CacheEventTypeInterface"
Migrating schema "skyvva_9055" to version "19 - AddCredentialDetailsTable"
Migrating schema "skyvva_9055" to version "20 - ChangeTypeInTableCredentail"
Migrating schema "skyvva_9055" to version "21 - AddForeignKeyIntoIChainInferfaceTable"
Migrating schema "skyvva_9055" to version "22 - AddColumnRefreshTokenIntoCredentialDetailTable"
Migrating schema "skyvva_9055" to version "23 - ChangeTypeInTableAdapterProperty"
Migrating schema "skyvva_9055" to version "24 - CreateTableBatchQueue"
Migrating schema "skyvva_9055" to version "25 - AddBy Passing Message  c INTO InterfaceTable"
Migrating schema "skyvva_9055" to version "26 - AddingFieldsToTable"
Migrating schema "skyvva_9055" to version "27 - AddMsgPerRQ"
Migrating schema "skyvva_9055" to version "28 - addLengthCronTrigger"
Migrating schema "skyvva_9055" to version "29 - AddDirectionJobProcessDetails"
Migrating schema "skyvva_9055" to version "30 - AddPosting techinque"
Migrating schema "skyvva_9055" to version "31 - CreateConnection healthTable"
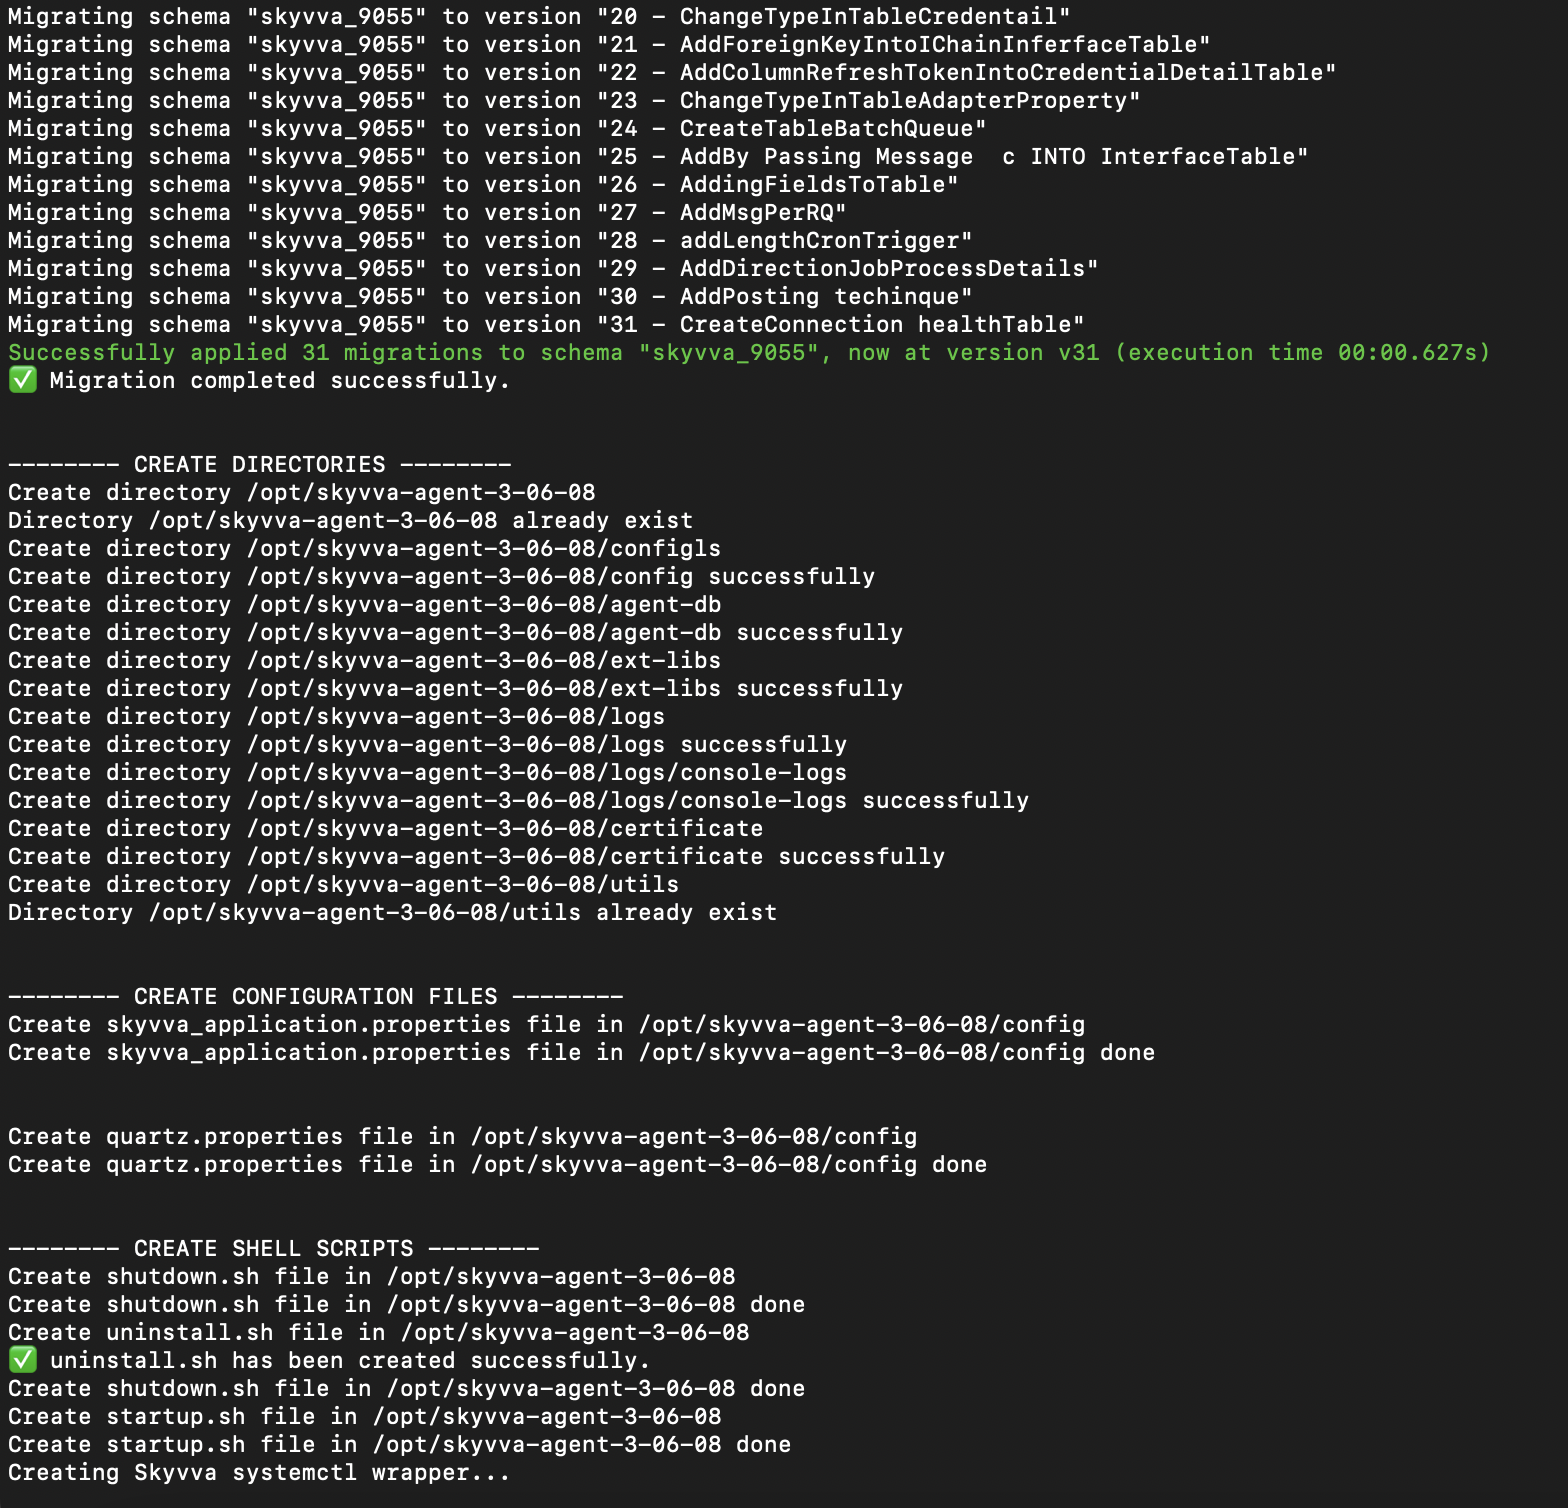
Successfully applied 31 migrations to schema "skyvva_9055", now at version v31 (execution time 00:00.627s)
✅ Migration completed successfully.


-------- CREATE DIRECTORIES --------
Create directory /opt/skyvva-agent-3-06-08
Directory /opt/skyvva-agent-3-06-08 already exist
Create directory /opt/skyvva-agent-3-06-08/configls
Create directory /opt/skyvva-agent-3-06-08/config successfully
Create directory /opt/skyvva-agent-3-06-08/agent-db
Create directory /opt/skyvva-agent-3-06-08/agent-db successfully
Create directory /opt/skyvva-agent-3-06-08/ext-libs
Create directory /opt/skyvva-agent-3-06-08/ext-libs successfully
Create directory /opt/skyvva-agent-3-06-08/logs
Create directory /opt/skyvva-agent-3-06-08/logs successfully
Create directory /opt/skyvva-agent-3-06-08/logs/console-logs
Create directory /opt/skyvva-agent-3-06-08/logs/console-logs successfully
Create directory /opt/skyvva-agent-3-06-08/certificate
Create directory /opt/skyvva-agent-3-06-08/certificate successfully
Create directory /opt/skyvva-agent-3-06-08/utils
Directory /opt/skyvva-agent-3-06-08/utils already exist


-------- CREATE CONFIGURATION FILES --------
Create skyvva_application.properties file in /opt/skyvva-agent-3-06-08/config
Create skyvva_application.properties file in /opt/skyvva-agent-3-06-08/config done


Create quartz.properties file in /opt/skyvva-agent-3-06-08/config
Create quartz.properties file in /opt/skyvva-agent-3-06-08/config done


-------- CREATE SHELL SCRIPTS --------
Create shutdown.sh file in /opt/skyvva-agent-3-06-08
Create shutdown.sh file in /opt/skyvva-agent-3-06-08 done
Create uninstall.sh file in /opt/skyvva-agent-3-06-08
✅ uninstall.sh has been created successfully.
Create shutdown.sh file in /opt/skyvva-agent-3-06-08 done
Create startup.sh file in /opt/skyvva-agent-3-06-08
Create startup.sh file in /opt/skyvva-agent-3-06-08 done
Creating Skyvva systemctl wrapper...

✓ Installed:
    /usr/local/bin/skyvva-systemctl

-------- REGISTER SYSTEMD SERVICE --------
Creating systemd service file: /etc/systemd/system/skyvva-agent@3.06.08-9055.service
✅ Service file created at /etc/systemd/system/skyvva-agent@3.06.08-9055.service
✅ systemd daemon reloaded
Created symlink '/etc/systemd/system/multi-user.target.wants/skyvva-agent@3.06.08-9055.service' → '/etc/systemd/system/skyvva-agent@3.06.08-9055.service'.
✅ Service enabled for auto-start on boot

Start the Agent Service During Installation
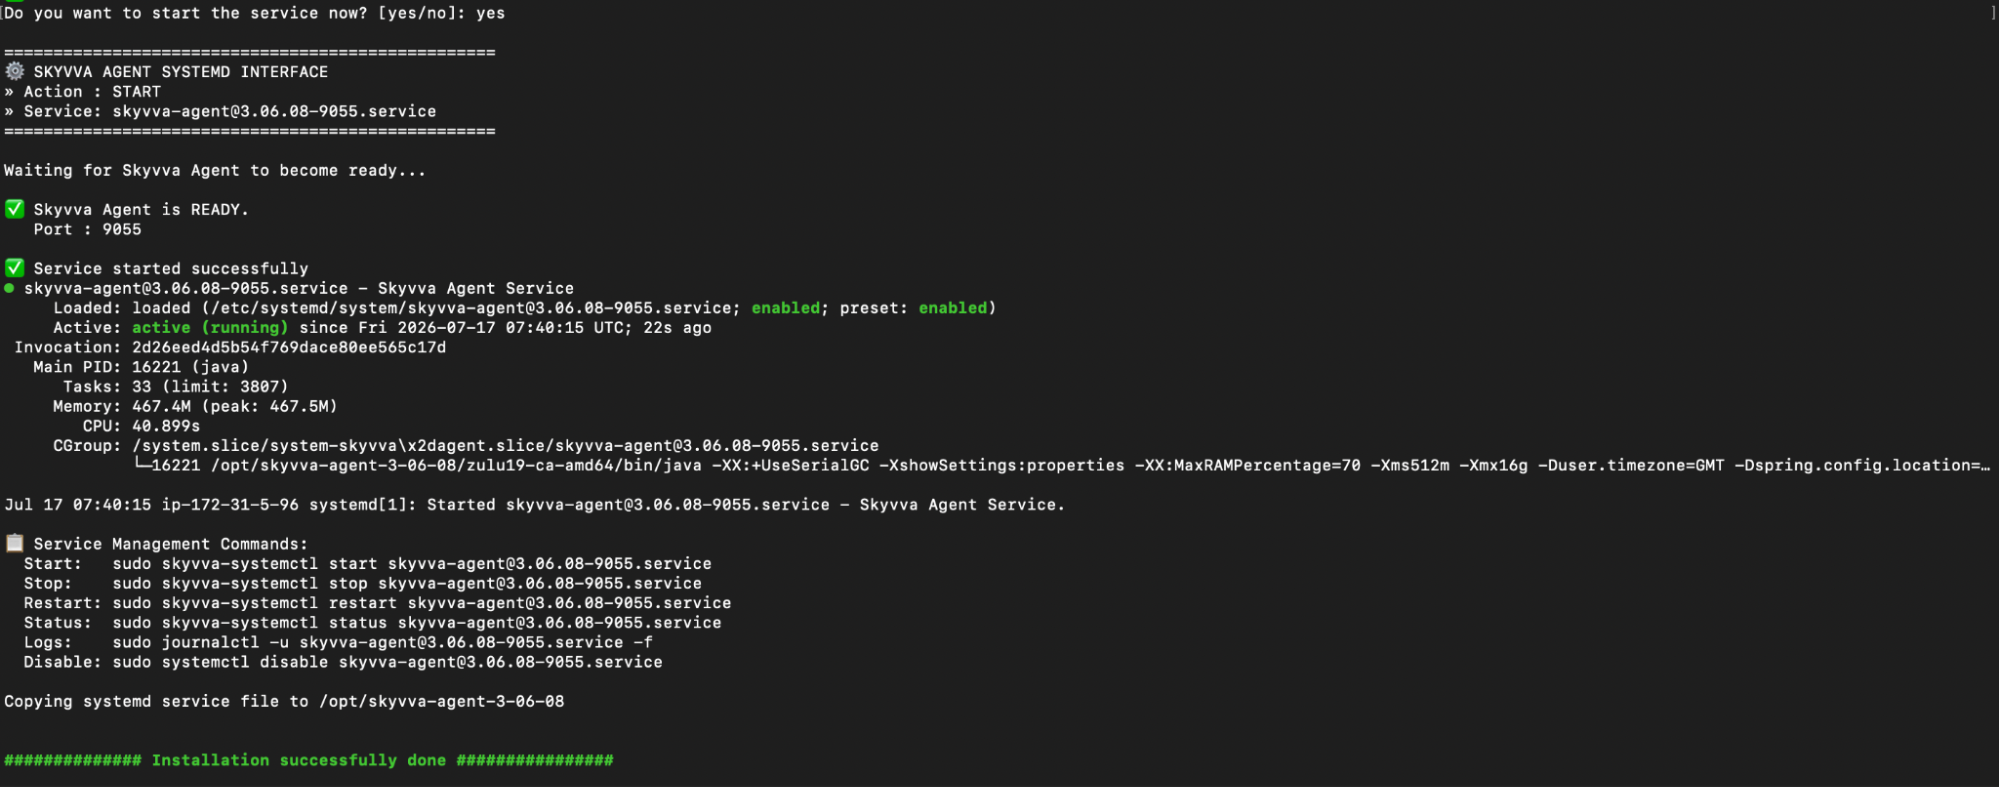
After the installation is complete, the installer asks whether you want to start the SKYVVA Agent service immediately:
Do you want to start the service now? [yes/no]: yes
Enter
Result after execution.
Do you want to start the service now? [yes/no]: yes

==================================================
⚙️  SKYVVA AGENT SYSTEMD INTERFACE
» Action : START
» Service: skyvva-agent@3.06.08-9055.service
==================================================

Waiting for Skyvva Agent to become ready...

✅ Skyvva Agent is READY.
   Port : 9055

✅ Service started successfully
● skyvva-agent@3.06.08-9055.service - Skyvva Agent Service
     Loaded: loaded (/etc/systemd/system/skyvva-agent@3.06.08-9055.service; enabled; preset: enabled)
     Active: active (running) since Fri 2026-07-17 07:40:15 UTC; 22s ago
 Invocation: 2d26eed4d5b54f769dace80ee565c17d
   Main PID: 16221 (java)
      Tasks: 33 (limit: 3807)
     Memory: 467.4M (peak: 467.5M)
        CPU: 40.899s
     CGroup: /system.slice/system-skyvva\x2dagent.slice/skyvva-agent@3.06.08-9055.service
             └─16221 /opt/skyvva-agent-3-06-08/zulu19-ca-amd64/bin/java -XX:+UseSerialGC -XshowSettings:properties -XX:MaxRAMPercentage=70 -Xms512m -Xmx16g -Duser.timezone=GMT -Dspring.config.location=…

Jul 17 07:40:15 ip-172-31-5-96 systemd[1]: Started skyvva-agent@3.06.08-9055.service - Skyvva Agent Service.

📋 Service Management Commands:
  Start:   sudo skyvva-systemctl start skyvva-agent@3.06.08-9055.service
  Stop:    sudo skyvva-systemctl stop skyvva-agent@3.06.08-9055.service
  Restart: sudo skyvva-systemctl restart skyvva-agent@3.06.08-9055.service
  Status:  sudo skyvva-systemctl status skyvva-agent@3.06.08-9055.service
  Logs:    sudo journalctl -u skyvva-agent@3.06.08-9055.service -f
  Disable: sudo systemctl disable skyvva-agent@3.06.08-9055.service

Copying systemd service file to /opt/skyvva-agent-3-06-08


############## Installation successfully done ################
5. Verify the Agent Service
If you select Yes, the Agent Service will start automatically. If you select No, you can start the Agent Service later by using the shell script below:
Specific Agent Service Management Commands
- For one exact service:
📋 Service Management Commands:
  Start:   sudo systemctl start skyvva-agent@3.06.08-9055.service
  Stop:    sudo systemctl stop skyvva-agent@3.06.08-9055.service
  Restart: sudo systemctl restart skyvva-agent@3.06.08-9055.service
  Status:  sudo systemctl status skyvva-agent@3.06.08-9055.service
  Logs:    sudo journalctl -u skyvva-agent@3.06.08-9055.service -f
  Disable: sudo systemctl disable skyvva-agent@3.06.08-9055.service
All SKYVVA Agent Service Management Commands
- For all services matching the SKYVVA Agent service name:
📋 Service Management Commands:
Start:   sudo systemctl start skyvva-agent*.service
Stop:    sudo systemctl stop skyvva-agent*.service
Restart: sudo systemctl restart skyvva-agent*.service
Status:  sudo systemctl status skyvva-agent*.service
Logs:    sudo journalctl -u skyvva-agent*.service -f
Disable: sudo systemctl disable skyvva-agent*.service
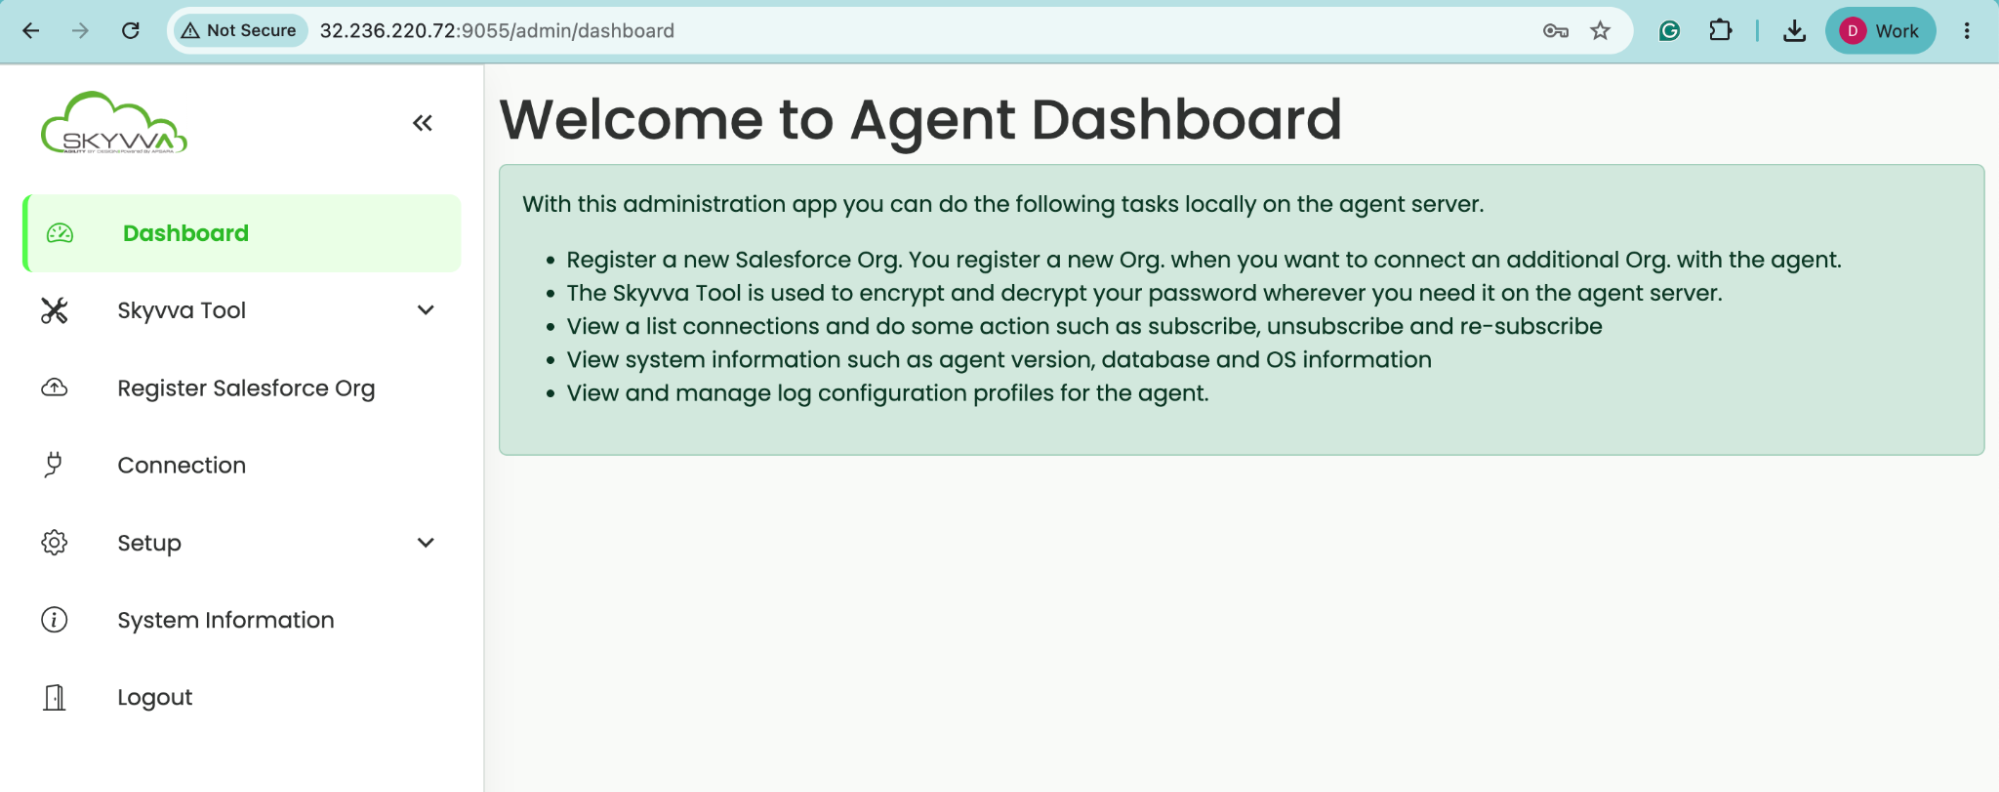
5.1 Open the Skyvva Agent Web UI
# From a browser on the Linux desktop or from another client machine:
http://<linux-server-ip>:9055

# Example:
http://192.168.1.50:9055
Note: If the Linux server has no desktop GUI or browser, open the Skyvva Agent Web UI from another computer browser using the server IP address and Agent port.
6. Configure SSL for the SKYVVA Agent
The SSL requirement depends on how Salesforce communicates with the SKYVVA Agent.
6.1 Event-Based Connection with a Closed Firewall (Non-Open Firewall Mode)
When the Agent uses an event-based connection, the SKYVVA Agent initiates the outbound connection to Salesforce and subscribes to Salesforce events.
Because Salesforce does not connect directly to an inbound Agent port, a public SSL certificate or PFX file is normally not required for this connection mode. The communication between the Agent and Salesforce is already protected through the secure Salesforce connection.
To register the SKYVVA Agent in Non-Open Firewall Mode, follow the video guide starting at 3:20:
Video guide:
6.2 Direct Connection with an Open Firewall (Open Firewall Mode)
When the Agent port is publicly accessible and Salesforce connects directly to the SKYVVA Agent, HTTPS must be configured to protect the inbound connection.
In this case, you need a valid SSL certificate in PFX format. The PFX file can be generated through the SKYVVA Agent Web App, which automatically:
- Generates the PFX certificate file.
- Adds the required SSL configuration to skyvva_application.properties.
Video guide:
Note: HTTPS is also recommended when the SKYVVA Agent Web UI is accessible outside a trusted internal network.
7. Troubleshooting Checklist
- PostgreSQL service is running.
- PostgreSQL password is correct.
- PostgreSQL host is localhost when the database and Agent are on the same server.
- PostgreSQL port is 5432 unless changed by the customer.
- The database name is postgres unless changed by the customer.
- The schema name, such as skyvva_9055, is entered during Agent installation; the installer creates it automatically.
- Agent port 9055 is open in the firewall. On Ubuntu Server with UFW, make sure UFW is active, and 9055/tcp is allowed.
- Agent service is running after installation.