4. How to create an inbound interface using integrateBatch() with SkyvvaSalesforce Adapter
Overview
This document explains how to create a SKYVVA Inbound Interface in Salesforce using the integrateBatch API with the SkyvvaSalesforce Adapter.
It covers the following steps:
- Create and configure a SKYVVA Inbound Interface in Salesforce.
- Enable batch processing for the interface.
- Create an integration flow in SAP CPI.
- Configure the HTTPS sender channel.
- Configure the SKYVVA Salesforce receiver channel.
- Deploy the integration flow.
- Send a test request from Postman through SAP CPI.
- Monitor the message in SAP CPI.
- Process and verify the batch in Salesforce.
| Item | Value |
|---|---|
| Salesforce Object | Account |
| Message Source | Postman |
| Middleware | SAP CPI |
| SKYVVA API Version | V2 |
| SKYVVA API | integrateBatch |
| Processing Mode | Asynchronous |
| Operation Type | Upsert |
Context Before You Start
In short: this collects incoming records into a working basket instead of processing each one immediately — SAP CPI posts to the legacy integrateBatch API (Skyvva API Version = V2), Salesforce queues the records into a batch, and the batch is then reprocessed from the SKYVVA Batch Control Board rather than being handled inline on the inbound call.
Reasons to pick this path:
- The source system is sending (or can be made to send) multiple records per call, or many calls in quick succession, and processing them one-by-one inline would be slower or riskier than letting Salesforce batch and reprocess them together.
- It matches an existing/legacy
integrateBatchcaller you're routing through CPI instead of hitting Salesforce directly — same rationale as the plainIntegratepattern in How to Create a SKYVVA Inbound Interface Using the Integrate() with the SkyvvaSalesforce Adapter?, but for the batch case.
- Bulk or high-volume inbound loads (e.g. an overnight sync, a bulk export from another system) where grouping records into a basket and reprocessing them together is more efficient than one interface call per record.
- Cases where the caller doesn't need an immediate per-record result back — the response here confirms the basket was created, not that each record finished processing.
How integrateBatch Works
The integrateBatch API is designed to process incoming records as a batch. Instead of processing each record individually, the incoming records are collected and processed together.
The end-to-end flow is:
Postman
   ↓
SAP CPI
   ↓
SKYVVA Salesforce Adapter
   ↓
SKYVVA Inbound Interface
   ↓
Working Basket
   ↓
Process Batch
   ↓
Salesforce Account
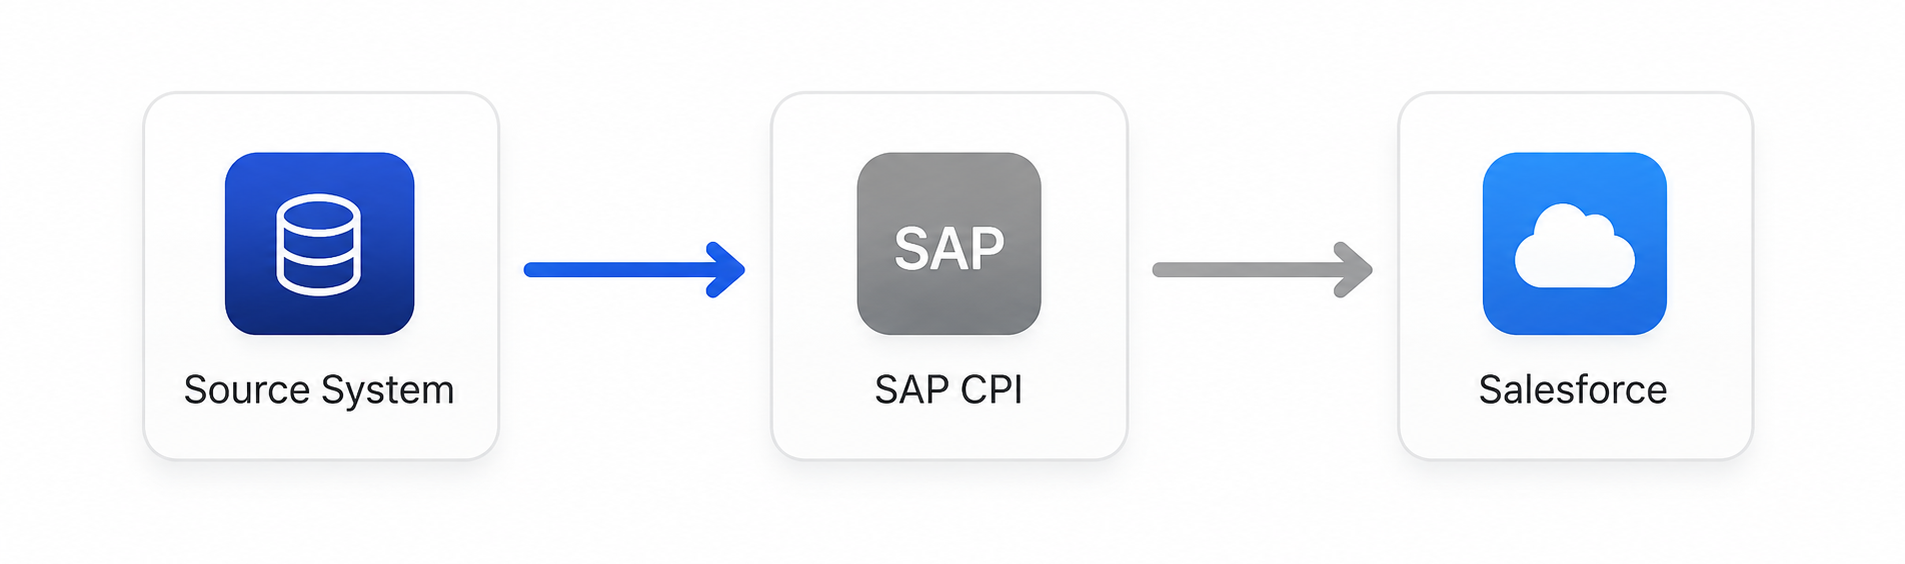 Figure 1: End-to-end message flow using the
 integrateBatch API.
Unlike a synchronous integration, the batch is queued for processing and must be processed from the SKYVVA Batch Control Board.
1. Configure the SKYVVA Inbound Interface in Salesforce
Create a SKYVVA Inbound Interface under Integration in Salesforce.
For this example, create the interface:Account_CPI_integrateBatch
Configure the interface as follows:
| Setting | Value |
|---|---|
| Interface Name | Account_CPI_integrateBatch |
| Integration | Your SAP CPI Integration App record |
| Source Name | Account |
| Target Name | Account |
| Interface Direction | Inbound |
| Interface Type | Main-Interface |
| Processing Mode | Asynchronous |
| Operation Type | Upsert |
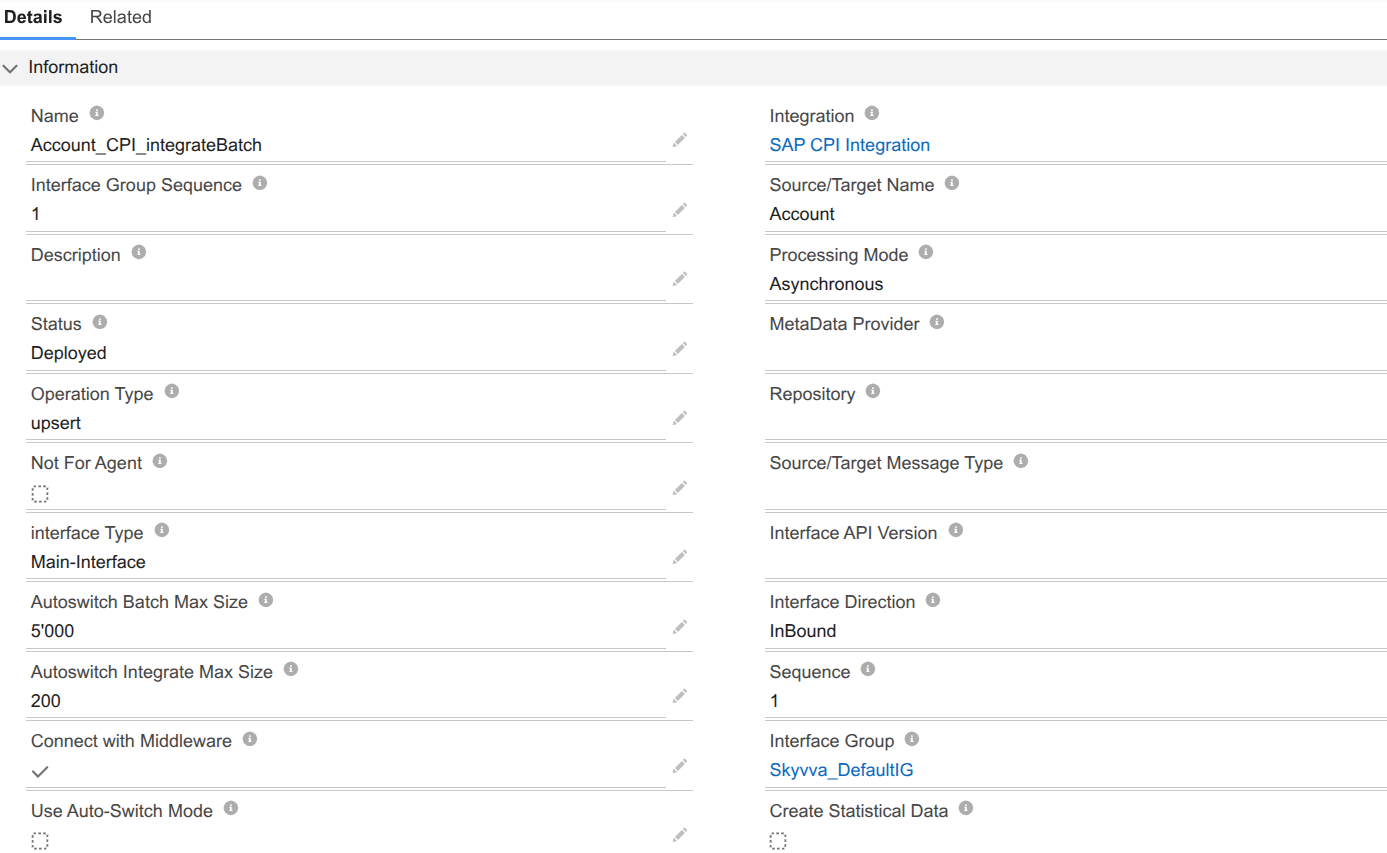 Figure 2: SKYVVA Inbound Interface
 AccountCPIintegrateBatch configured with Inbound direction, Asynchronous processing, and the Upsert operation.
1.1 Configure the Inbound Setup
In the Inbound Setup section, configure the settings required to process the incoming data.
For this example:
- Enable External Mapping.
- Configure the required Salesforce External ID fields.
 Figure 3: Interface’s Inbound Setup section — External Mapping checked, Salesforce External ID set to the four composite-key fields.
External Mapping allows the incoming field names to be mapped to the corresponding Salesforce fields without defining a separate mapping.
The configured Salesforce External ID fields are used to identify the Salesforce records during the upsert operation.
1.2 Enable Batch Mode
In the Basket Setting section, enable:Batch Mode

Figure 4: SKYVVA Inbound Interface Basket Setting section with Batch Mode enabled
Important: Batch Mode must be enabled for the interface to process incoming records according to the batch processing behavior described in this guide.
After completing the configuration, click Save.
2. Create the SAP CPI Integration Flow
In SAP CPI, create an integration package under Design, and then create an integration flow.
Example:
| Item | Example |
|---|---|
| Integration Package | Skyvva Salesforce Adapter Testing |
| Integration Flow | Account Interface to Salesforce_integrateBatch |
For this example, the flow contains:
- HTTPS Sender Adapter
- SKYVVA Salesforce Receiver Adapter
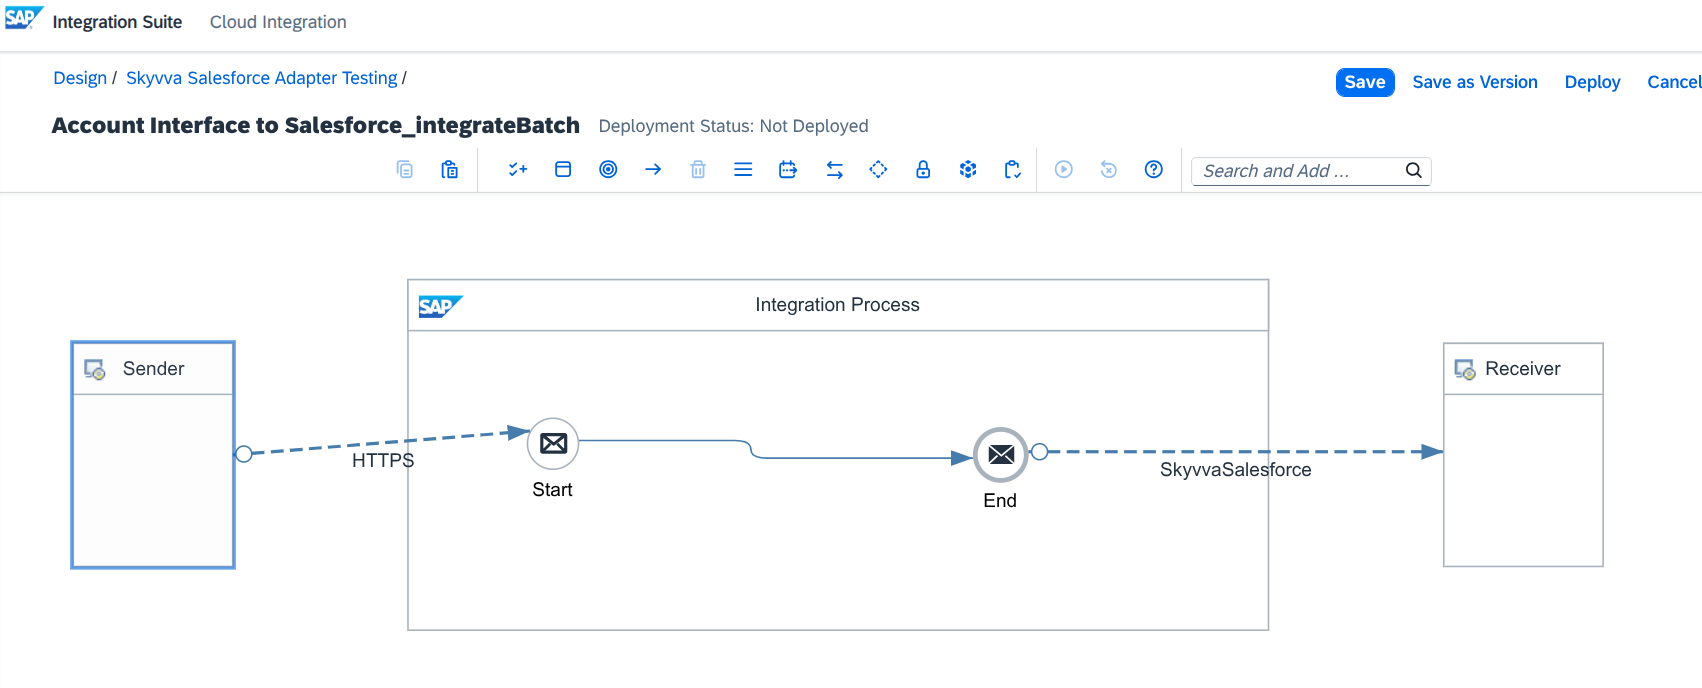
Figure 5: Integration flow showing HTTPS Sender → Start → End → SKYVVA Salesforce Receiver
3. Configure the HTTPS Sender Channel
Select the standard SAP HTTPS sender adapter and configure the required channel parameters.
General
Configure the required settings in the General tab.
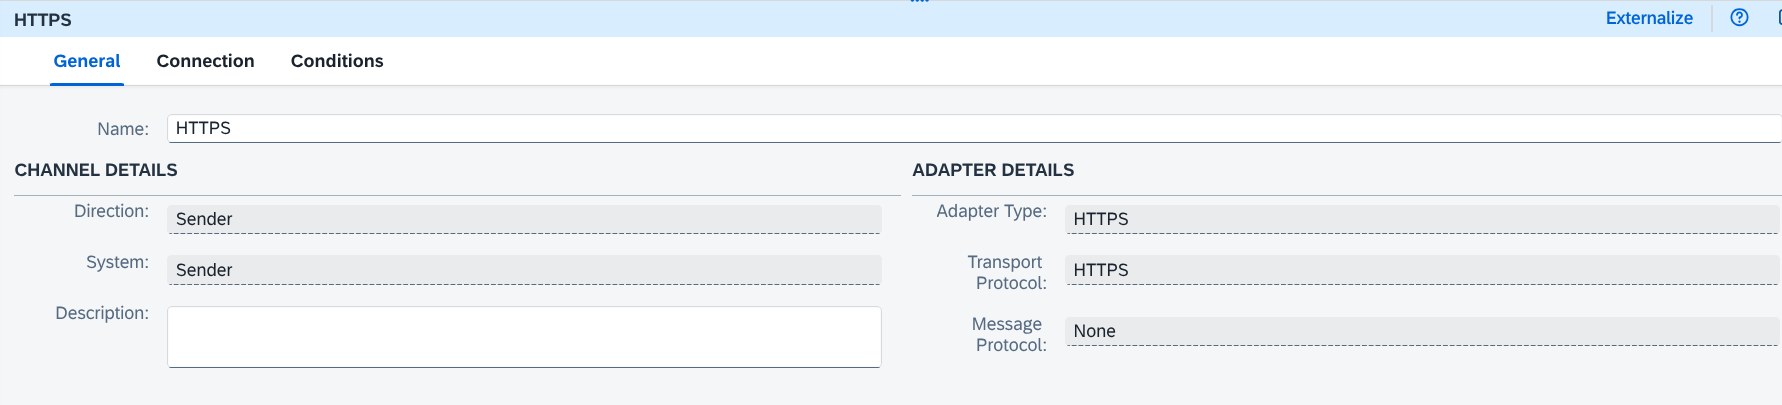
Figure 6: HTTPS sender channel — General tab.
Connection
Configure the required settings in the Connection tab.
The User Role must already exist and be assigned to the CPI user used by Postman.
For this example:ESBMessaging.send
Important: If the authenticated CPI user does not have the configured role, the HTTPS sender may reject the request with a 403 Forbidden response.
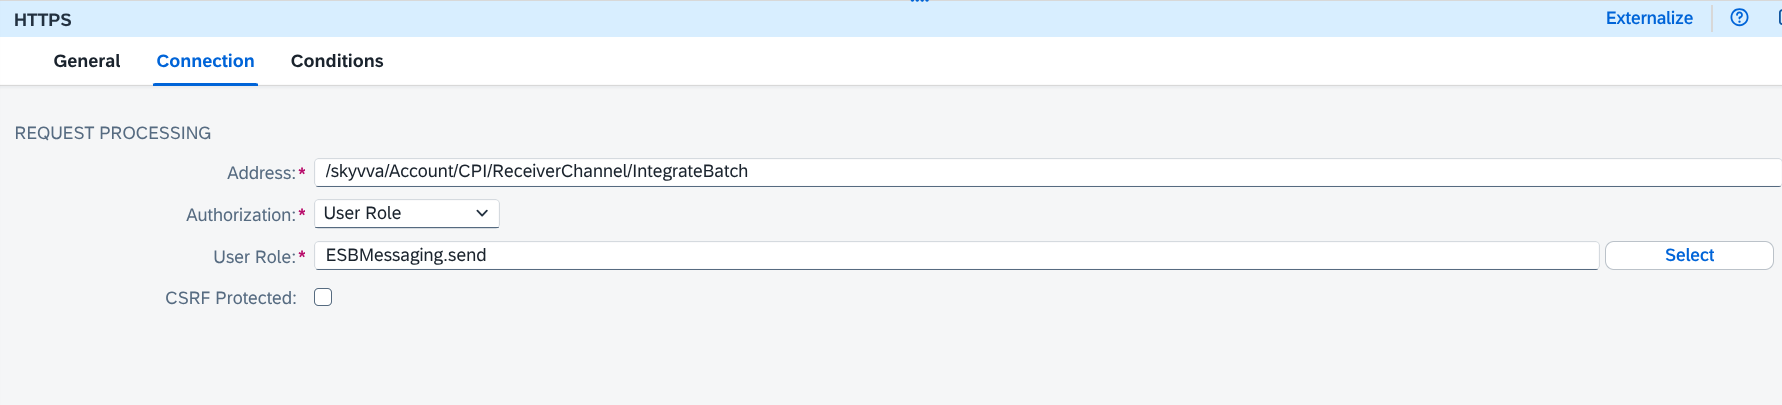
Figure 7: HTTPS sender channel — Connection tab.
The "User Role" value (ESBMessaging.send in this example) must already exist and be assigned to whichever user/credential POSTMAN authenticates as — create or confirm this role in your CPI tenant's user management before testing, or the HTTPS sender will reject the request with a 403.
4. Configure the SKYVVA Salesforce Receiver Channel
Select:SkyvvaSalesforce as the receiver adapter.
For this example, use:Skyvva Salesforce Adapter 1.2.3
The receiver channel contains the following tabs:
- General
- Connection
- Skyvva
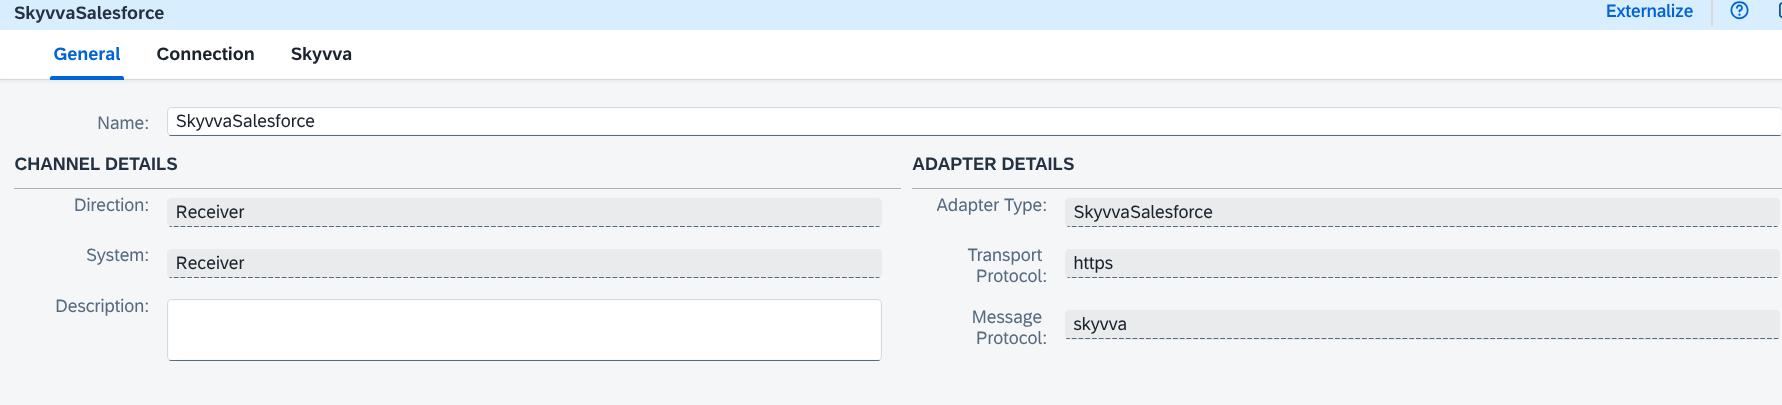 Figure 8: SkyvvaSalesforce receiver channel — General tab.
4.1 Configure the Connection
For this example, set:
| Parameter | Value |
|---|---|
| Authentication Type | OAuth2 |
| OAuth2 Flow | Client Credential |
| Login URL | https://yourdomain.my.salesforce.com |
| Client Credential | OAuth2 Client Credentials artifact deployed in the CPI keystore |
For the full Connection tab field reference — both OAuth2 flows, and why Client Credential is required regardless of which flow you pick — see SkyvvaSalesforce Receiver Adapter in SAP Cloud Platform Integration §3.
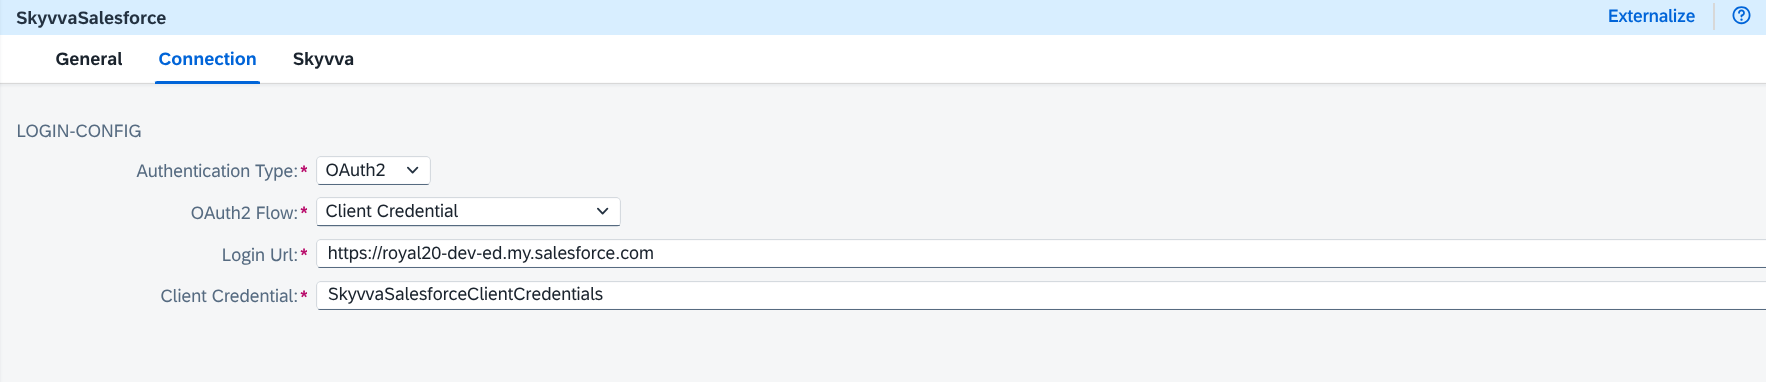
Figure 9: SkyvvaSalesforce receiver channel — Connection tab (OAuth2, Client Credential flow).
5. Configure the SKYVVA API
Open the Skyvva tab and set:
| Parameter | Value |
|---|---|
| Skyvva API Version | V2 |
| Skyvva API | integrateBatch |
| Apex Method | POST |
| Logging Option | Default |
| Enable Retry for Fatal Connectivity Errors | Unchecked (leave disabled for this test; consider enabling for production) |
| HTTP Client Timeout | 60 seconds (increase for batches that need more processing time) |
For what each of these fields does and how Skyvva API Version gates the rest of the tab, see SkyvvaSalesforce Receiver Adapter in SAP Cloud Platform Integration §5–§8.
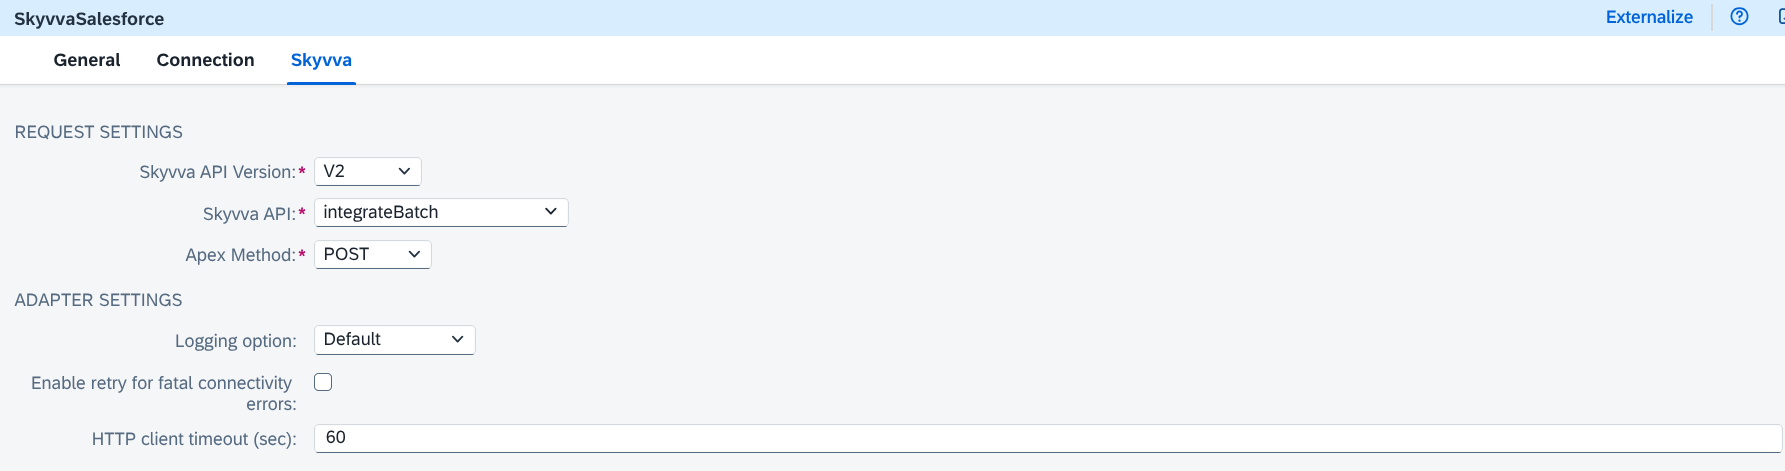
Figure 10: SkyvvaSalesforce receiver channel — Skyvva tab, Skyvva API set to integrateBatch.
After completing the configuration, save and deploy the integration flow.
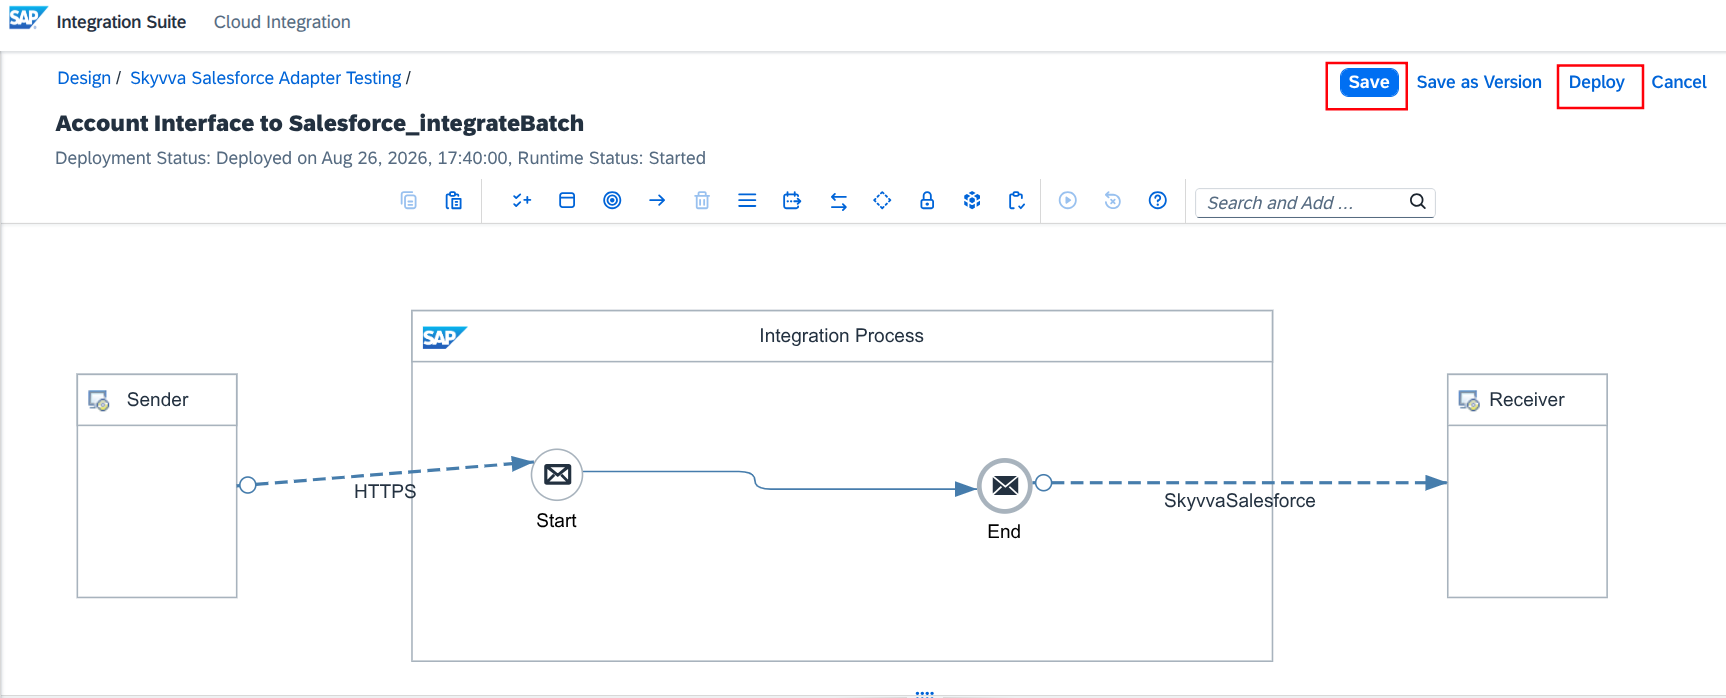
Figure 11: Integration flow deployed and saved.
6. Get the SAP CPI Endpoint URL
After deploying the integration flow, navigate to:CPI → Monitoring → Manage Integration Content
Locate the deployed integration flow and copy its endpoint URL.
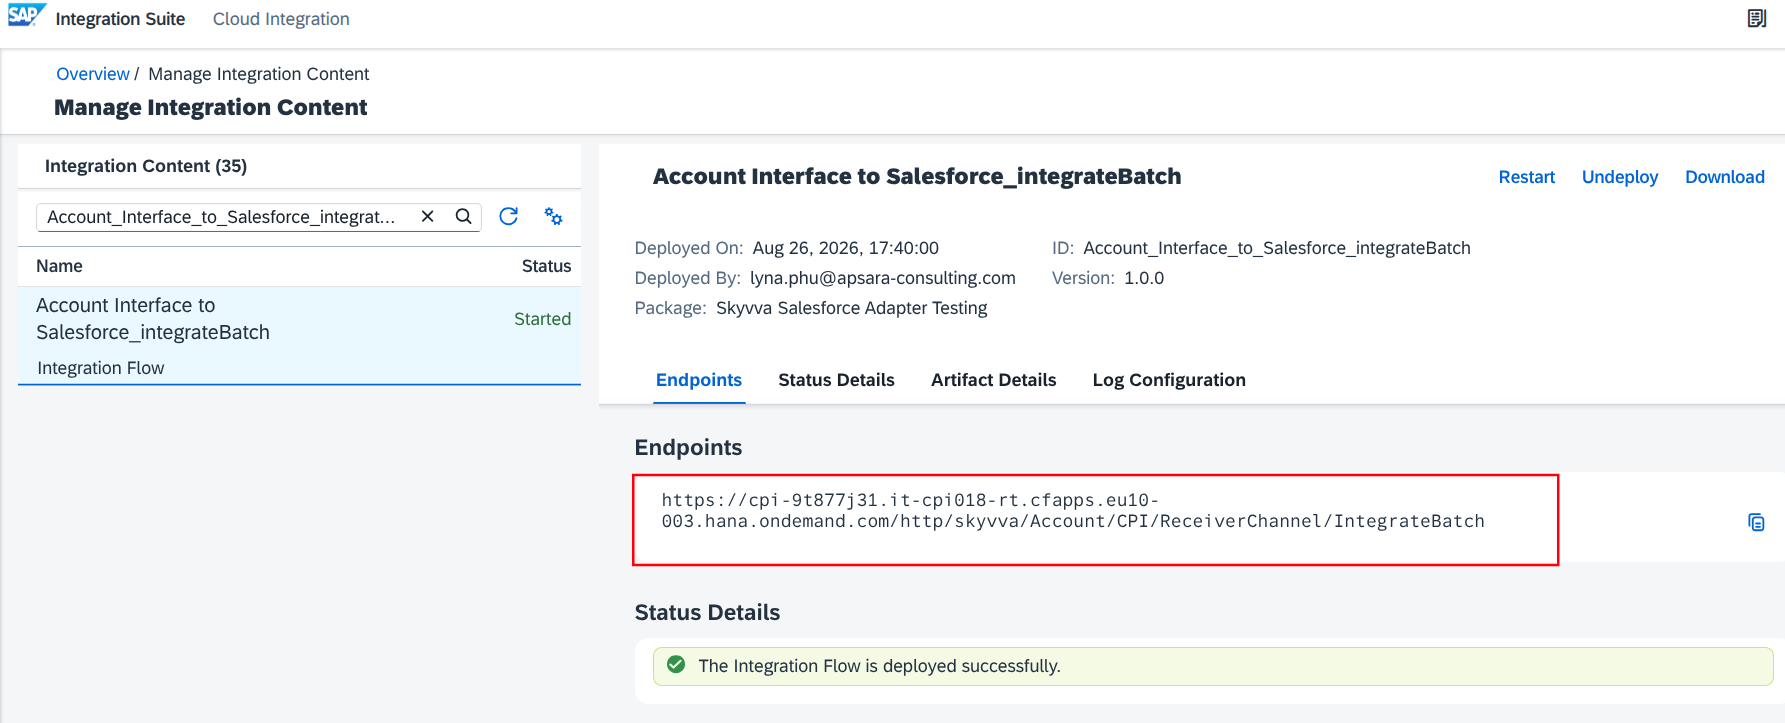
Figure 12: Manage Integration Content — Endpoints panel showing the deployed iFlow’s CPI endpoint URL.
The endpoint typically follows this format:
https://{{TenantId}}.{{RuntimeCluster}}.cfapps.{{Region}}.hana.ondemand.com/http/skyvva/Account/CPI/ReceiverChannel/IntegrateBatch
Example:
https://cpi-9t877j31.it-cpi018-rt.cfapps.eu10-003.hana.ondemand.com/http/skyvva/Account/CPI/ReceiverChannel/IntegrateBatch
Important: Always copy the exact endpoint URL displayed by your SAP CPI tenant instead of constructing the URL manually.
7. Test the Integration with Postman
After deploying the integration flow, create a new request in Postman.
Configure the request as follows:
| Setting | Value |
|---|---|
| Method | POST |
| URL | Your deployed SAP CPI endpoint URL |
| Authorization | Basic Auth |
| CPI User | User with the ESBMessaging.send role |
| Content-Type | application/json |
https://cpi-9t877j31.it-cpi018-rt.cfapps.eu10-003.hana.ondemand.com/http/skyvva/Account/CPI/ReceiverChannel/IntegrateBatch
7.1 Request Body
Select Body → raw → JSON and use the following payload:
{
  "integrationid": "SAP CPI Integration",
  "interfacename": "Account_CPI_integrateBatch",
  "messages": [
    {
      "Name": "Test Account IntegrateBatch",
      "Phone": "+49 30 1234567",
      "Industry": "Manufacturing",
      "BillingCity": "Berlin",
      "BillingCountry": "Germany",
      "ERP_DEBTOR_ID__c": "DEBTOR-0001",
      "SAP_Sales_Org__c": "1000",
      "skyvva_external_id__c": "DEBTOR-0001-1000",
      "isAlreadySync__c": "true"
    }
  ]
}
Adjust the field names and values according to your Salesforce organization.
If the interface uses multiple Salesforce External ID fields as a composite key, include all required fields in every record.
7.2 Send the Request
Click Send in Postman.
A successful request should return a successful response from the SAP CPI endpoint containing the batch information.
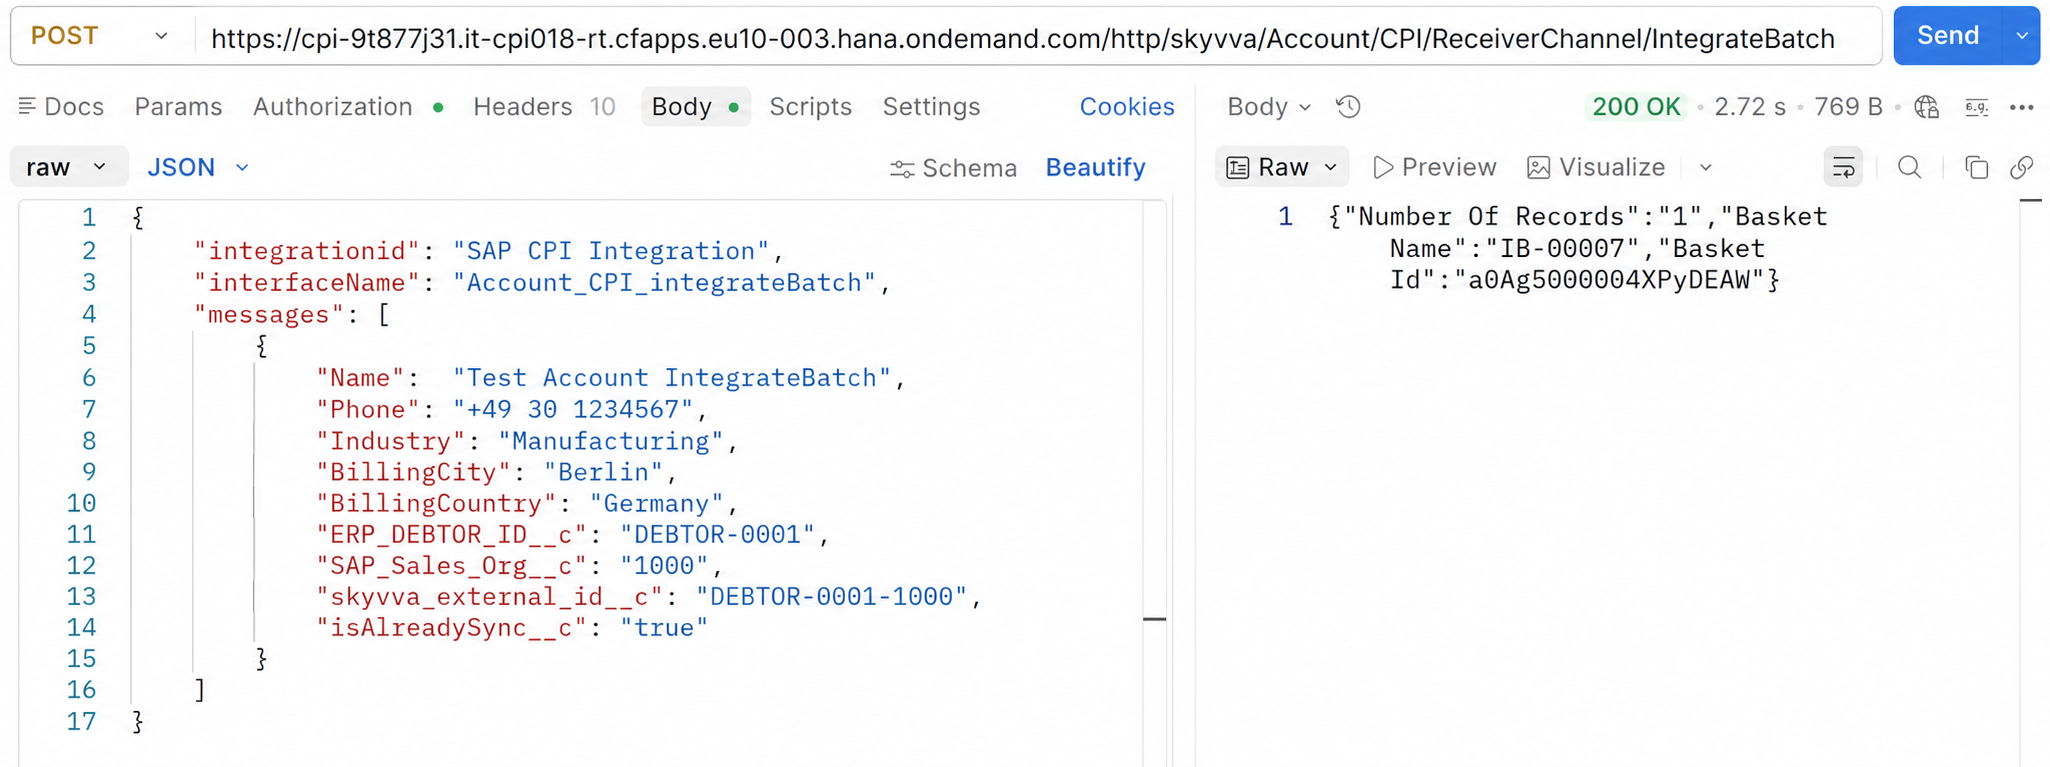
Figure 13: POSTMAN request and response — POST to the CPI endpoint, 200 OK, response body containing the batch basket details.
8. Monitor the Message in SAP CPI
Navigate to:Monitor→ Monitor Message Processing
Verify that the message was processed successfully.
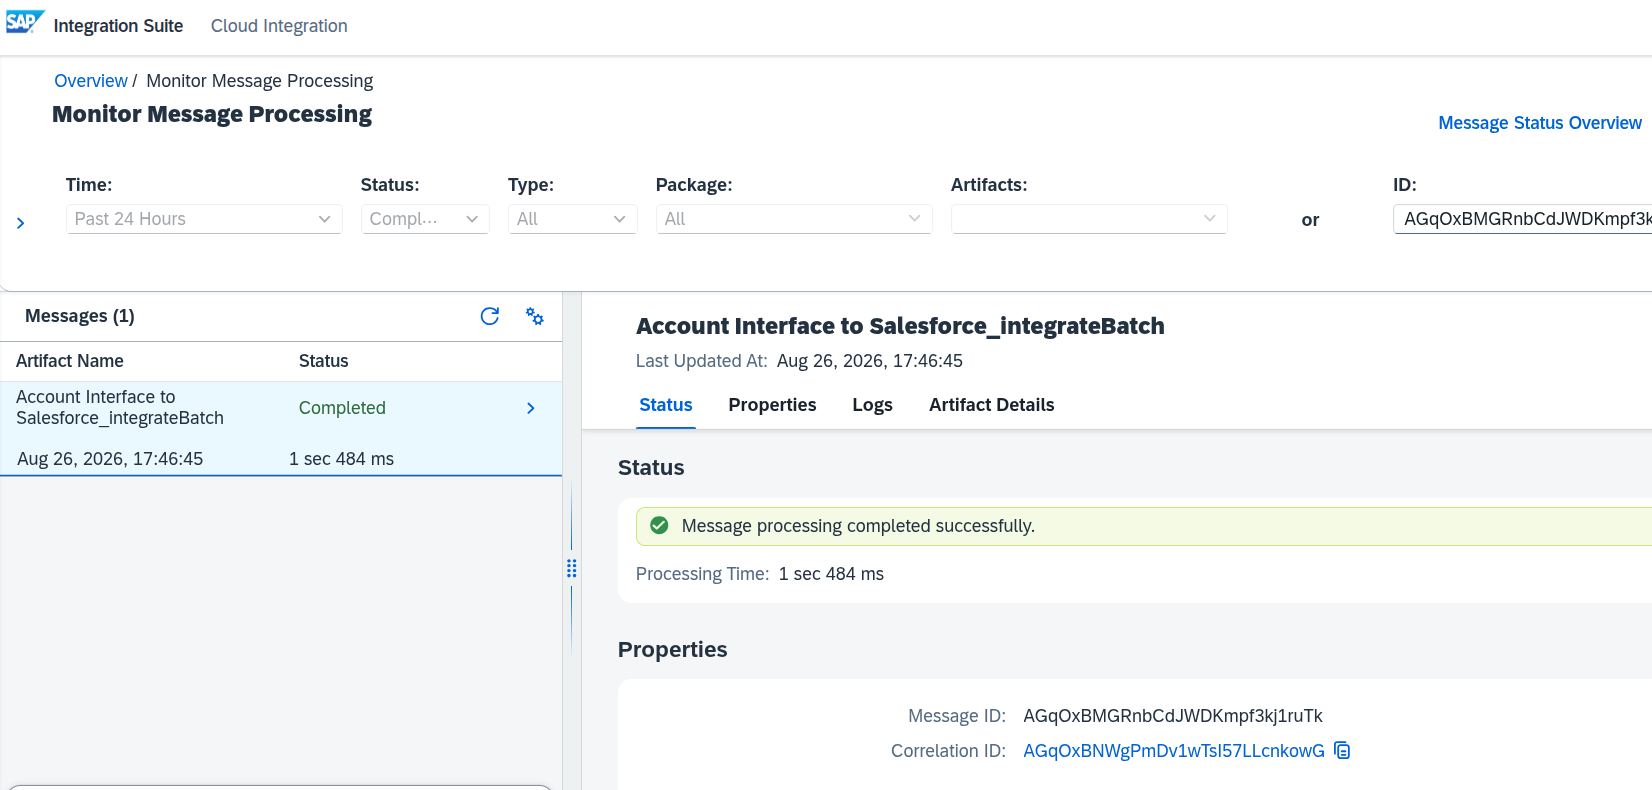
Figure 14: CPI Monitor Message Processing — message completed successfully.
9. Process the Batch in Salesforce
After the message reaches Salesforce, the data is placed into a batch for processing.
Navigate to:Batch Control Board → Working Basket
Locate the batch created for:Account_CPI_integrateBatch
The batch may initially have the status:Init
Select the batch and click Reprocess.
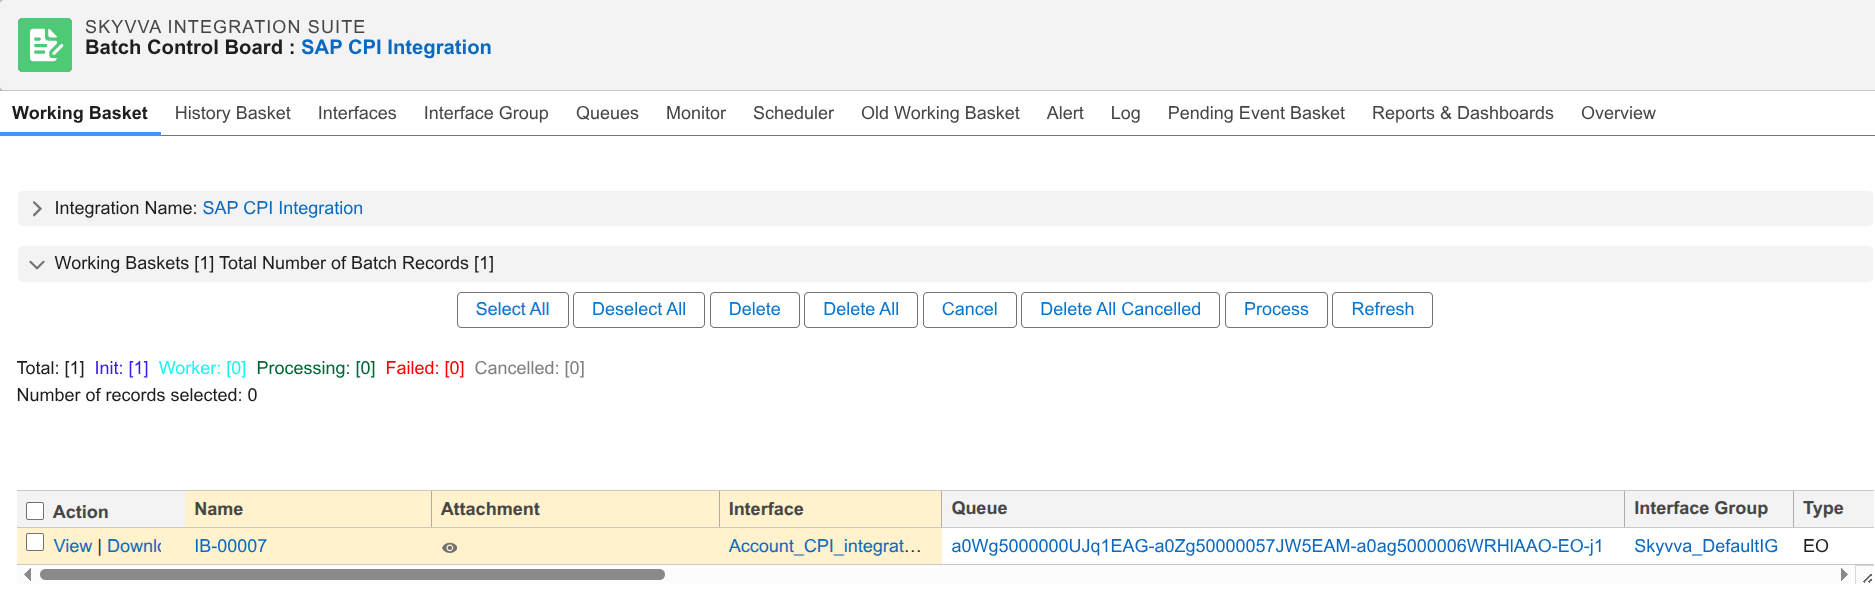
Figure 15: Batch Control Board — Working Basket showing the queued batch for AccountCPIintegrateBatch.
After processing is complete, verify that the Account record was created or updated successfully.
Summary
The complete batch integration flow is:
Postman
   ↓
HTTPS Sender
   ↓
SAP CPI Integration Flow
   ↓
SKYVVA Salesforce Adapter
   ↓
SKYVVA Inbound Interface
   ↓
Working Basket
   ↓
Process Batch
   ↓
Salesforce Account
The key configuration is:
| Component | Configuration |
|---|---|
| SKYVVA Interface | Inbound |
| Processing Mode | Asynchronous |
| Operation Type | Upsert |
| Batch Mode | Enabled |
| SKYVVA API Version | V2 |
| SKYVVA API | integrateBatch |
| Apex Method | POST |