6. Adding custom logic to the inbound message processing
Actually, SKYVVA integrates API can get data and create from JSON or XML payload messages. As of now we can create flat and tree messages as with integrate3. However, if the data is a raw text and not formatted in JSON or XML, we cannot parse and create messages. Since we cannot create messages in our message table we need a new object to store the raw payload data. In this case, we pass the raw data to the customer class and the custom class will handle everything itself as it will create and post the messages. We use this feature to pass raw payload data which is an unstructured data to the custom class. Those unstructured data are for example binary data, windows in the file, etc.
How to pass raw data to Custom Class
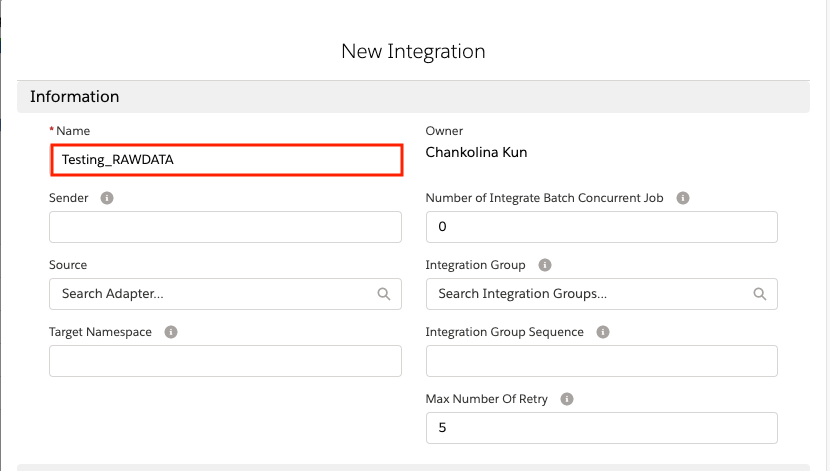
To be able to pass raw data to custom class you need to follow the steps below: Step 1: Create Integration
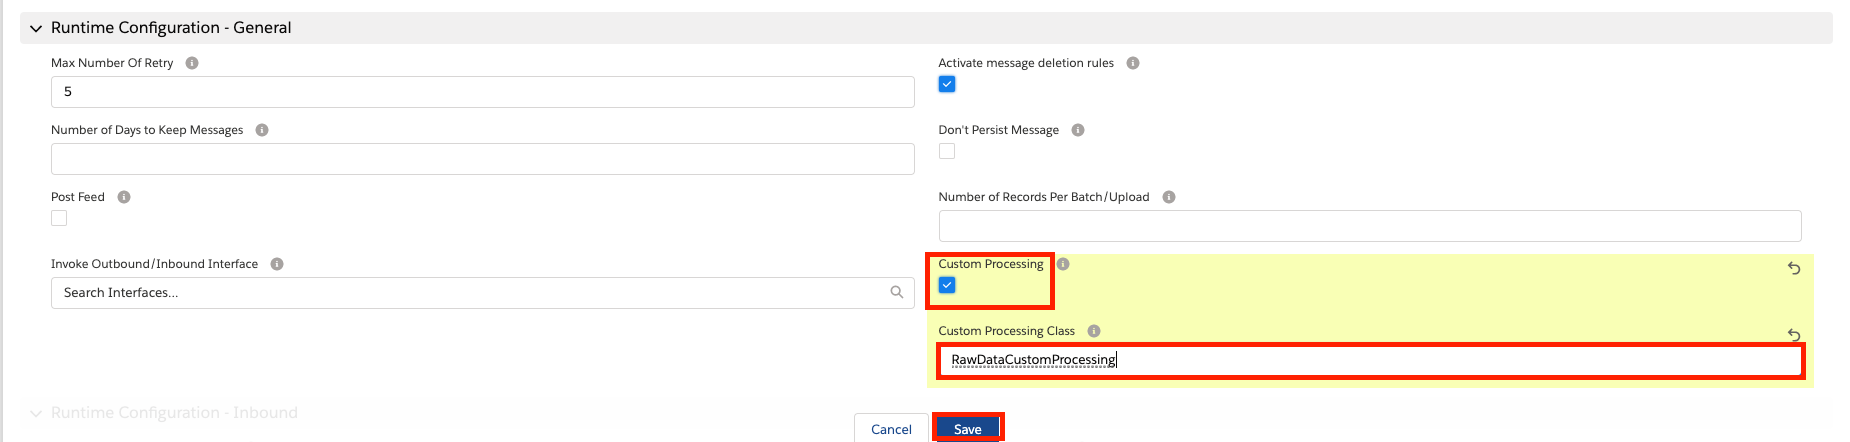
Step 2: Create Interface
In the Runtime Configuration General Section of Interface page, we need to select two things which are shown in the picture given below:
- You need to tick Custom Processing
- Enter Custom Processing class
Step 3: Create a custom class:
- The custom code is given below to pass raw data to custom class:
**public with sharing class RawDataCustomProcessing extends AbstractIntegrationV3 { public override String messageProcessing(){ System.debug('>>>>>>RawDataCustomProcessing>messageProcessing>dtoRequestBody: '+dtoRequestBody); //do raw data in dtoRequestBody return 'ok'; } public override IServicesUtil.IMessageResult createMessage(AbstractIntegrationV3.DtoRequestBody dtoRequestBody, AbstractIntegrationV3.DtoStructure dtoStr){ return null; } }**
- We can use dtoRequestBody to do the complex logic that payload defined dtoRequestBody structure is as below:
**global class DtoRequestBody{ global String mode{get;set;}//Synchronous,Asynchronous global String integration{get;set;}//integration name or integration id global String iinterface{get;set;}//interface name or interface id global String transferId{get;set;} global String runtimeParameter{get;set;}//runtime interface field value to overwrite real interface in memory global String payloadFormat{get;set;}//xml/json global String payload{get;set;}//data to be integrated }** Step 4: Call Webservice:
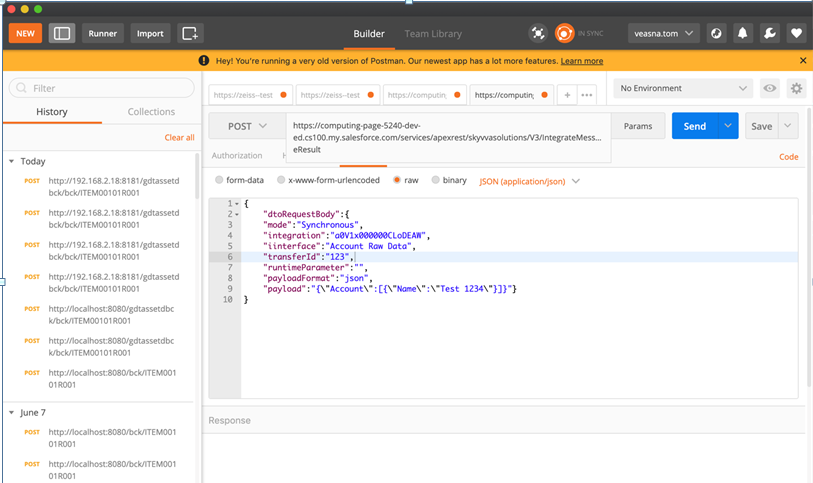
- After call Webservice, it will pass raw data to messageProcessing method.
- After that, the user can use this raw data to do with the complex logic that they want.