1. How to enhance the response of the inbound synchronous interface to have a custom-defined message type?
Learning Objectives:- This unit describes:-
- The response of the inbound synchronous interface to have a custom-defined message type.
- Difference between custom defined message type and standard message type
Introduction:-
In this unit, we will learn how to get the response of the inbound synchronous interface to have a custom-defined message type. Here we will also come to know the difference between the standard message type and custom-defined message type. The picture given below shows the process of Standard message type response and of Custom defined message type response.

Standard Message Type:-
The API is integrate synchronous, we need to define the inbound interface of type synchronous we can use soap UI for soap or rest call and then we can apply DML operations like upsert, insert, update and delete and then we will get the response which will be the standard response like salesforce Id, Message-Id.
Custom Defined Message Type:-
The API is integrate synchronous here as well. We can push much more data with the help of a custom-defined message type. We will create two interfaces Inbound interface and outbound interface. The inbound interface role is to request data and the Outbound interface role is to response data. We will define message type on the outbound interface detail page and then do mapping on the outbound interface. Add response interface-Id i.e, outbound interface Id in the Inbound interface which is request interface. We support the Rest API variant. [su_box title="Note" box_color="#2a8af0" title_color="#000000"]We Support only Rest API variant for custom defined message type.[/su_box]
How to use it?
Follow the steps given below:- Step 1:- Pre-requisite:-
- Create Integration.
- Create Inbound and Outbound Interface.
- Create Metadata Provider.
- Create Repository.
- Create Message Type as hierarchical(Account and Contact).
Step 2:- Configuration of Inbound interface:-
- Select the processing mode Synchronous. (As shown in the picture given below)
- Enter Outbound Interface Id in Response Interface Id section. (As shown in the picture given below)

- We can do mapping or we can check an option of External mapping in the process. Here we will see the way by doing the mapping.
- Do Mapping (As shown in the picture given below)
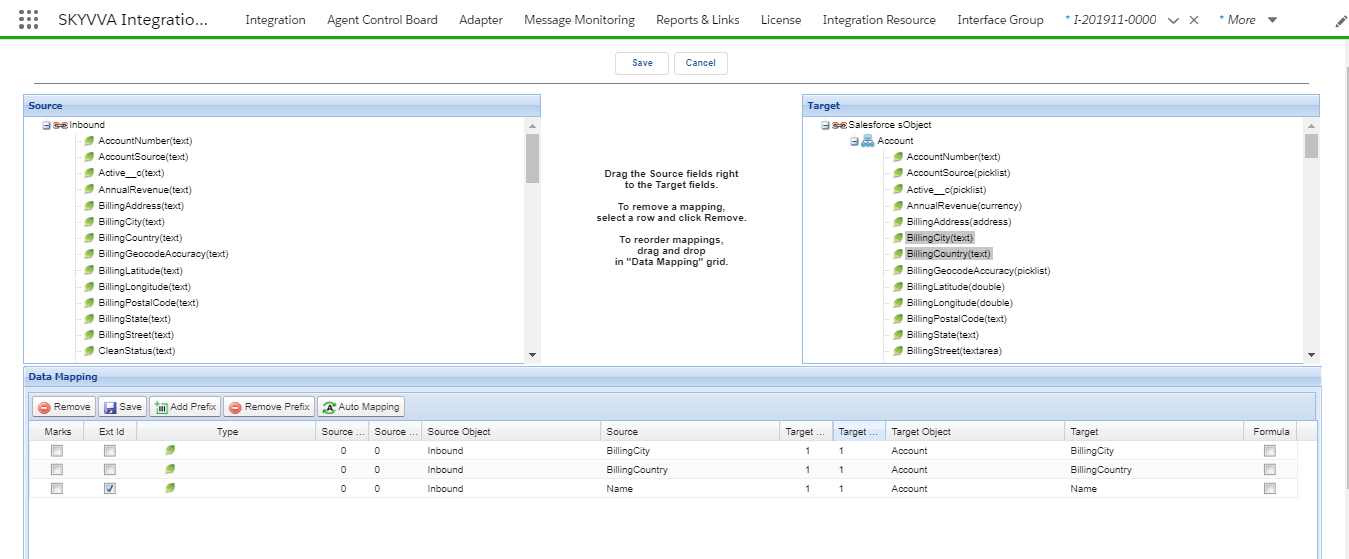
[su_box title="Note" box_color="#2a8af0" title_color="#000000"]We have two ways either we can do mapping or else we can check an option of External mapping. Here in the picture given below, we can see where to select external mapping and Salesforce External ID

[/su_box] Step 3:- Configuration of an Outbound interface:-
- Select Processing mode "Synchronous". (As shown in the picture given below)

- Select Metadata Provider, Repository, Message Type. (As shown in the picture given below)

- Do Mapping. (As shown in the picture given below)

Step 4:-
- Go to the Soap UI application.
- Click on REST Project => enter Endpoint URL Instance => OK.
- Select method = POST
- Enter API integrate synchronous (/services/apexrest/skyvvasolutions/IntegrateSynchronous) into Resource field. (As shown in the picture given below)

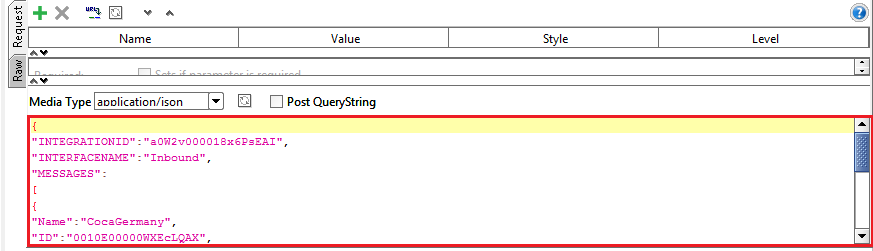
- Define data in the Request page to call data to salesforce.
- The sample data is given below.
[aux_code language="javascript" theme="tomorrow" title="" extra_classes=""]{ "INTEGRATIONID":"a0W2v000018x6PsEAI", "INTERFACENAME":"Inbound", "MESSAGES": [ { "Name":"CocaGermany", "ID":"0010E00000WXEcLQAX", "BillingCountry":"Germany", "BillingCity":"Hamburg" }, { "Name":"CocaCambodia", "ID":"0010E00000WXDyQQAX", "BillingCountry":"Cambodia", "BillingCity":"PP" } ] } [/aux_code]
- Create Header = authorization
- Create Value = Bearer with SessionID

- Click Submit Request button:-

Here is the result of the outbound response JSON data payload. (As shown in the picture given below)

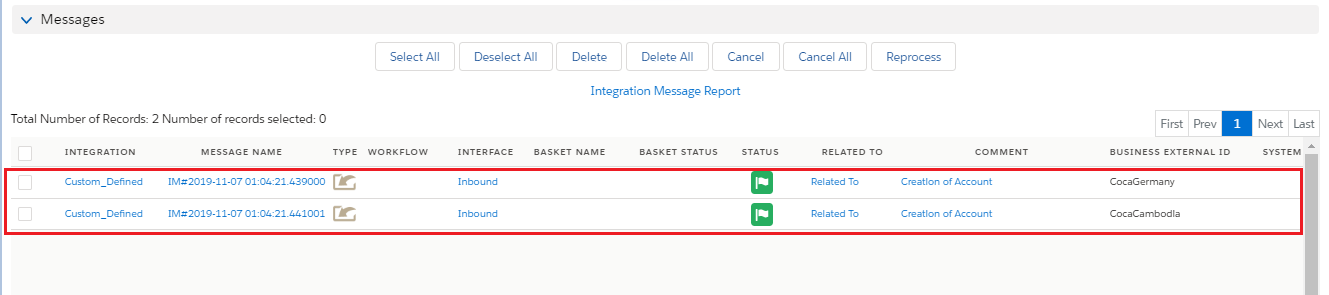
Check Result in Message Monitoring:-