How to Import CSV with Header using Agent File Adapter in the protocol: SFTP?
Introduction:
This tutorial explains how to import CSV with header files using the Agent File in the SFTP protocol of the inbound Adapter of our new agent application. The Agent File Adapter provides a streamlined process for seamlessly integrating CSV data into our platform. This functionality is available using the None Interface API Version.
Pre-require:
- Agent File Type of Connection Destination. If you do not know how to create Agent File type of Connection Destination, please follow this document below:
OAuth2 Username-Password Authentication: #article/1-how-to-connect-a-new-agent-to-the-agent-control-board-using-oauth2-username-password-authentication
- OAuth2 Client-Credential Authentication: (link not available))
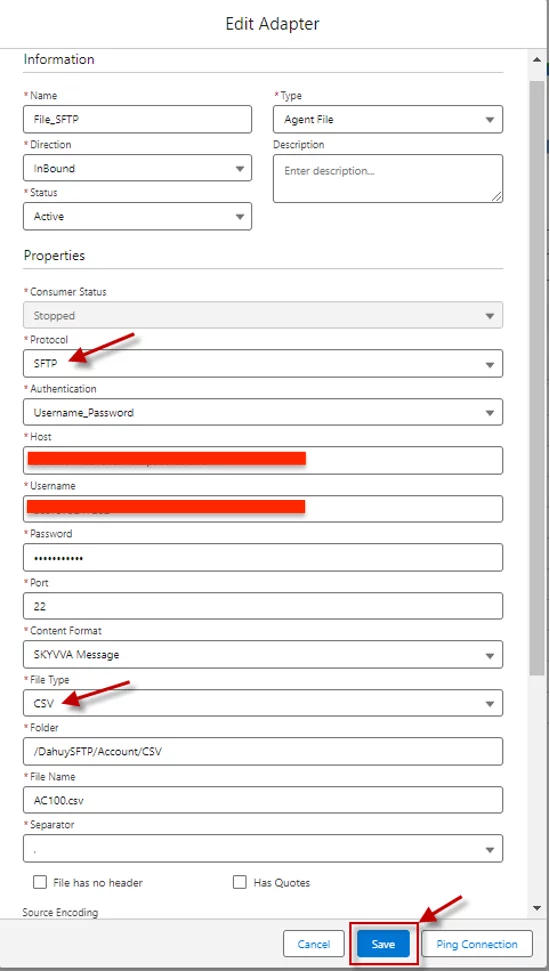
- Create an Inbound Agent File Adapter for CSV format with a header
Fill in all required field
Enter Name: Any Name
- Select Type: Agent File
- Select Status: Active (in version 2.51.2 up) Inactive (2.51.1 down)
- Select Direction: Inbound
- Select Protocol: SFTP
- Host: Public IP Address
- Select Authentication: Username_Password
- Enter Host: SFTP Host
- Enter Username: SFTP Username
- Enter Password: SFTP Password
- Select Port: SFTP Server Port
- Select Content Format: SKYVVA Message
- Select File Type: CSV
- Enter Folder: (Your SFTP Folder Name) ex: /DahuySFTP/Account/CSV
- Enter File Name: (Your File Name)
- What to do with the file after Processing?: Delete File
- Connection Destination: Your destination name
- Select Separator: “,”
- Select Source encoding: UTF-8
- Select What to do with the file after Processing?: Delete File
- Select the Connection Destination: Choose the destination name that you created earlier.
- Create Inbound Interface
Give Interface Name
- Status: Deployed
- Operation Type: Upsert. Note you can use any operation based on your purpose
- Interface API Version: None
- Interface Direction: Inbound

- Link the interface with the recently created one above

- Create or Import to create IStructure into Interface
Here is the format for the CSV data file
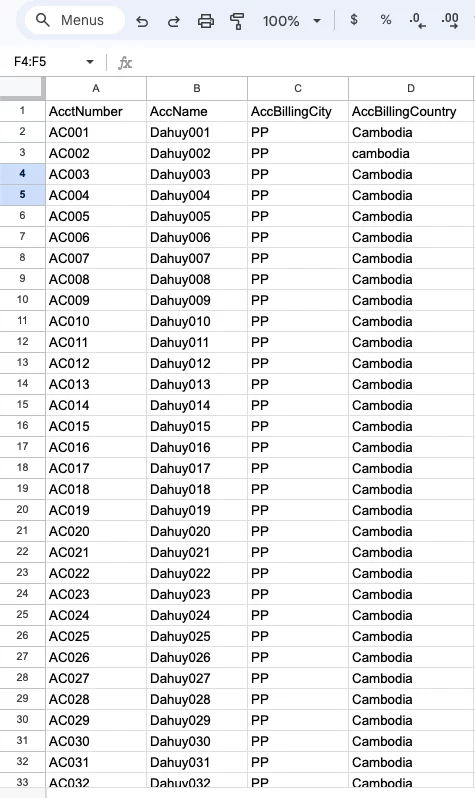
- To create an IStructure, import this CSV file
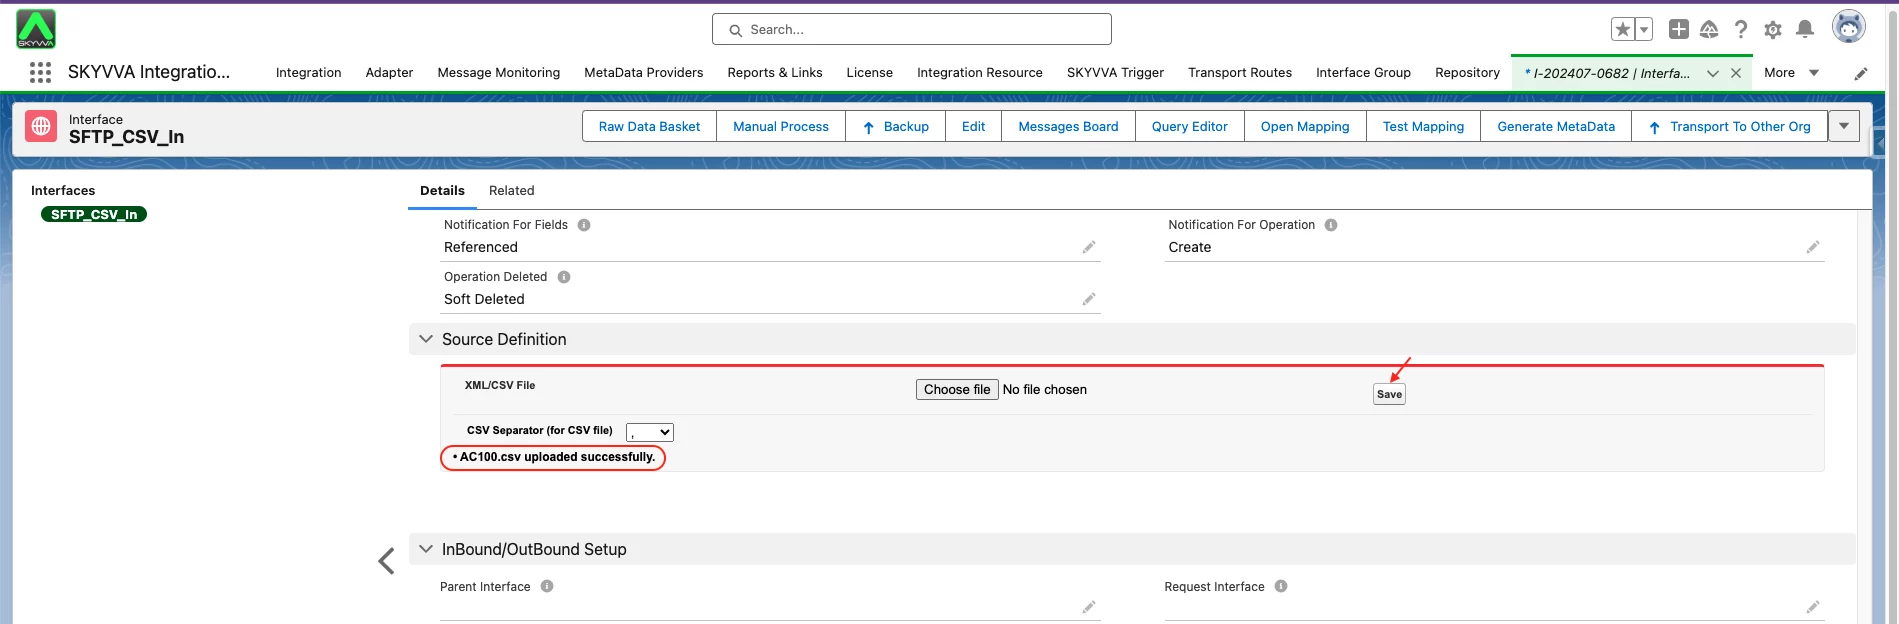
Go to the Interface Details Page
- Scroll down to the Source Definition section
- Click the Choose File button
- Select the file to upload
- Click Open Button

- Click Save Button
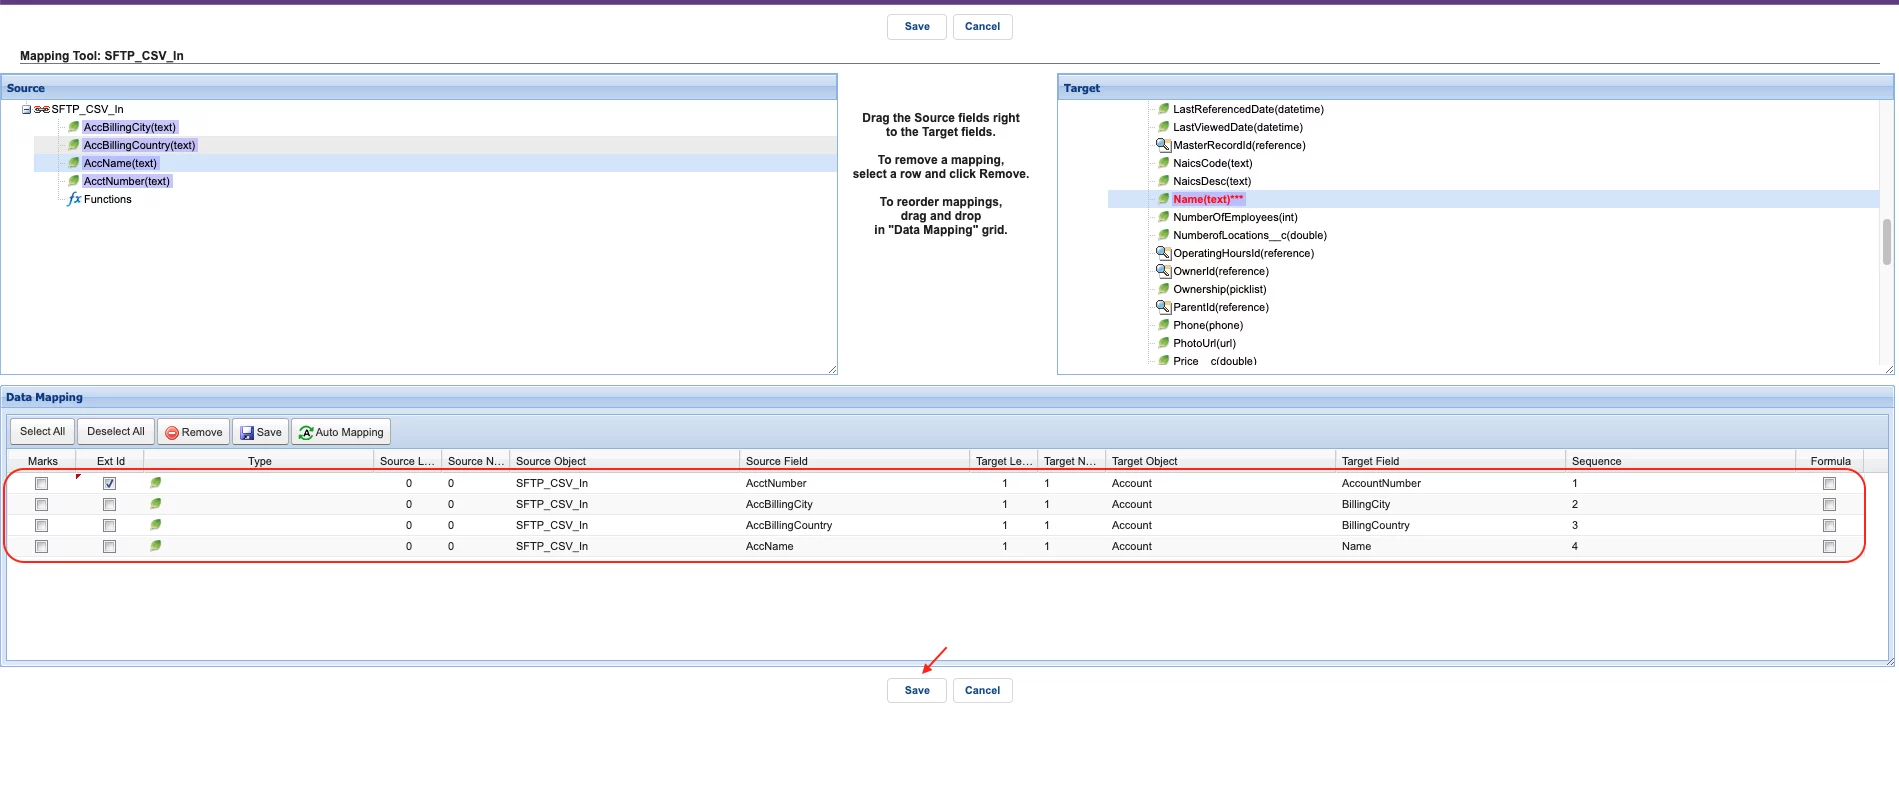
- Do Mapping
The file is located at the following path on the SFTP server:

- Manual Processing on the Agent Control Board:
Note: Before performing the Manual Process, ensure your cache is synchronized into the Postgres Database.
- Navigate to the Interface Tab on the Agent Control Board
- Select the Interface you want to process
- Click the Manual Process Button
- Select the "Read files from local or FTP/FTPs and push to salesforce" option
- Click Push Button

- After clicking the Push button, you will see an alert on the screen, as shown in the screenshot below. This alert indicates that you should check the message on the message monitor.

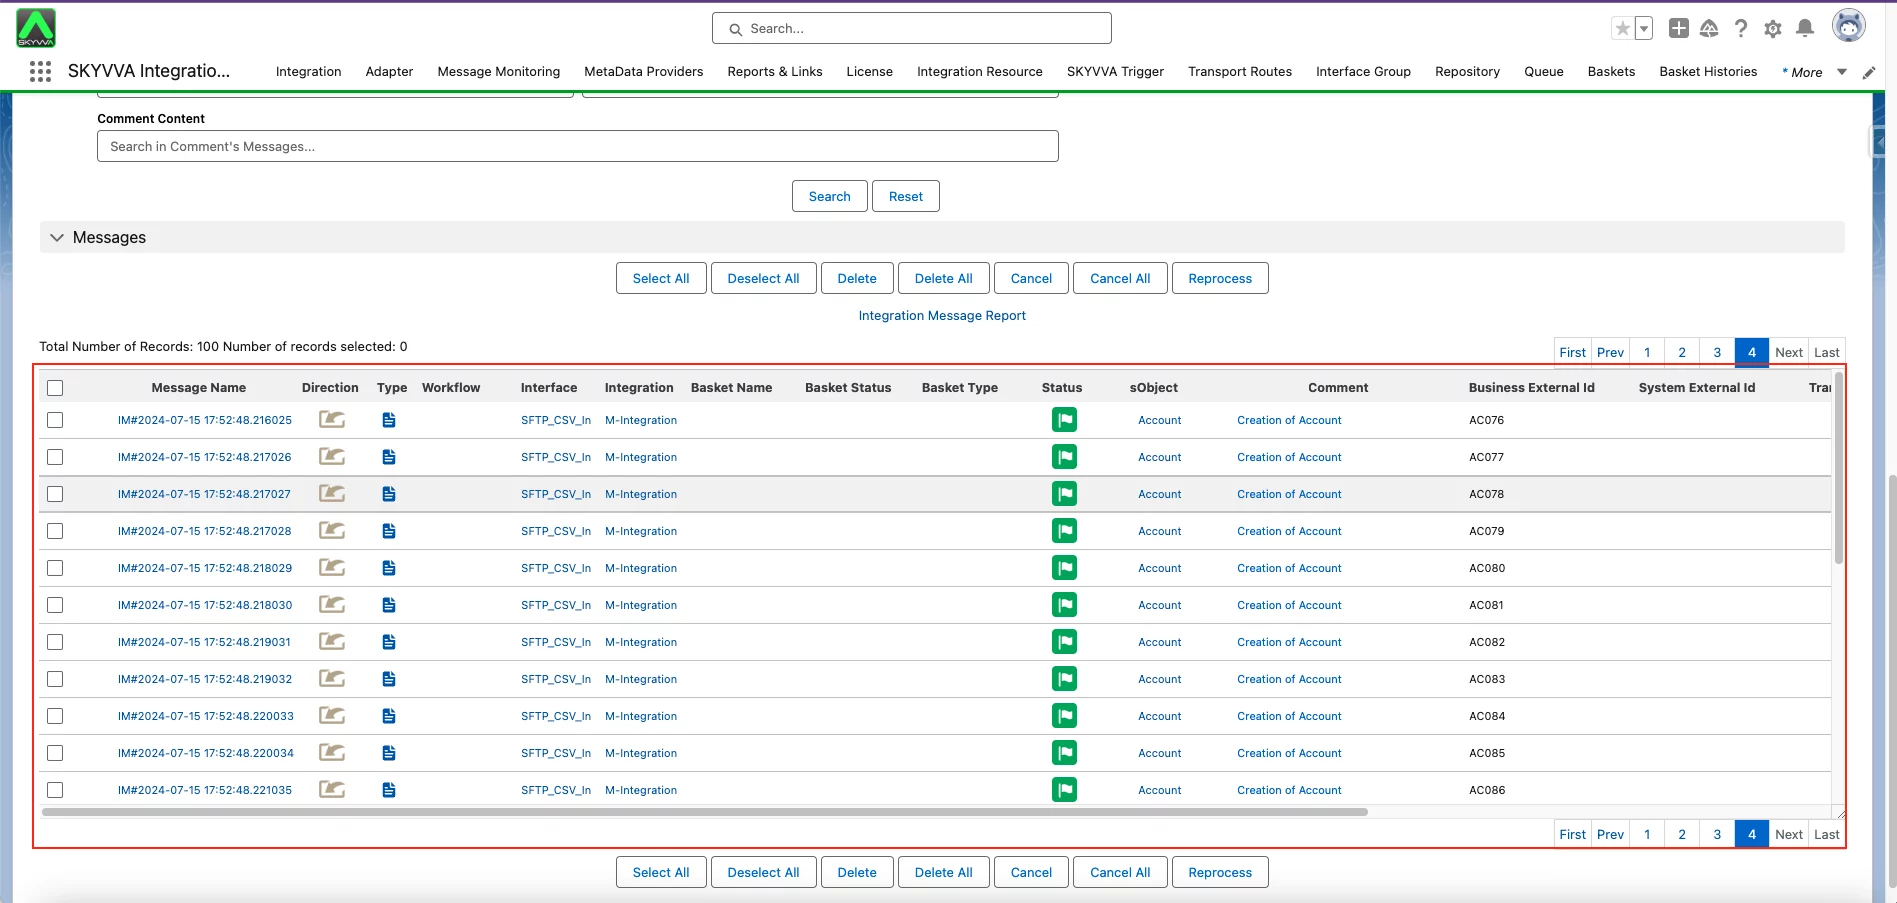
As a result, you now have the completed message, and all accounts have been created. The CSV file will be deleted on the SFTP server causing selecting "Delete File" on the " What to do with the file after Processing?" option
Summarize
This document covers the process of importing a CSV file using the Agent File Adapter and the SFTP (Secure File Transfer Protocol). After completing the steps outlined, you will be able to successfully import a CSV file that contains a header row. The Agent File Adapter provides the functionality to connect to an SFTP server and bring in the CSV data into Salesforce. This is done using the None Interface API Version.