How to Upgrade the SKYVVA Agent on a Linux Server?
1. Overview
This guide explains how to upgrade an existing SKYVVA Integration Agent on a Linux server. The upgrade uses a new Linux installation package while preserving the existing database connection, Agent configuration, and service settings.
The installer verifies the existing PostgreSQL connection, stops the current Agent service, updates the application files, database migrations, configuration properties, and systemd service, and then starts and verifies the upgraded Agent.
1.1 Upgrade Process Diagram
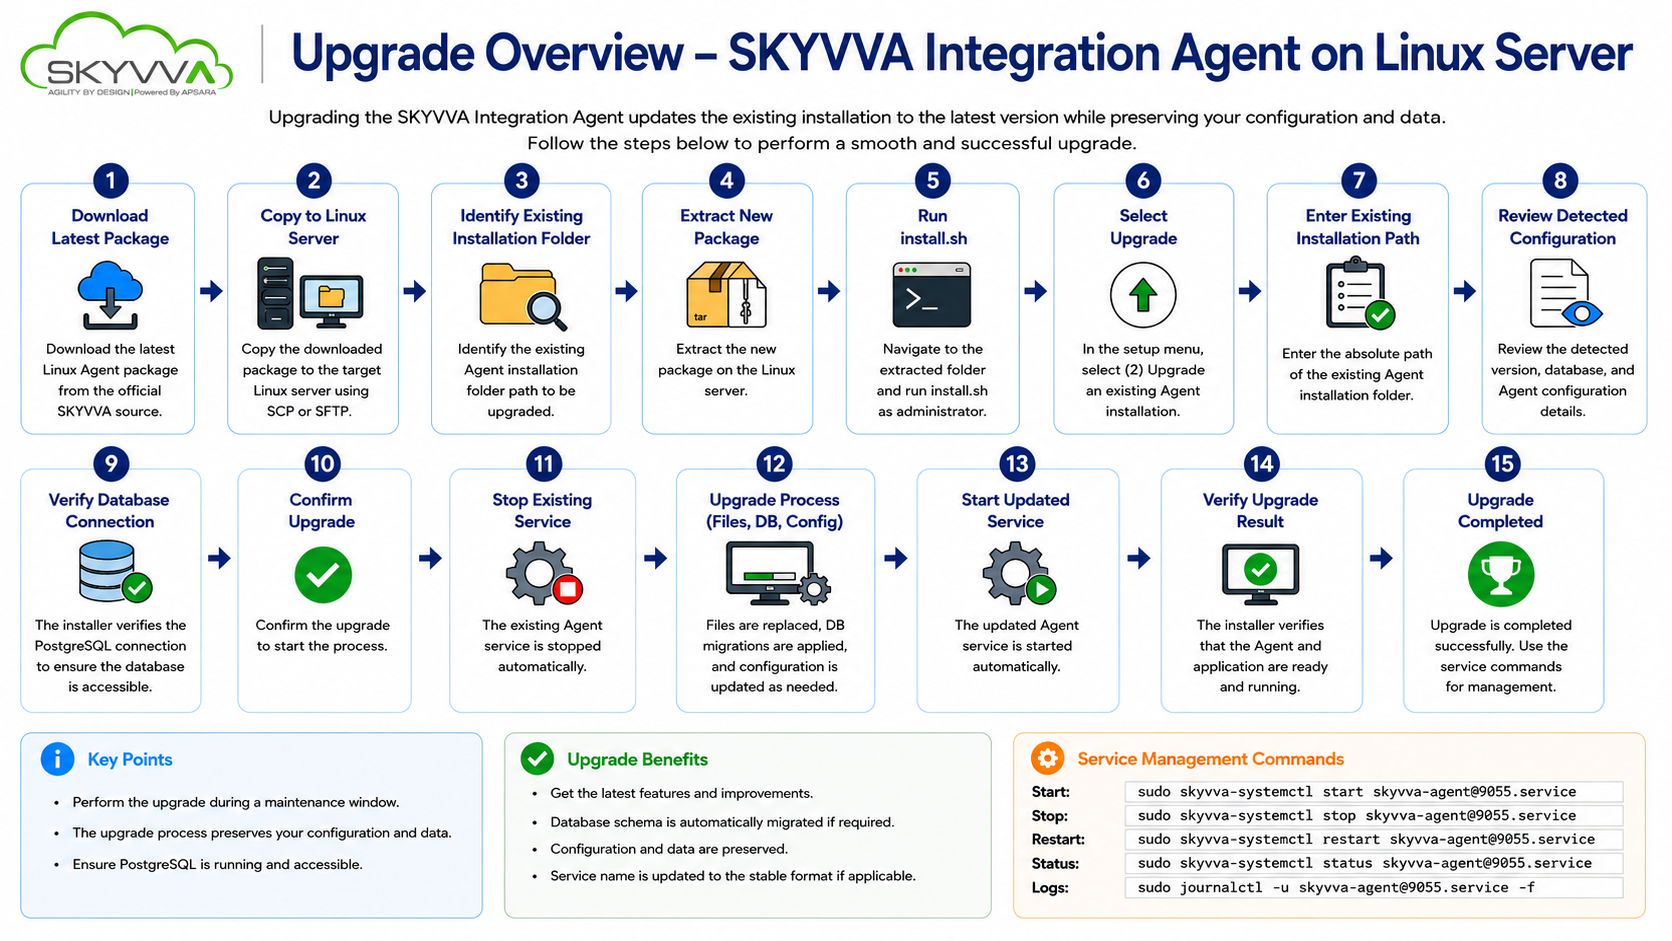
Figure 1: SKYVVA Agent upgrade process on a Linux server
Important: Before selecting Upgrade, make sure you know the current Agent installation folder.
If the installer cannot automatically detect the existing Agent installation during the upgrade, you must manually enter the full absolute installation path.
Example:/opt/skyvva-agent-9055
2. Upgrade Prerequisites
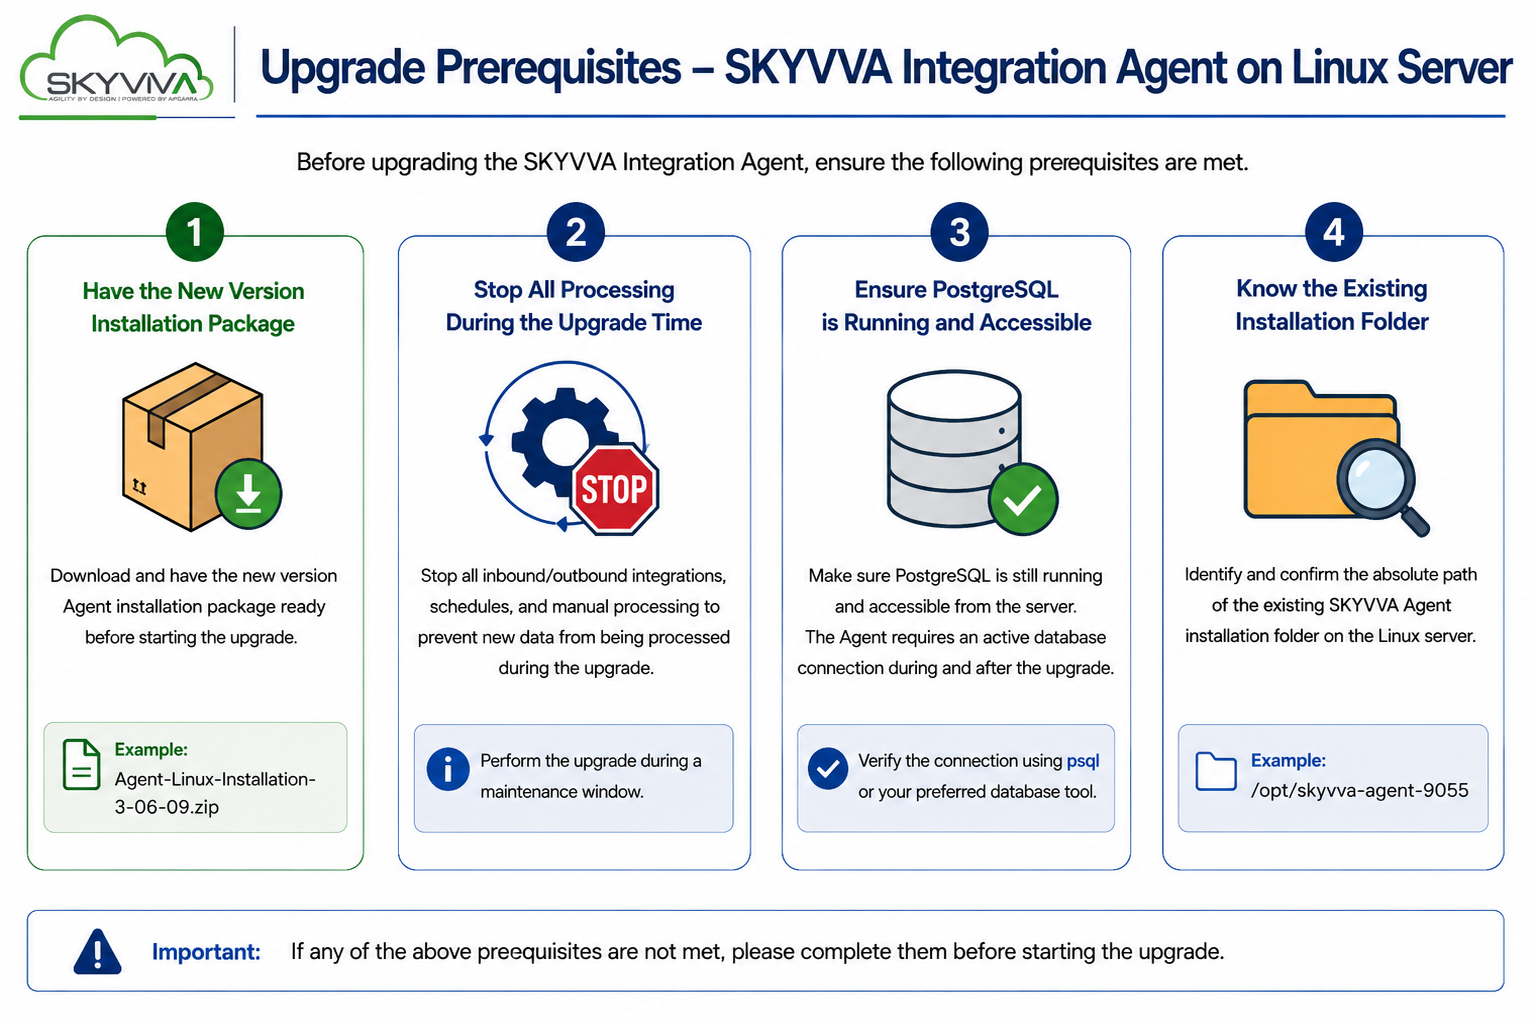
Before starting the upgrade, confirm all prerequisites below. These checks reduce interruption risk and ensure that the installer can access the existing Agent and database configuration.
1. Have the new-version Linux installation package ready. Example: Agent-Linux-Installation-3-06-09.zip.
2. Stop all processing during the upgrade window. Stop inbound and outbound integrations, schedules, and manual processing before the upgrade begins.
3. Ensure PostgreSQL is running and accessible. The installer must verify the existing database connection before it can continue.
4. Know the existing Agent installation folder. Prepare the full absolute path, for example: /opt/skyvva-agent-9055.
3. Download the Latest Linux Agent Package
You can download the SKYVVA Agent Linux installation package using the link below:
https://help.skyvva.com/#article/new-agent-3-06-09-patch-1-download-link
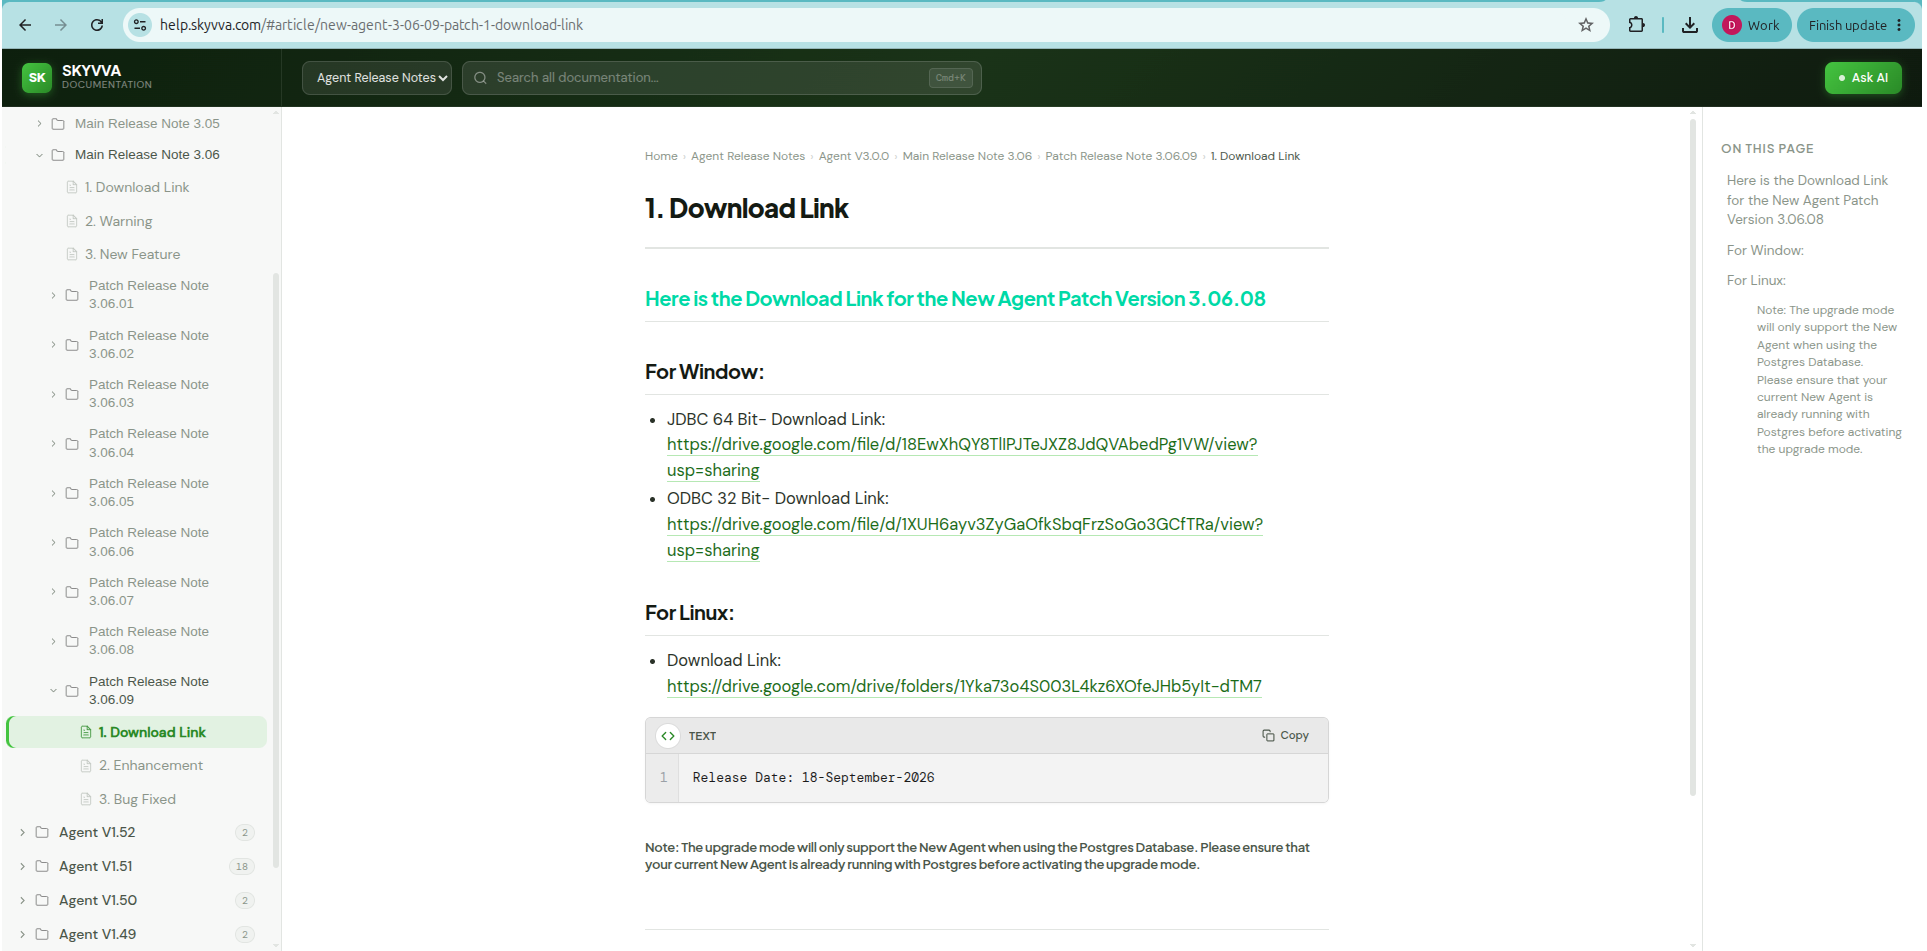
Click the Download Link in the For Linux section. You will be redirected to Google Drive, where you can download the SKYVVA Agent Linux installation package.
Agent-Linux-Installation-x-xx-xx.zip

Note: Always use the official SKYVVA download page or the download link provided by SKYVVA Support.
4. Copy the Upgrade Package to the Linux Server
Script Summary
# Example using SCP from your local machine
scp -i ~/.ssh/id_xxxxxxxx /folderpath/Agent-Linux-Installation-x-xx-xx.zip username@<linux-server-ip>:/tmp/

# Example using SFTP
sftp username@<linux-server-ip>
put Agent-Linux-Installation-x-xx-xx.zip /tmp/
exit
After downloading the SKYVVA Agent Linux installation package to your local computer, copy the ZIP file to the target Linux server.
Example local download folder on macOS:
/Users/deabdahuy-sk-backup-pc/Downloads
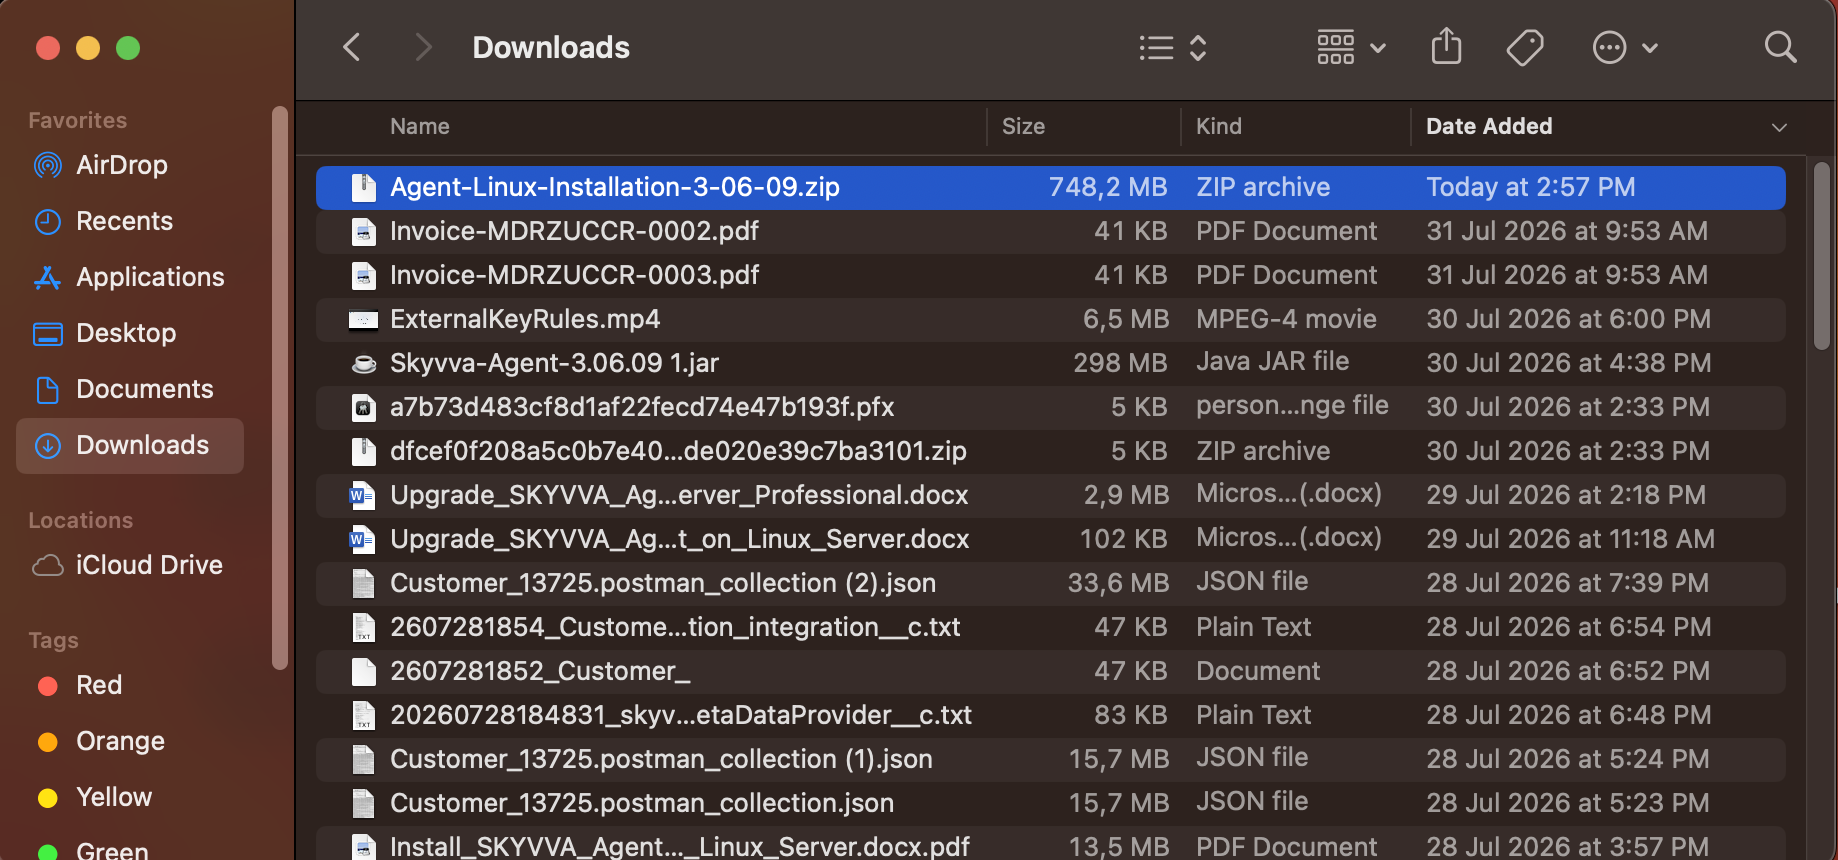
You can use SCP or SFTP to transfer the package securely. Before running the command, confirm the local file location, Linux server IP address, login username, SSH key path, and destination folder.
Example destination folder on the Linux server:
/home/ubuntu/Agent-Installer
scp -i ~/.ssh/id_ed25519 /Users/deabdahuy-sk-backup-pc/Downloads/Agent-Linux-Installation-3-06-09.zip ubuntu@32.236.220.72:/home/ubuntu/Agent-Installer Enter passphrase for key '/Users/deabdahuy-sk-backup-pc/.ssh/id_ed25519':

Wait until the file transfer is complete. Then connect to the Linux server and verify that the ZIP file exists in the destination folder before continuing.
ssh ubuntu@<linux-server-ip>
cd /home/ubuntu/Agent-Installer
ls

5. Identify the Existing Agent Installation Folder
Before selecting Upgrade, you must know the full path of the current SKYVVA Agent installation. The path must be an absolute Linux path beginning with /.
Example existing installation path: /opt/skyvva-agent-9055
By default, the SKYVVA Agent is installed under the /opt directory. To find possible existing Agent installation folders in the default location, run:
sudo find /opt -maxdepth 1 -type d -name 'skyvva-agent*' -print
This command displays folders under /opt whose names begin with skyvva-agent.

Important: Enter the path of the existing installed Agent, not the path of the new installer package.
6. Extract the New Agent Package
Go to the folder containing the uploaded package and extract it:
cd /home/ubuntu/Agent-Installer
ls

Unzip the file for the Agent-Linux-Installation-3-xx-xx.zip:
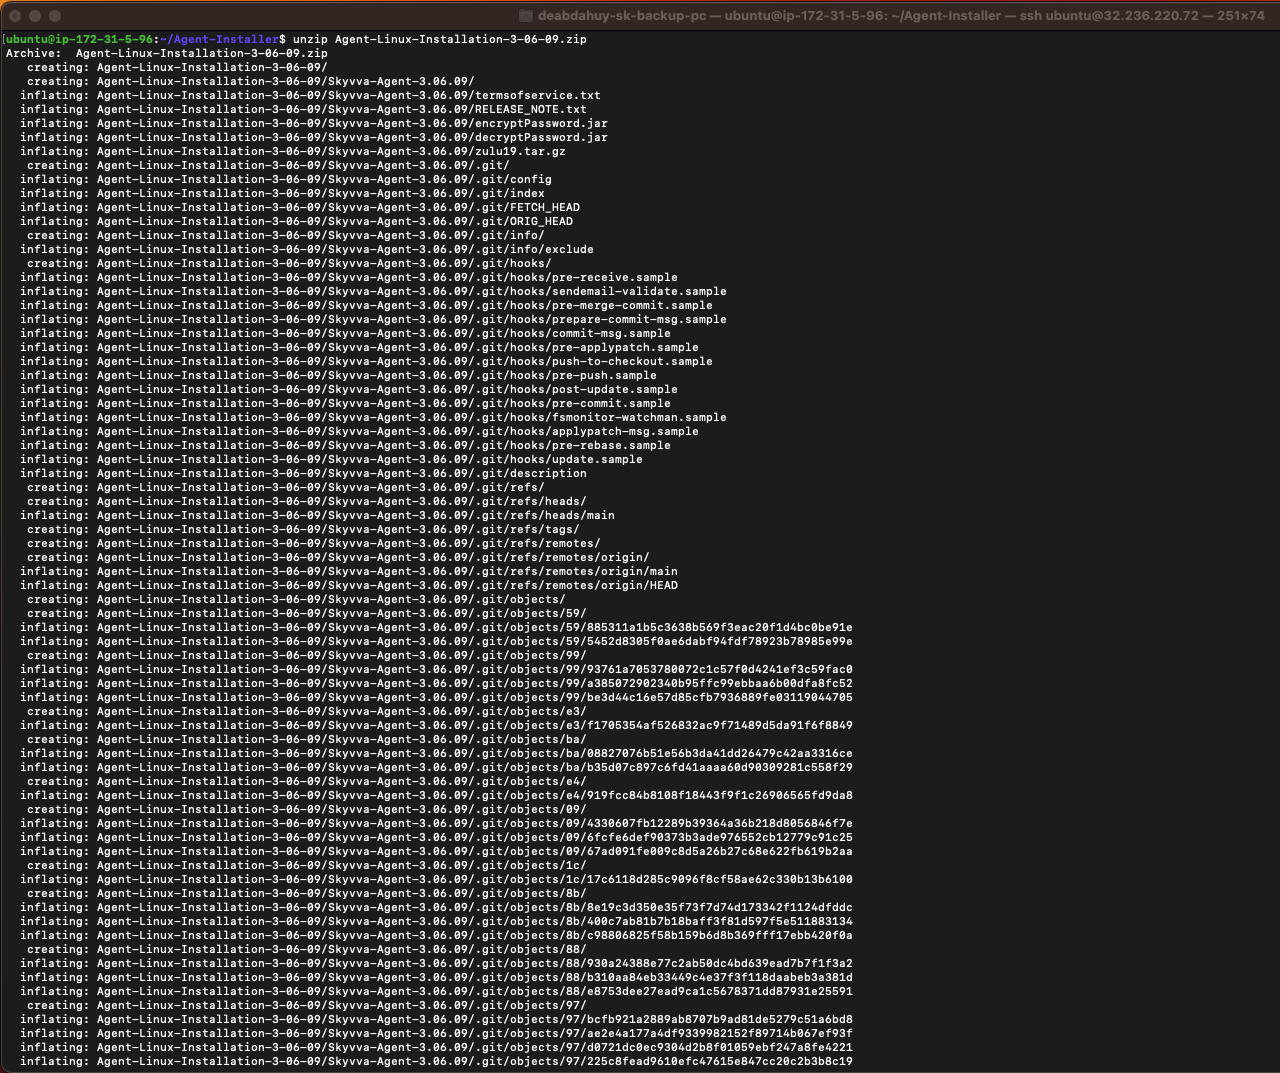
unzip Agent-Linux-Installation-3-06-09.zip