How to use Copy Node and Copy Field on the Mapping?
Introduction
In this tutorial, we will explore how to effectively use the Copy Node and Copy Field functionalities within Mapping in the SKYVVA integration app. These features allow for enhanced flexibility when working with data structures, making it easier to manage and manipulate data during integrations.
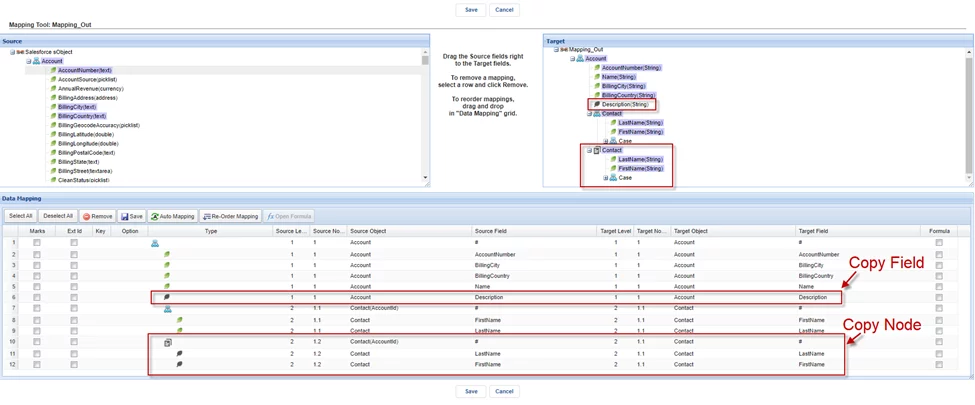
- The Copy Node function enables you to clone an existing node to a new node. This cloned node can be identical to the original, preserving all its attributes and structure. This is particularly useful when you need to generate a payload with a new node or field for a specific callout, without the need to create a new message type. By leveraging this feature, user can streamline their integration process and ensure efficiency when handling repetitive or complex data transformations.
- Similarly, the Copy Field functionality lets you duplicate individual fields from one node to another, allowing for precise control over how data is transferred and managed. Throughout this guide, we will demonstrate how to implement these functions, ensuring you understand the best practices for utilizing them effectively in your Skyvva integration projects
Pre-required
- Create an Integration
- Create an Adapter (e.g. SAP CPI Adapter)
- Create an Outbound Interface (Use API Version V3)
- The Configuration of Execute callout records by using Copy Node on the Mapping
Create an Integration
Create new Integration by following the guide, the link is given below: – What is an Integration and how to create it?
- Create an Adapter (e.g. SAP CPI Adapter)

- Create an Interface
To create the interface need to follow this guide
– What is an Interface and How to create it?
- Create an Outbound Interface

- Do Mapping
Right-click on the node you want to copy

- Click on the Copy Mode, it alerts the pop-up screen and you can rename that node based on the payload you want to generate.
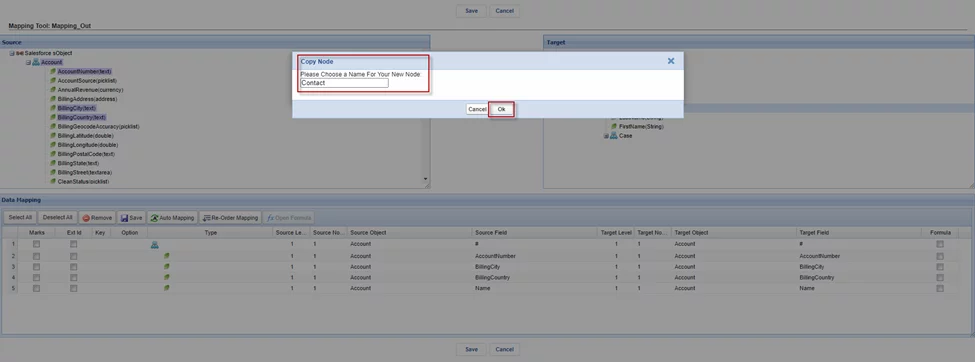
- After clicking 'Ok,' we received the new Node containing all the same fields as that node
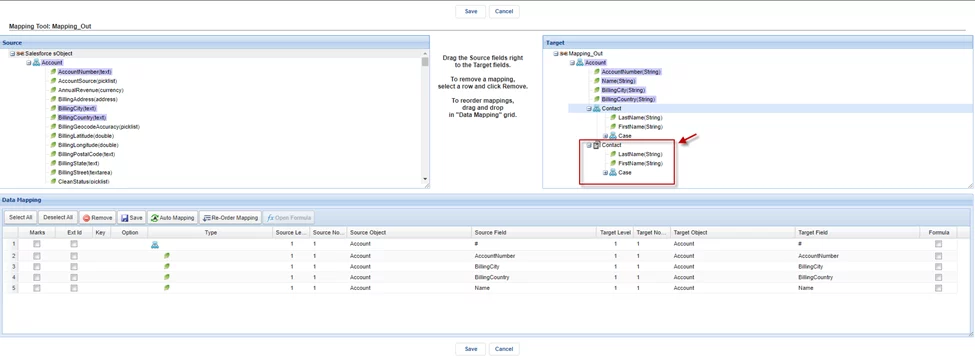
- After that, you can map the fields from the Source by dragging and dropping the fields onto the Target.
- Click on the Save button

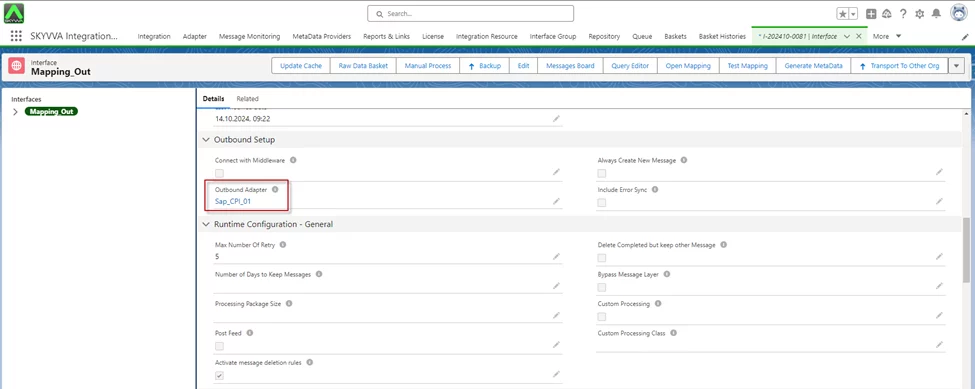
- Go to Interface
- Link Adapter on the interface
[su_box title="Example:" box_color="#2a8af0" title_color="#000000"]I have an account record and have many contacts that look the same but I just want to execute a callout of the records of two contacts by the last CreateDate[/su_box]
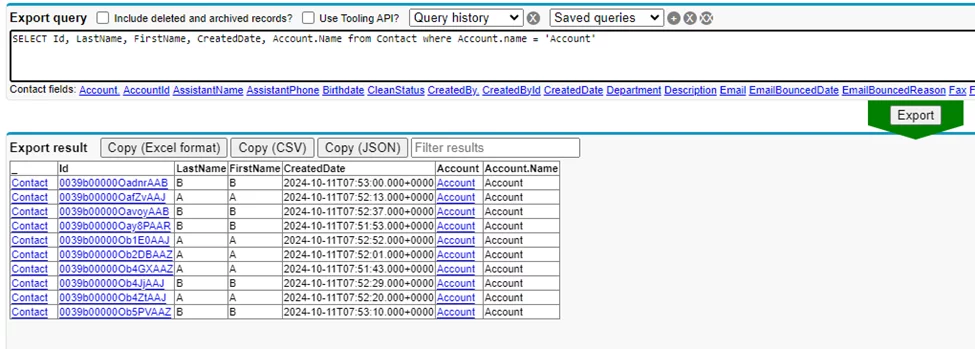
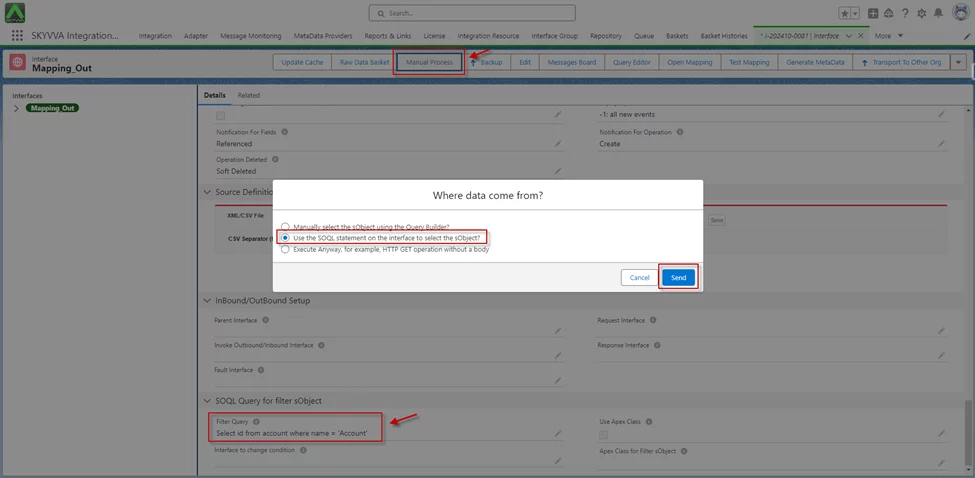
- Setting some conditions on the SOQL query on the Child Interface


- Execute Callout record by Manual Process
- Message Monitoring

- Here is the payload JSON/XML
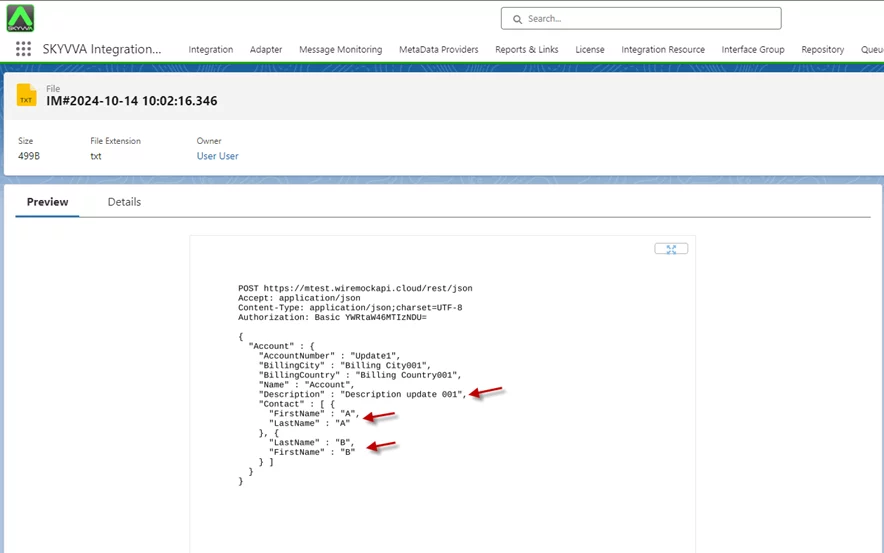


[su_box title="Result:" box_color="#00d9a6;" title_color="#000000"]After selecting 'Manual Process' for the callout record, the JSON payload will be generated. This payload is created according to the conditions defined in the Interface configuration.[/su_box]
Summary
Now the user understands, this tutorial explains how to use the Copy Node and Copy Field functionalities in Skyvva integration. The Copy Node function allows you to clone a node and generate a payload with a new node or field added for a callout, without needing a new message type. It enables efficient data mapping and integration by duplicating nodes, ensuring consistency and flexibility in payload generation for various integrations within the SKYVVA app.