6. SOAP Adapter
Introduction
Agent SOAP Adapter is a feature like SOAP Adapter, but it has more power than the SOAP Adapter. SOAP Adapter needs the System to have Public API to call out API, but Agent SOAP Adapter can callout API with Systems that have Public API and Local API. So it is useful for users who want to keep data in the local System. To use Agent SOAP Adapter, we need to have an Agent application to store in the local machine meaning that Agent SOAP Adapter is like a bright to connection Salesforce to the Agent machine and the Agent machine connects to Backend applications. Example: In a Real business scenario, we want to make our data secure, so we need to use a local network zone to install Agent machine and Backend applications such as SAP or Oracle. We do like this because we don't want any systems to access our System, and it is the technique to protect our data from being safe.
The processing of Agent SOAP Adapter
Here's the picture of the processing of Agent SOAP Adapter.
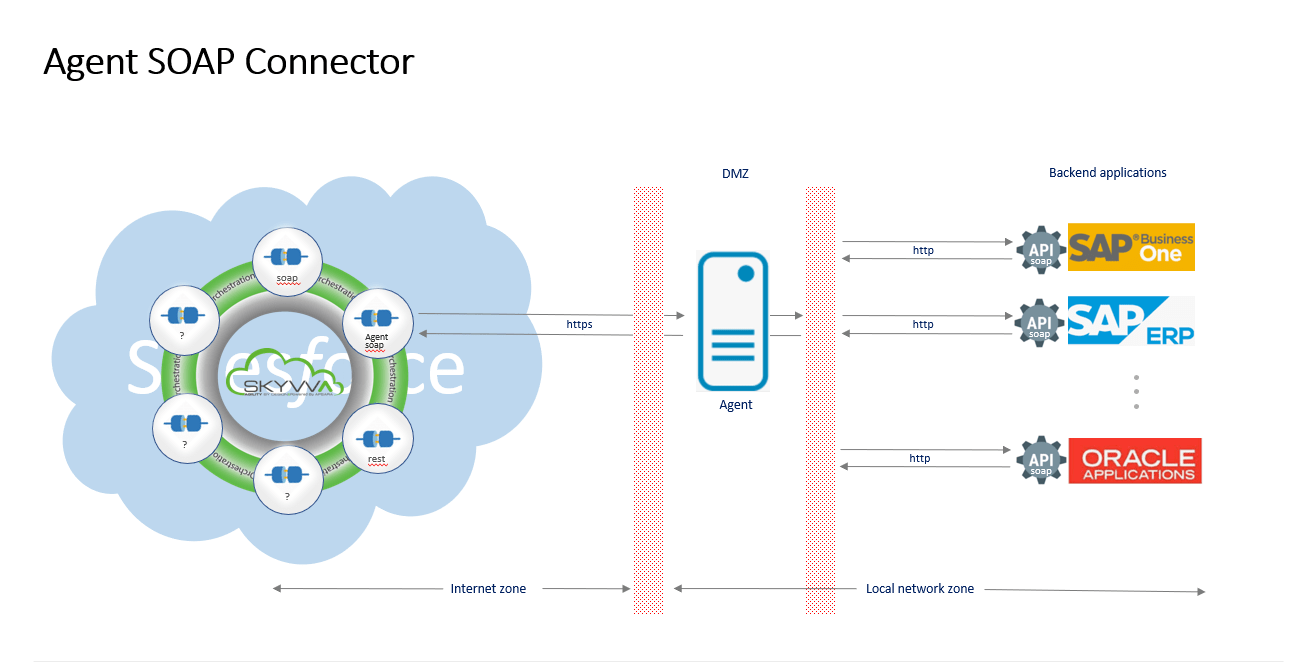
In this picture, we can see Salesforce and SKYVVA are in the Internet zone where Agent Machine and Backend applications are in the Local network zone. So when we callout from Salesforce to Backend applications, it will access Agent Machine and Agent Machine send data to Backend applications. The agent is responsible for making connections with the inside enterprise and then connecting with Salesforce (Internet zone). This Adapter is really helpful for users to send data to salesforce to local backend applications.
How to create a SOAP interface using the Agent SOAP Adapter?
How to use Agent SOAP Adapter for callout data from salesforce. We also learn about how to callout data and get a response message and we will learn how to use fault Interface when the other system has a fault message.
Case 1
Handle API message without Response Interface.
Pre-require
- Create or Upload Message Type SOAP.
- Configuration Agent control board.
- Create Adapter Agent SOAP.
- Create Integration and Outbound Interface.
Step 1: Create or Upload Message Type SOAP.
- Go to Metadata-> click button Import MetaData Provider.
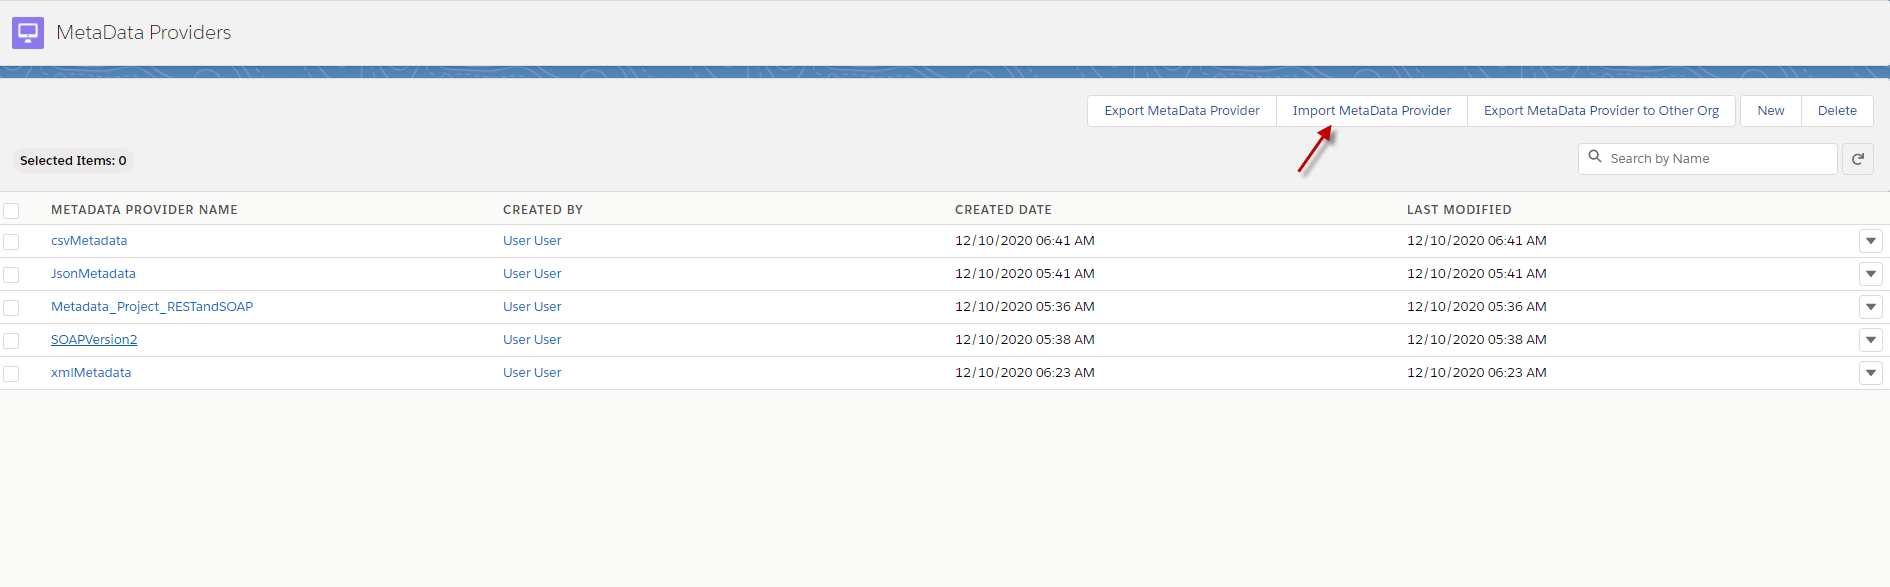
- Click upload files (Put metadata and click OK)
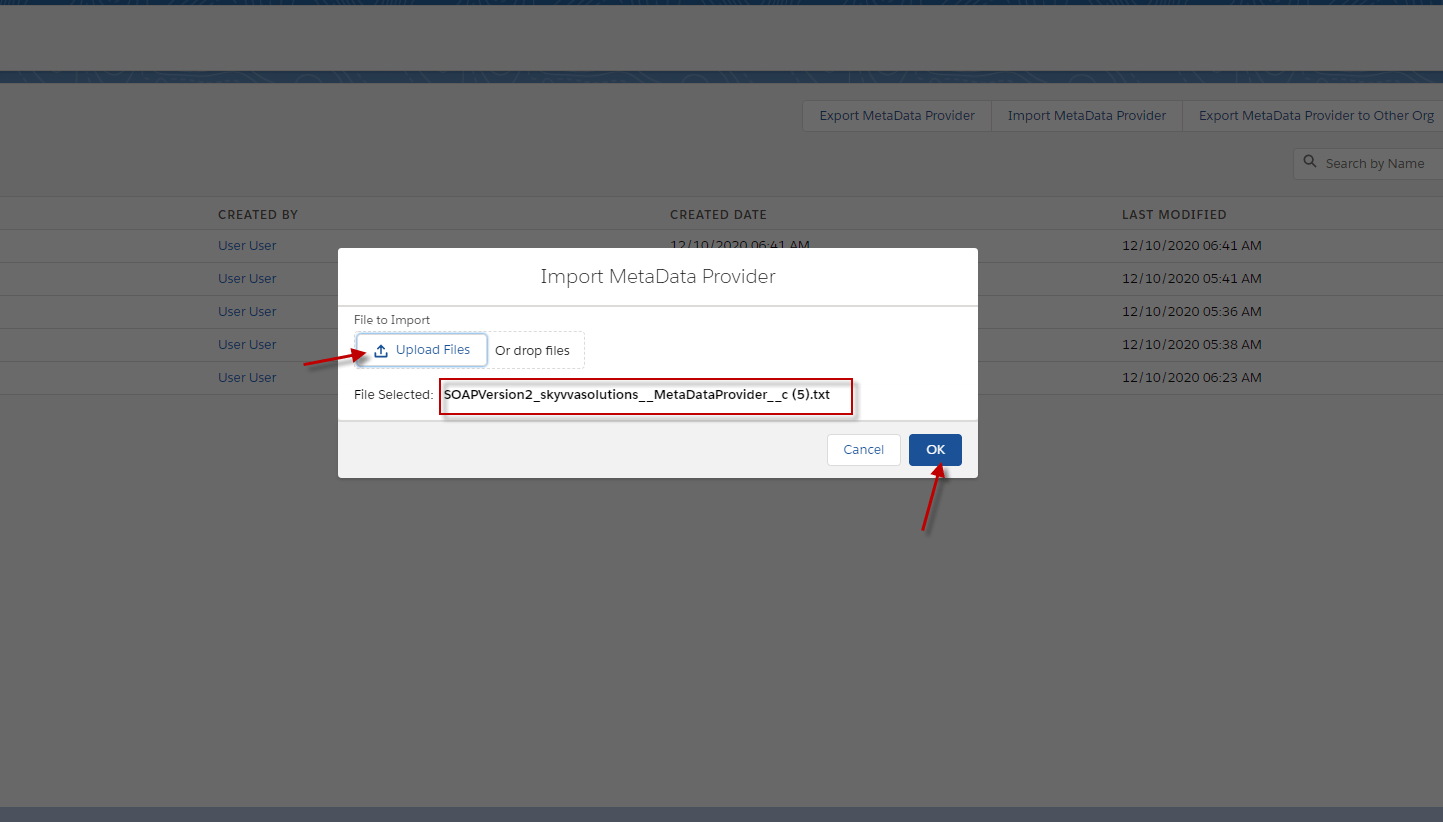
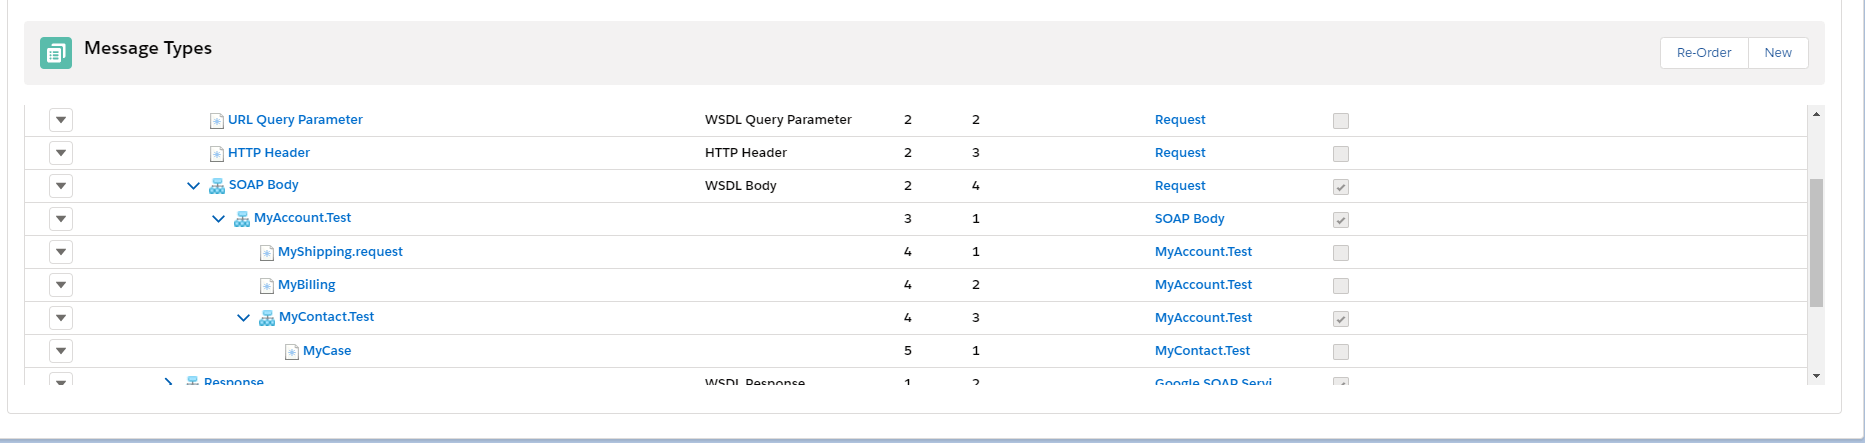
- Here’s SOAP Message Type. Click this to download.
– SOAPVersion2_skyvvasolutions__MetaDataProvider__c (5)
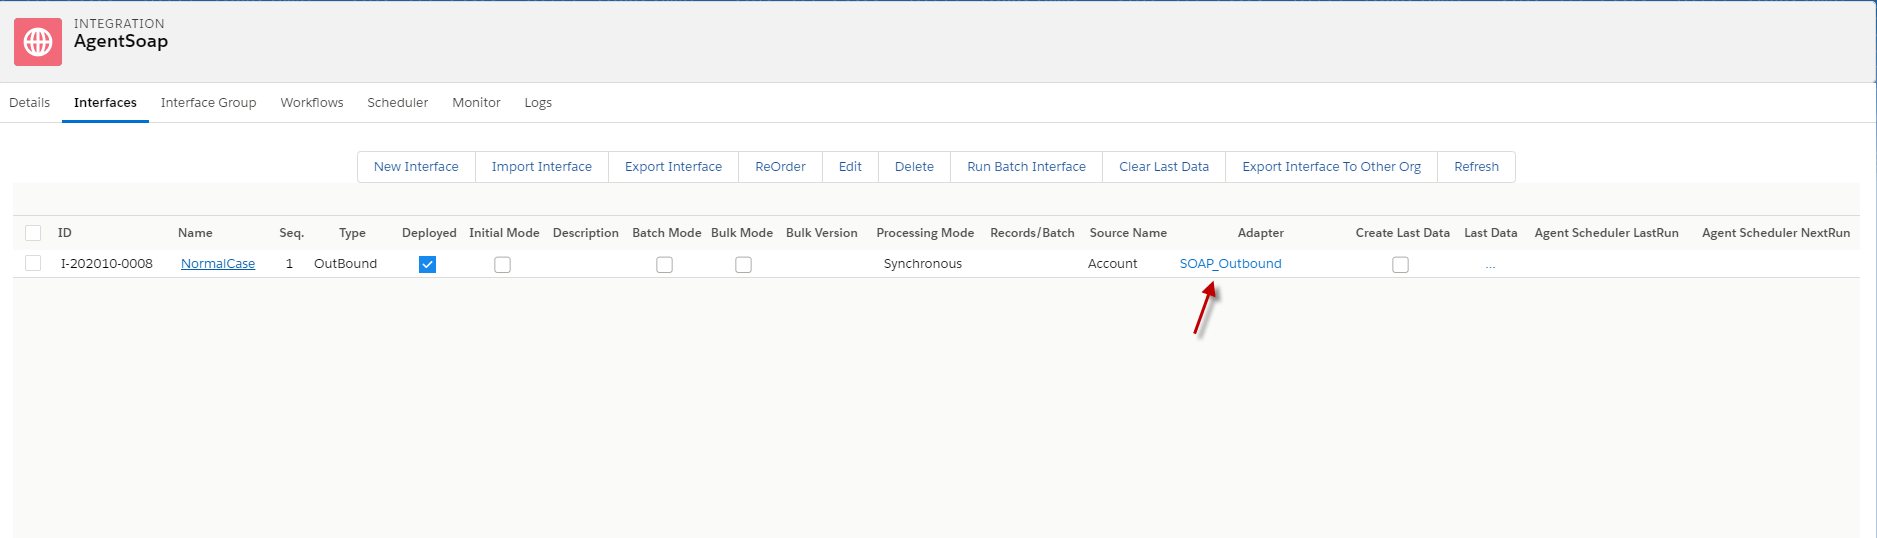
Step 2: Create integration and outbound Interface.
- Create an outbound Interface link with Message Type.
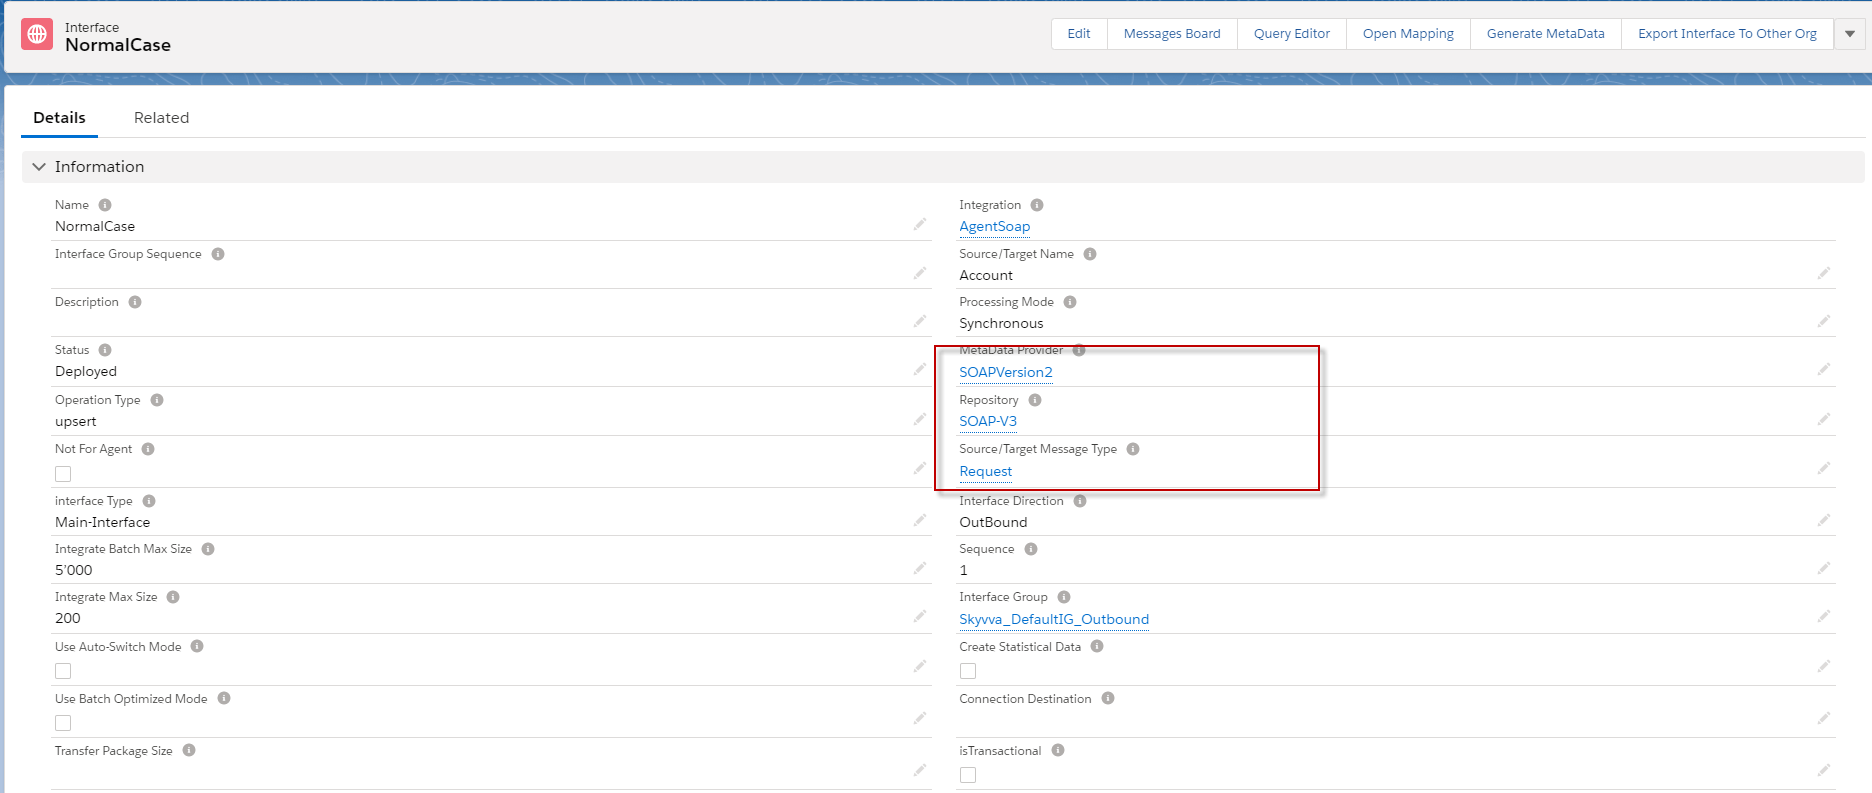
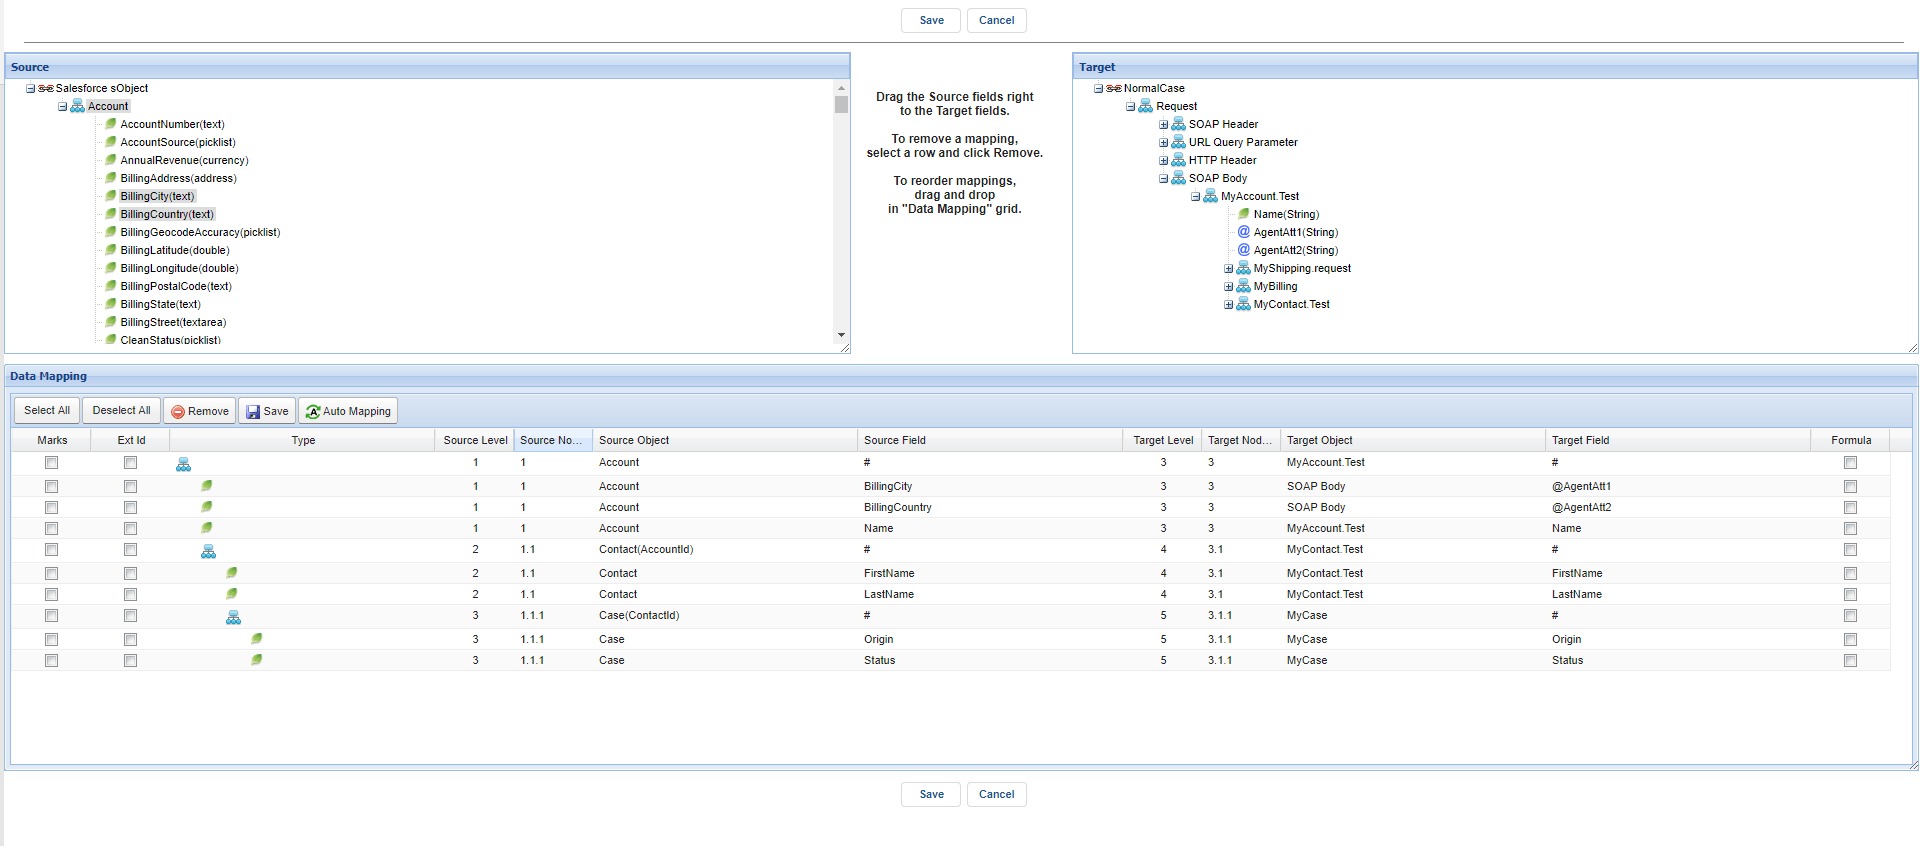
- Do mapping
Step 3: Configuration Agent Control Board.
- Go to Integration detail => click AGENT Control Board.

- Click on Agent Control Board Tab
Since the user now completely understand; How to use the Agent Control Board, by hitting the upper link, now we understand the Architect of the Agent Control Board now follows below on Salesforce org. Step4: Create Adapter Agent SOAP
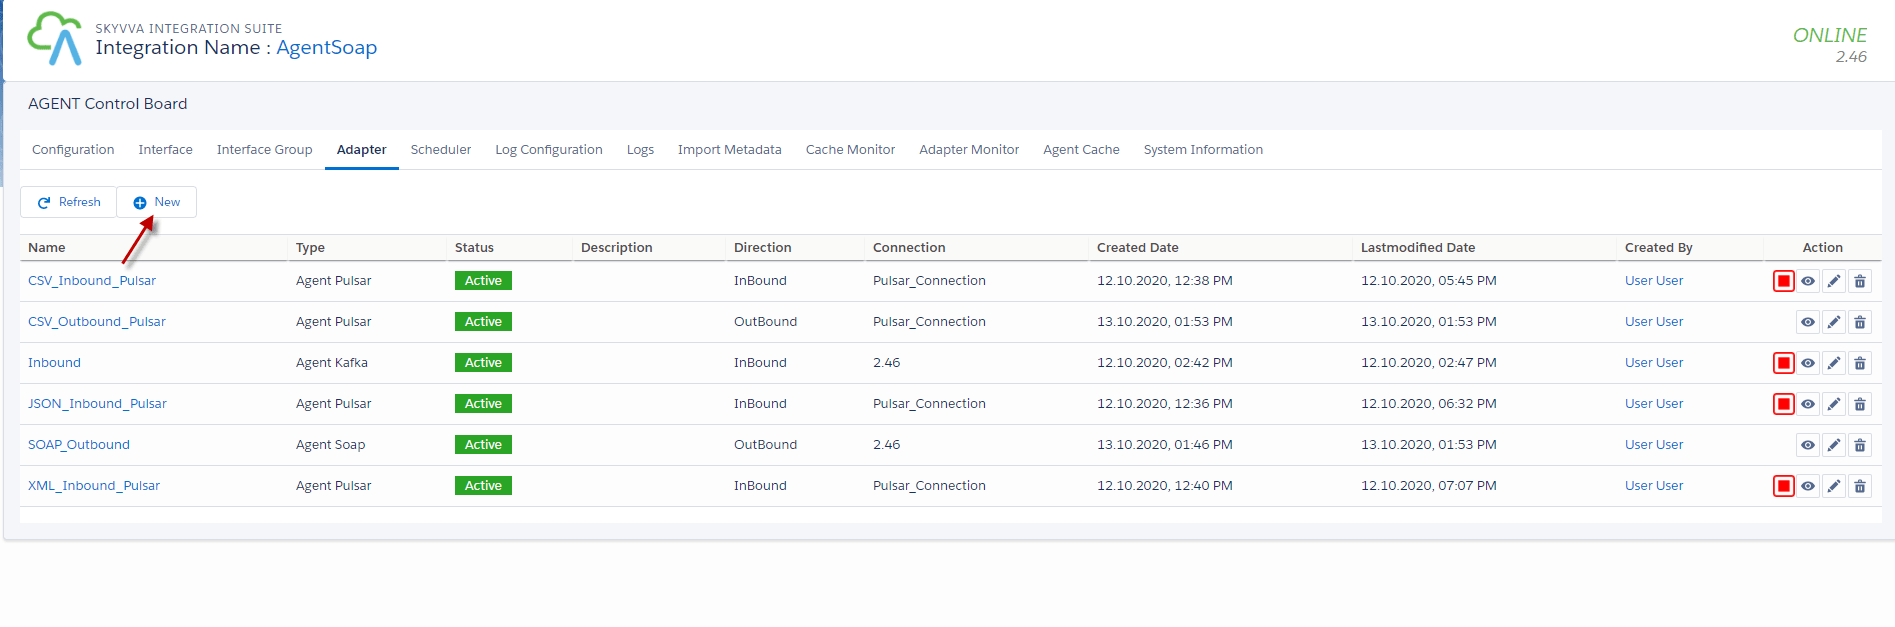
- Click adapter tap on Agent Control Board.

- Click New button
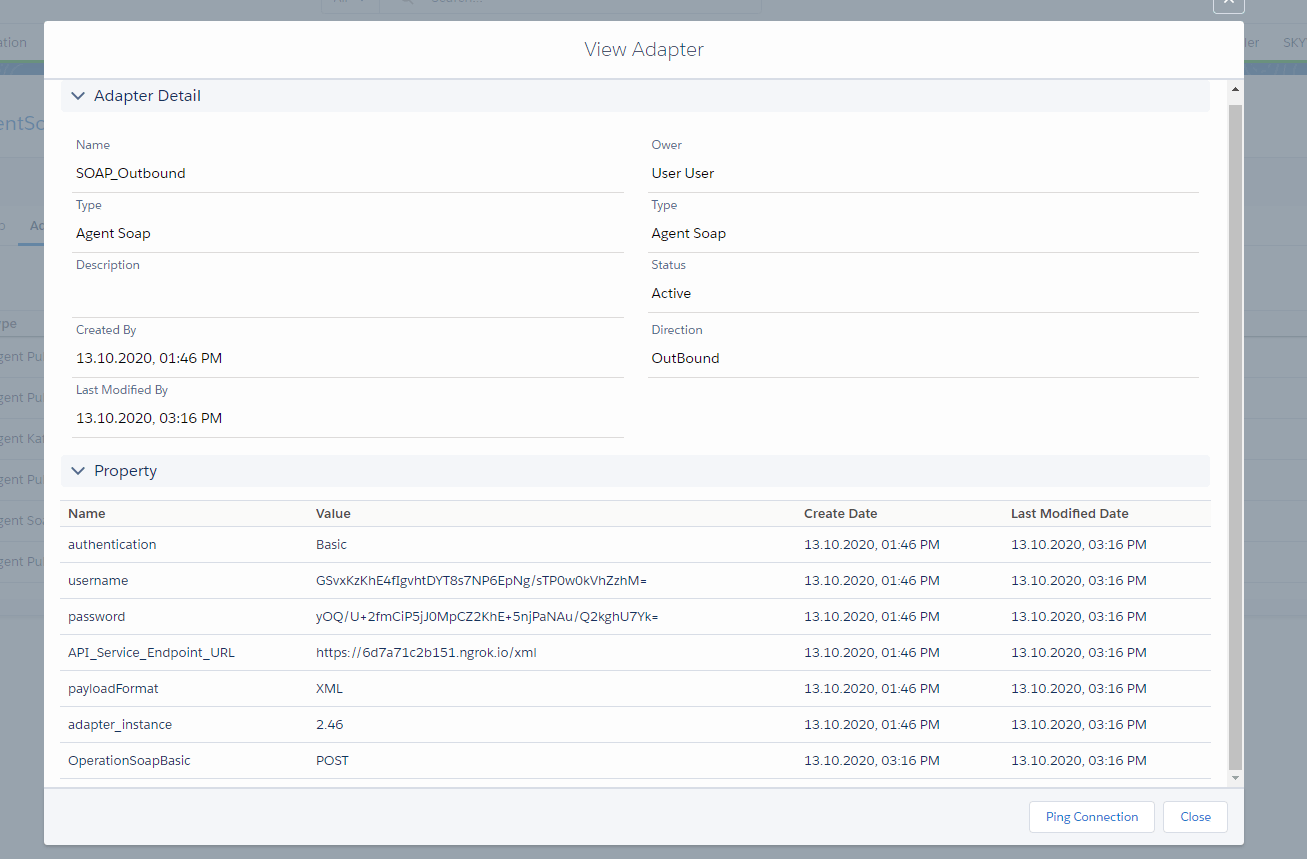
- Configure an Agent Adapter Soap
Fill name, choose Type =Agent Soap, Direction= outbound, choose XML payload, Operation= POST, fill username and password, and choose Adapter_instance.
- Here’s an example.
Step 5: put the adapter into Interface.
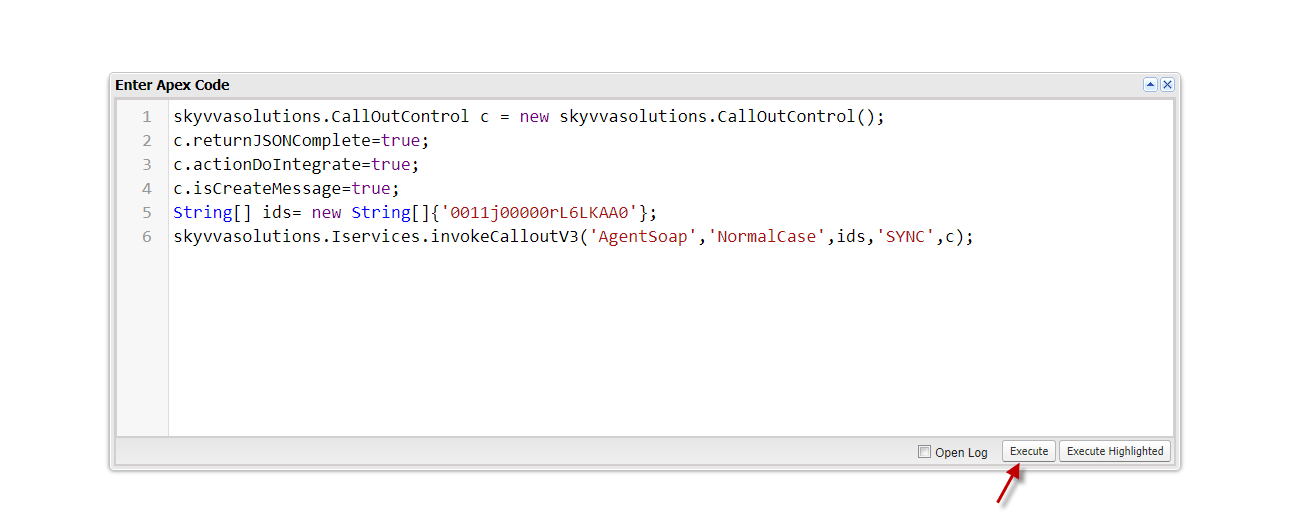
Step 6: Callout v3 with Apex code.
- Here’s code callout.
- Go to deveoper console => Debug => Open Execute Anonymous Window => copy the code abouve and click Execute.

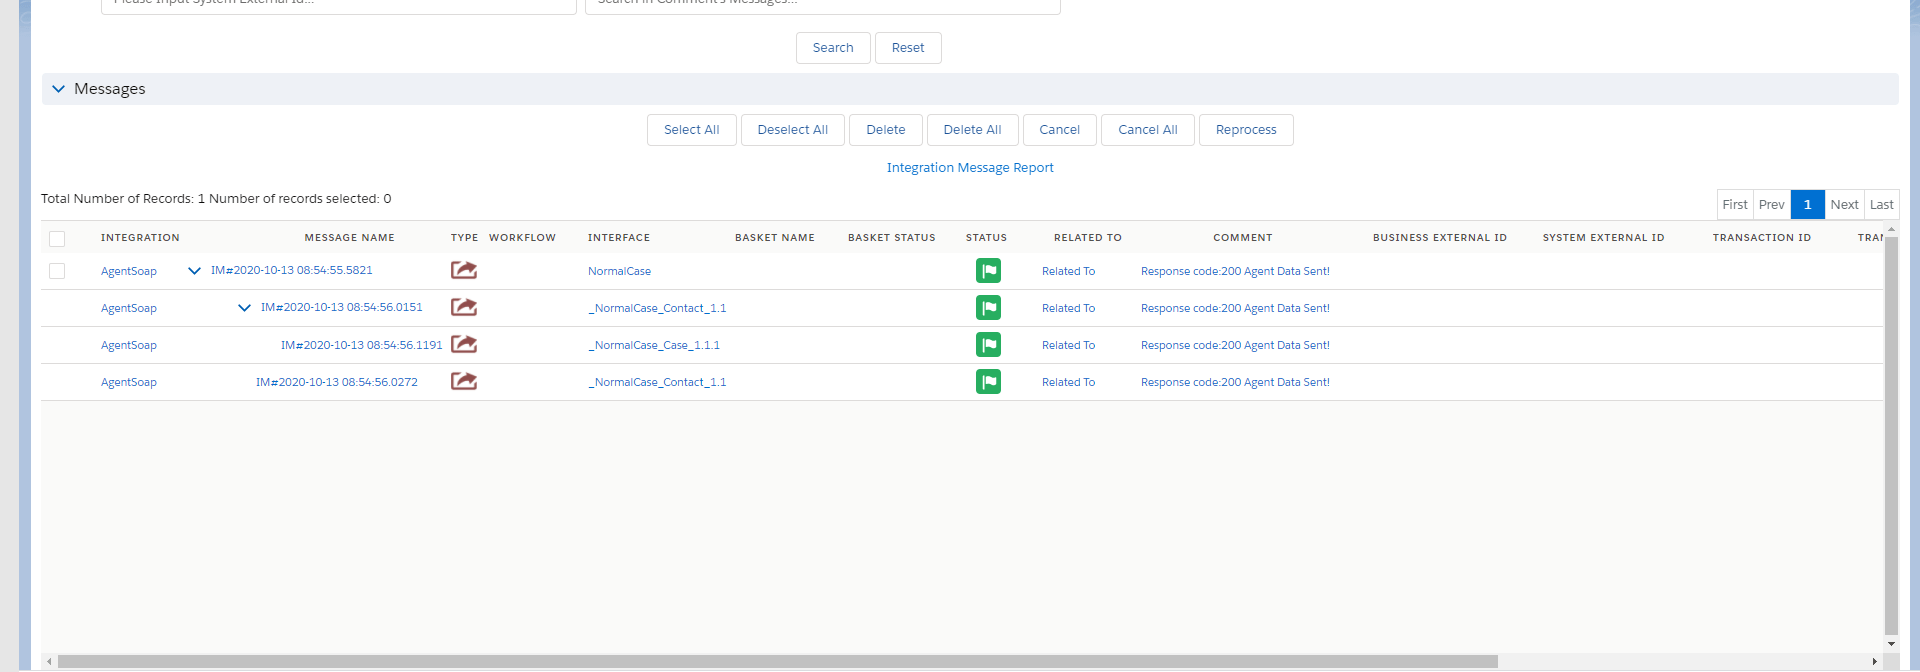
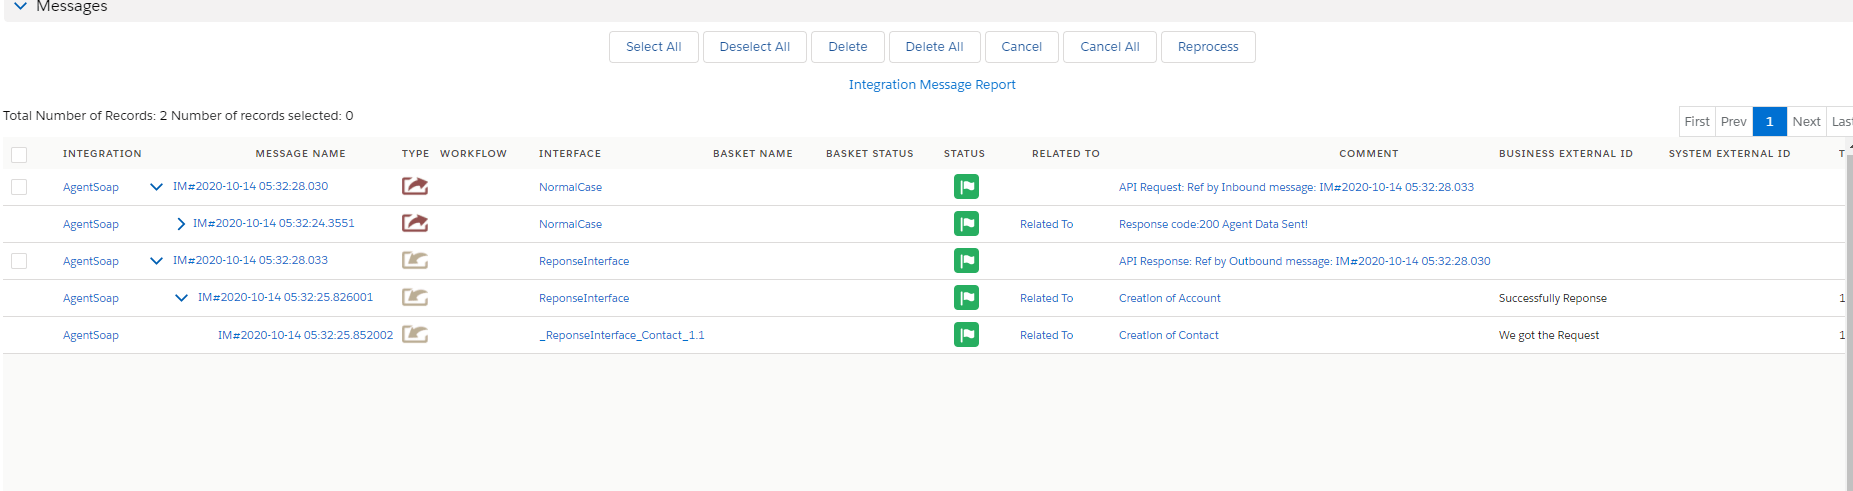
- Go to Monitor to see the result
Case 2
Handle API Message with Response Interface.
In this case, we just need to create a Response Interface using Soap Message Type. Pre requires
- Create or Upload Message Type SOAP. (We have configured in case1)
- Configuration Agent control board. (We have configured in case1)
- Create Adapter Agent SOAP. (We have configured in case1)
- Create Integration and outbound Interface. (We have configured in case1)
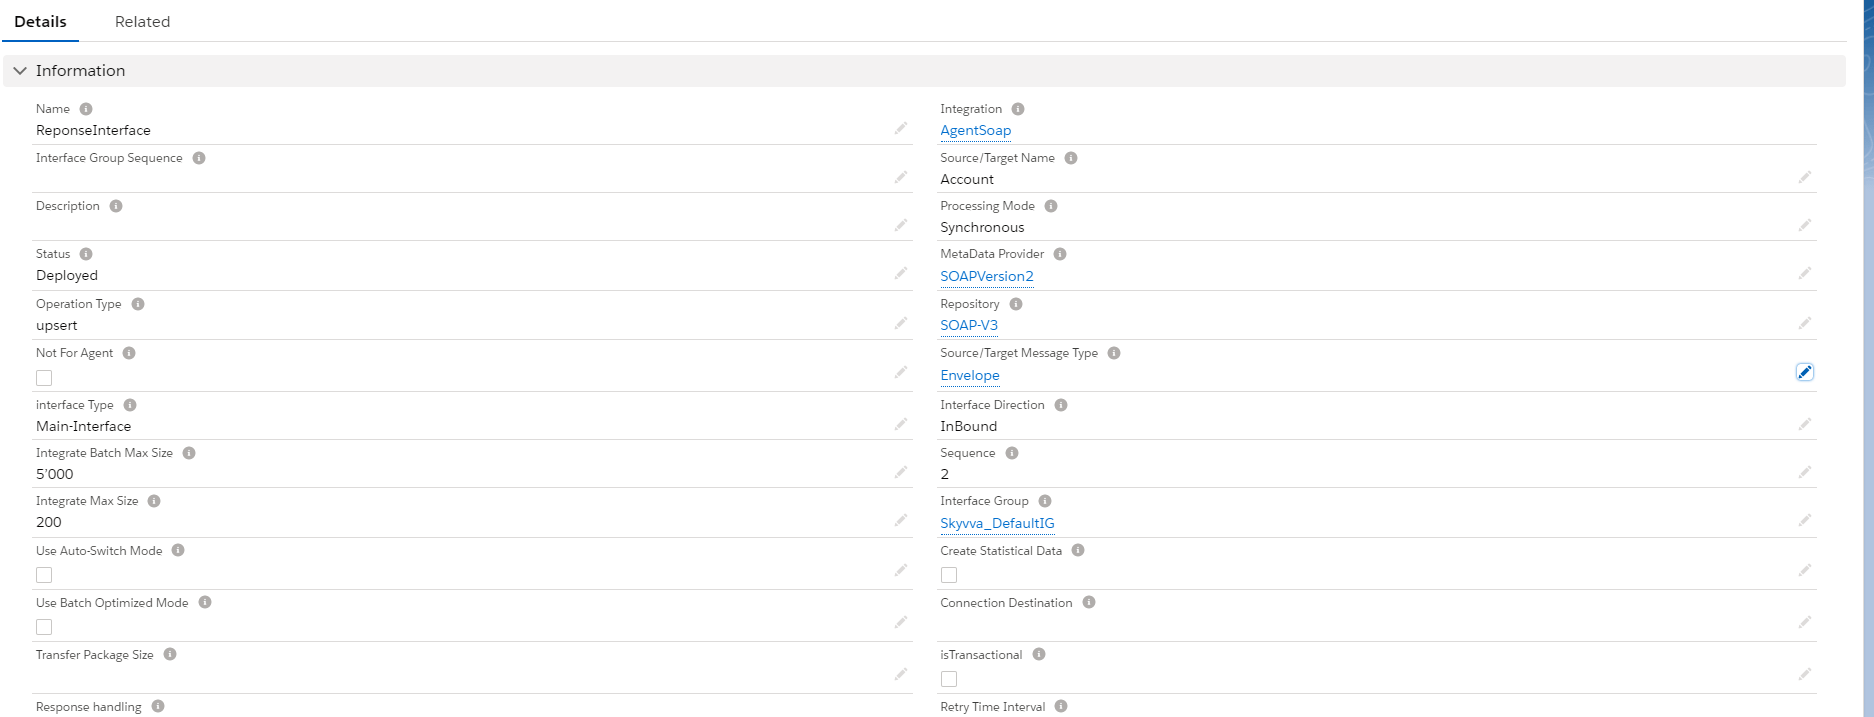
- Create Inbound Interface
How to Handle API message with Response Interface? In this case, we just need Inbound Interface one more for do response. Because of Case 1, we have configuration some pre-required already. [su_box title="Note" box_color="#2a8af0" title_color="#000000"] Make sure that Message Type Reponses Interface is matching with payload Reponses of other request System or server.[/su_box] Step 1: Create inbound Interface and link Message Type Response
- Here’s the response Interface.
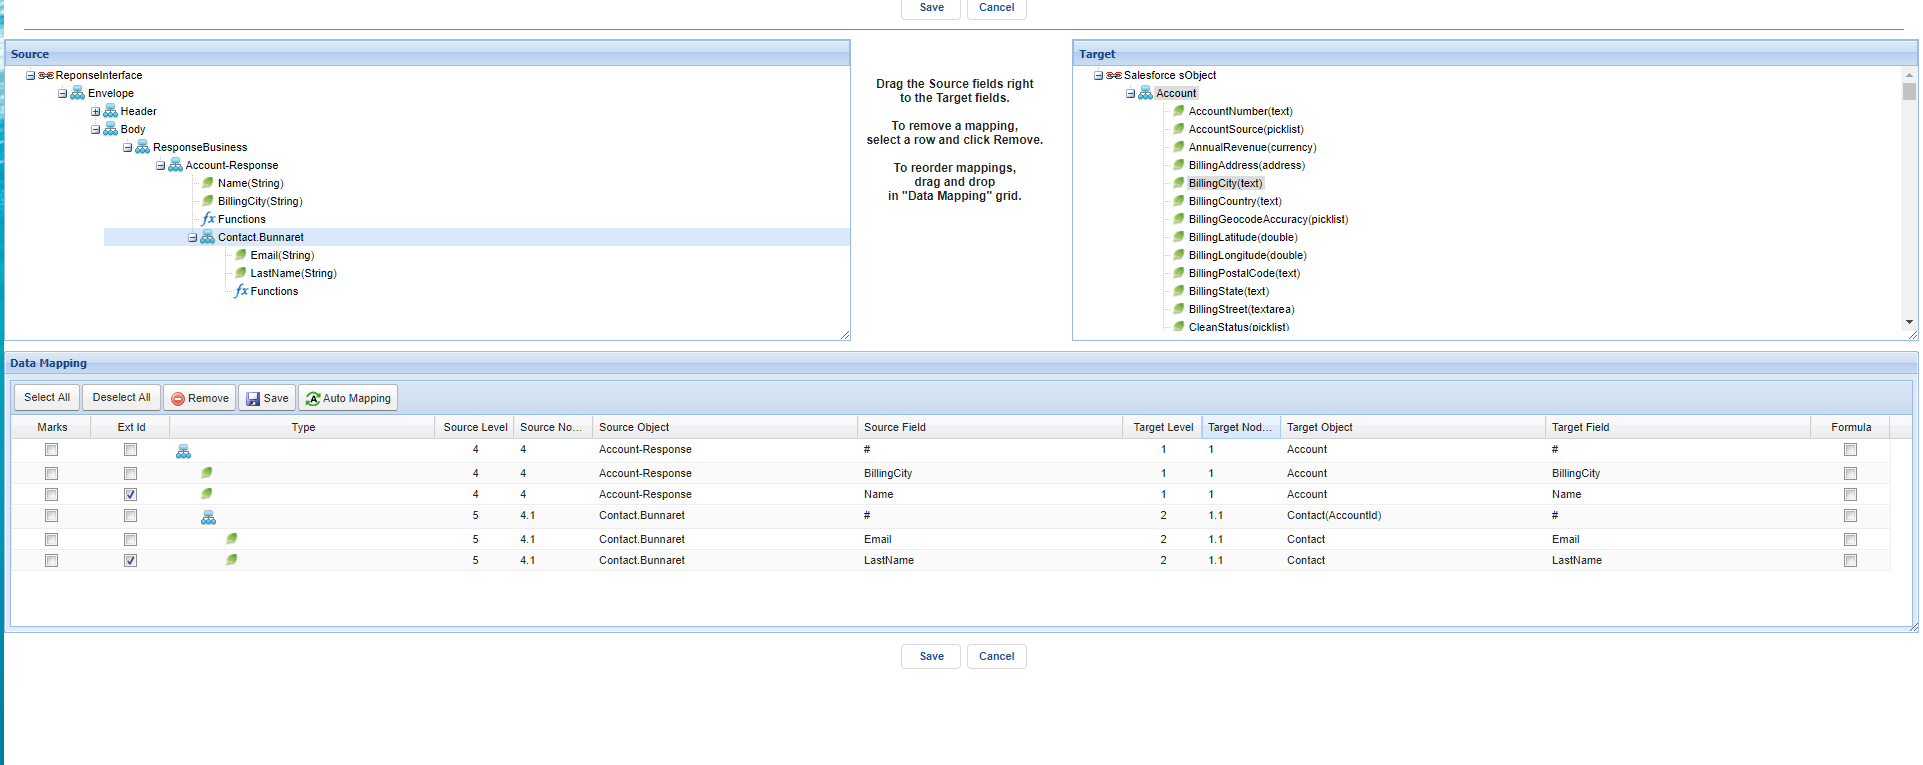
- Do mapping.
Step 2: Go to Interface Request and put the Response Interface in the field’s response Interface.
- Go to Interface Request.
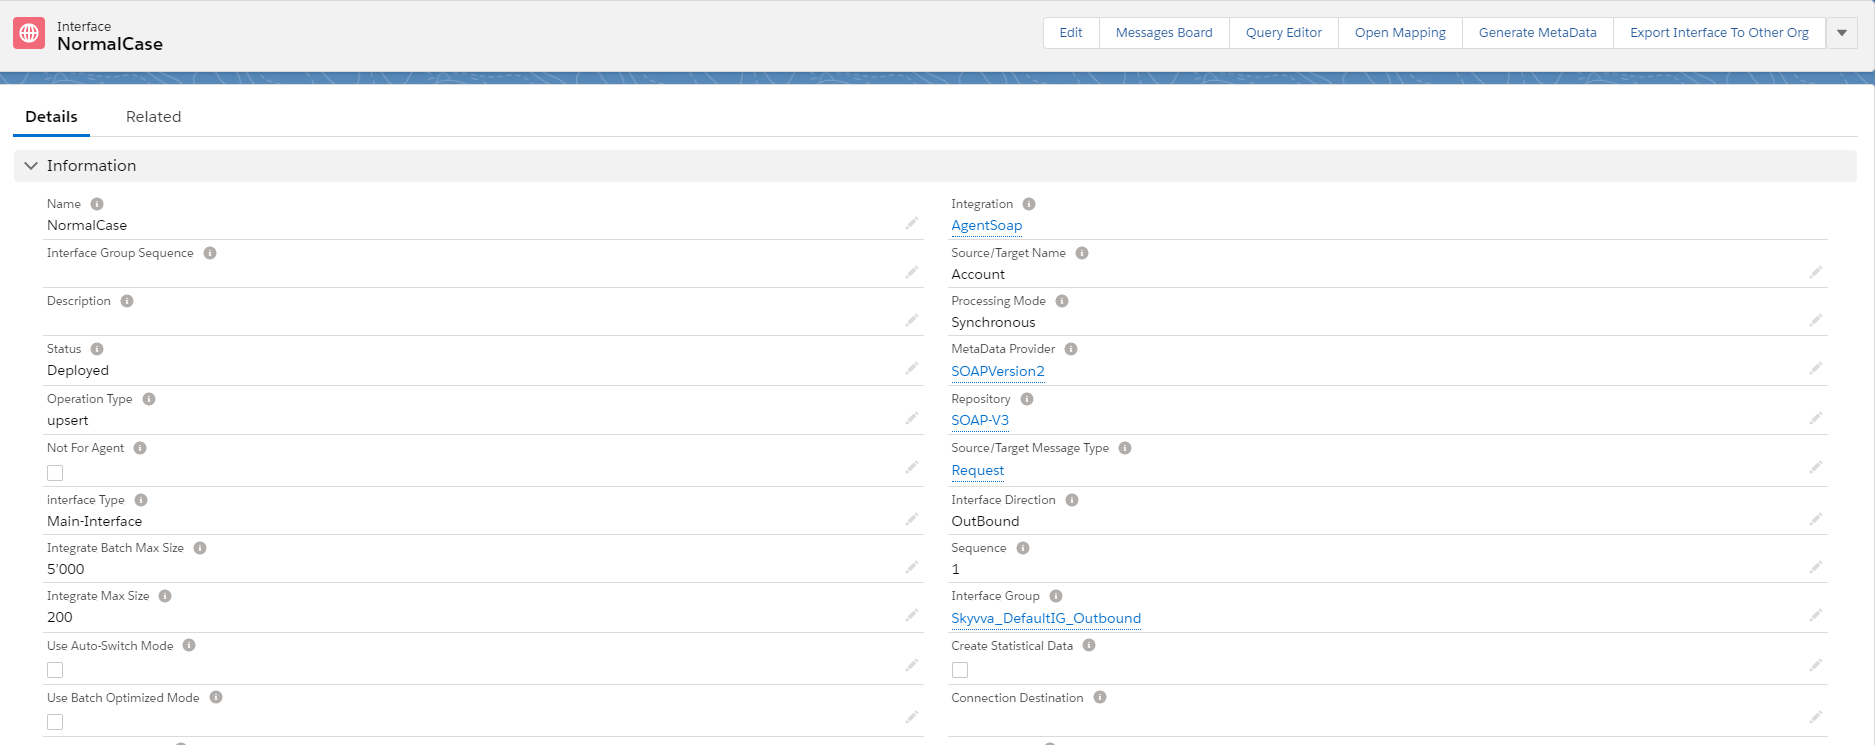
- Scroll down to see the field’s request Interface. Click this pencil.
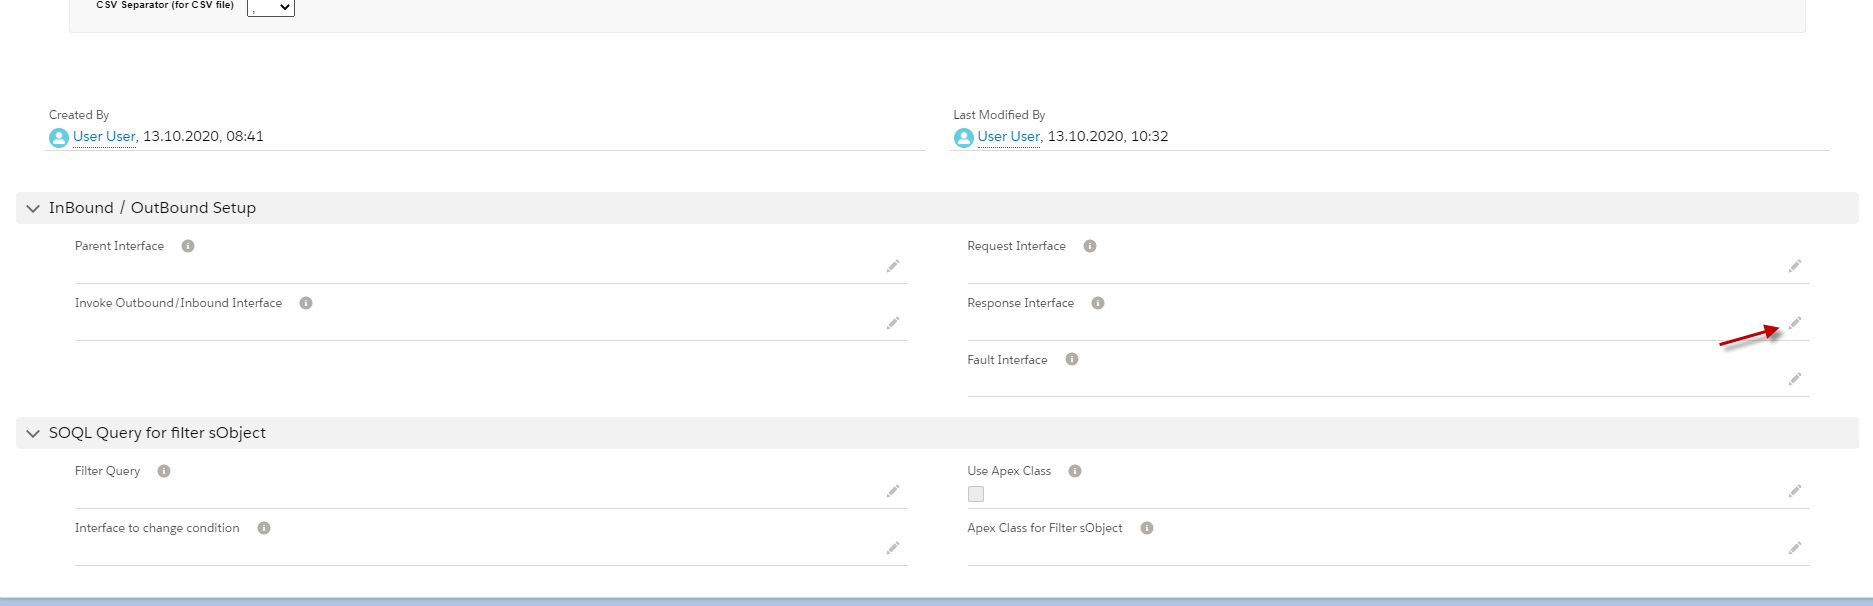
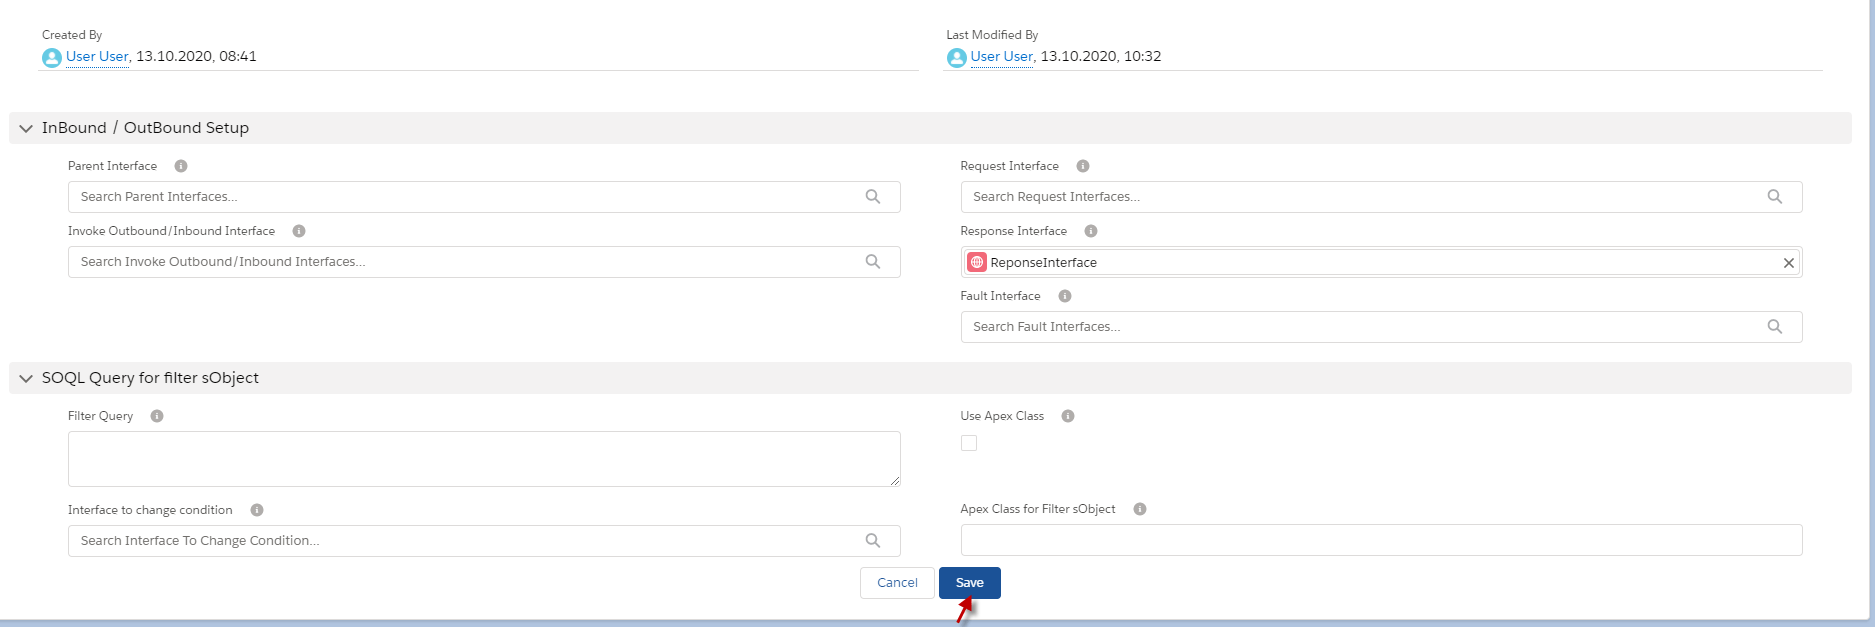
- Put response Interface in it, Example below. Click the save button.
Step 3: Callout v3 with Apex code with Request Interface.
- Here's code callout.
- Here’s example.
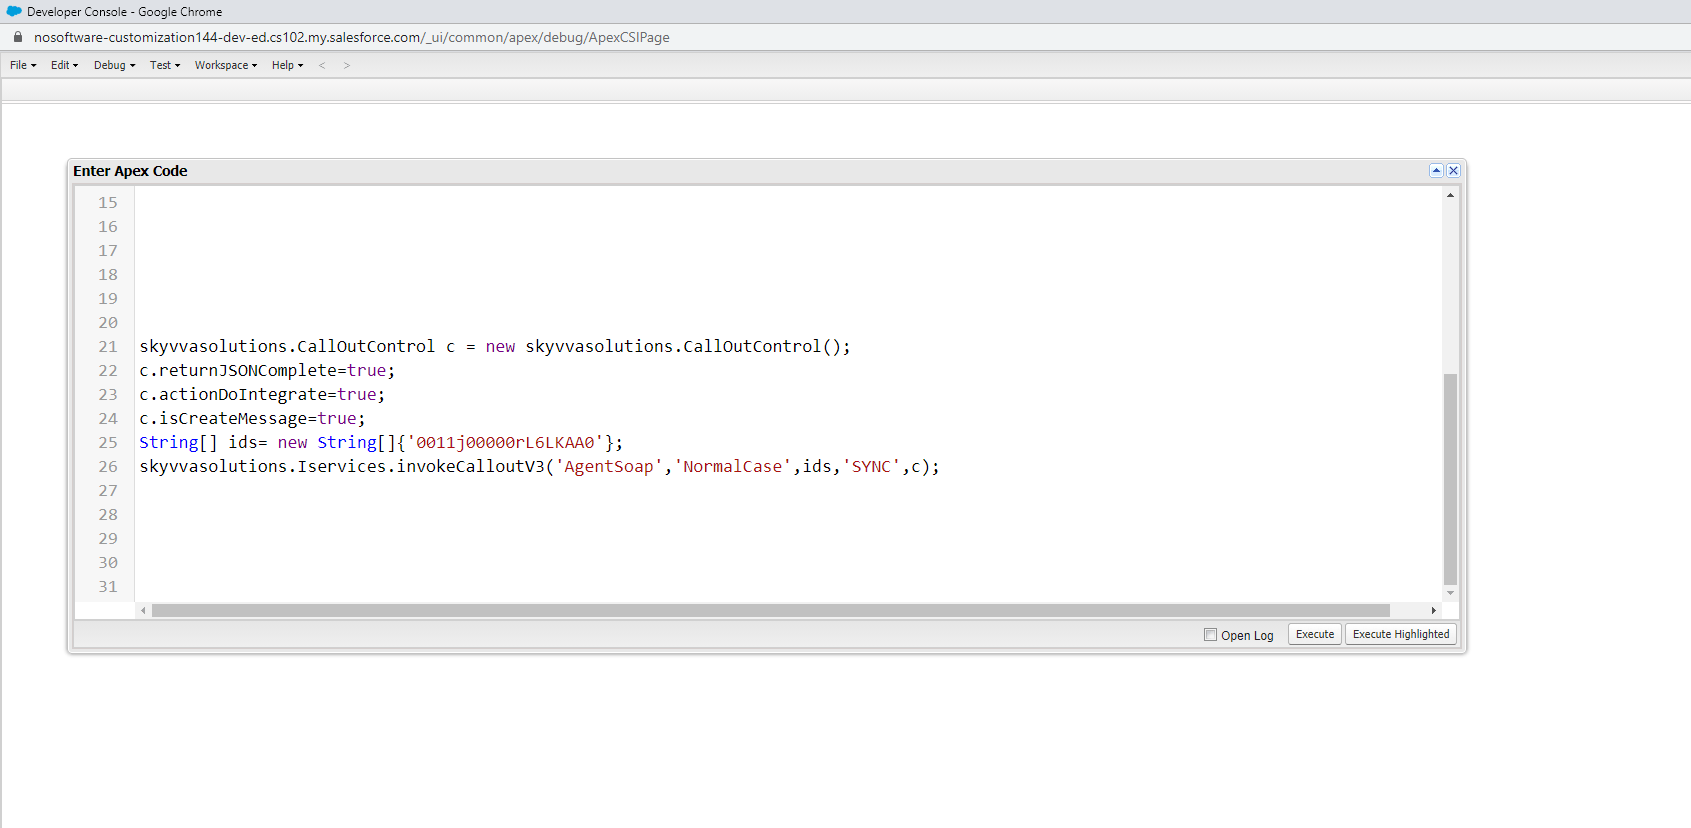
- Go to Monitor to check the result.
Case 3
Handler Over Fault Response.
- In this case, we use two Interfaces like Inbound Interface for Response and Outbound Interface for Request. The process of these cases is to put the Response Interface, which is fault Message Type, into the Request Interface.
- Example. We have an outbound Interface and put the fault Interface that has message Type fault_SystemError in the outbound Interface. When the callout V3 is met the situation, System Error, so the Inbound Interface will respond to the fault message to tell the user that the Callout has a problem with the system Error.
[su_box title="Note" box_color="#2a8af0" title_color="#000000"]Make sure that Adapter has fault response. [/su_box] Pre requires
- Create or Upload Message Type SOAP with Fault Message Type. (We have configured in case1)
- Configuration Agent control board. (We have configured in case1)
- Create Adapter Agent SOAP. (We have configured in case1)
- Create Integration and outbound Interface. (We have configured in case1)
- Create Inbound Interface as a fault Interface.
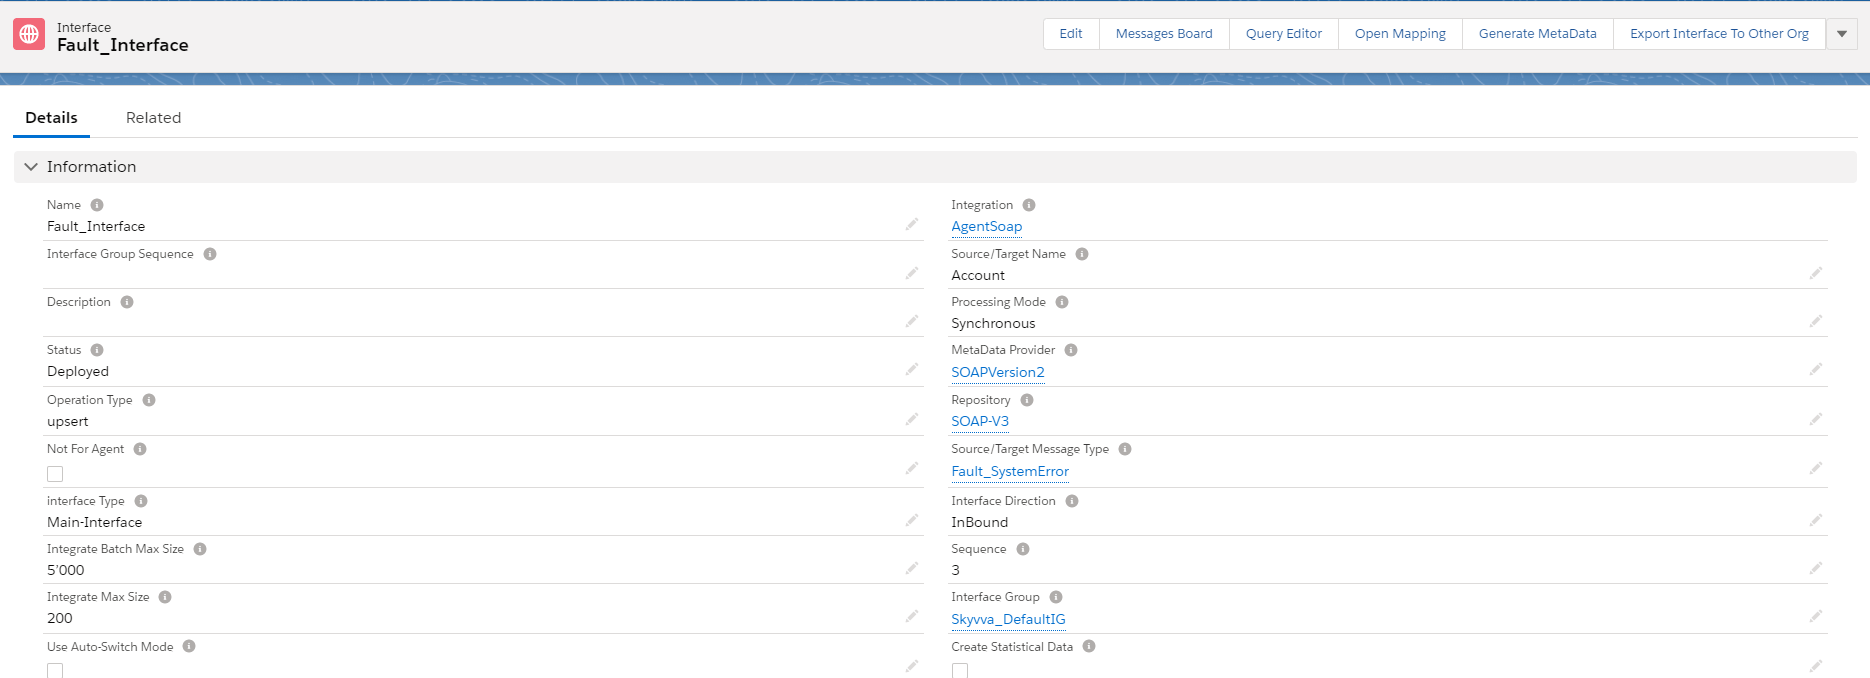
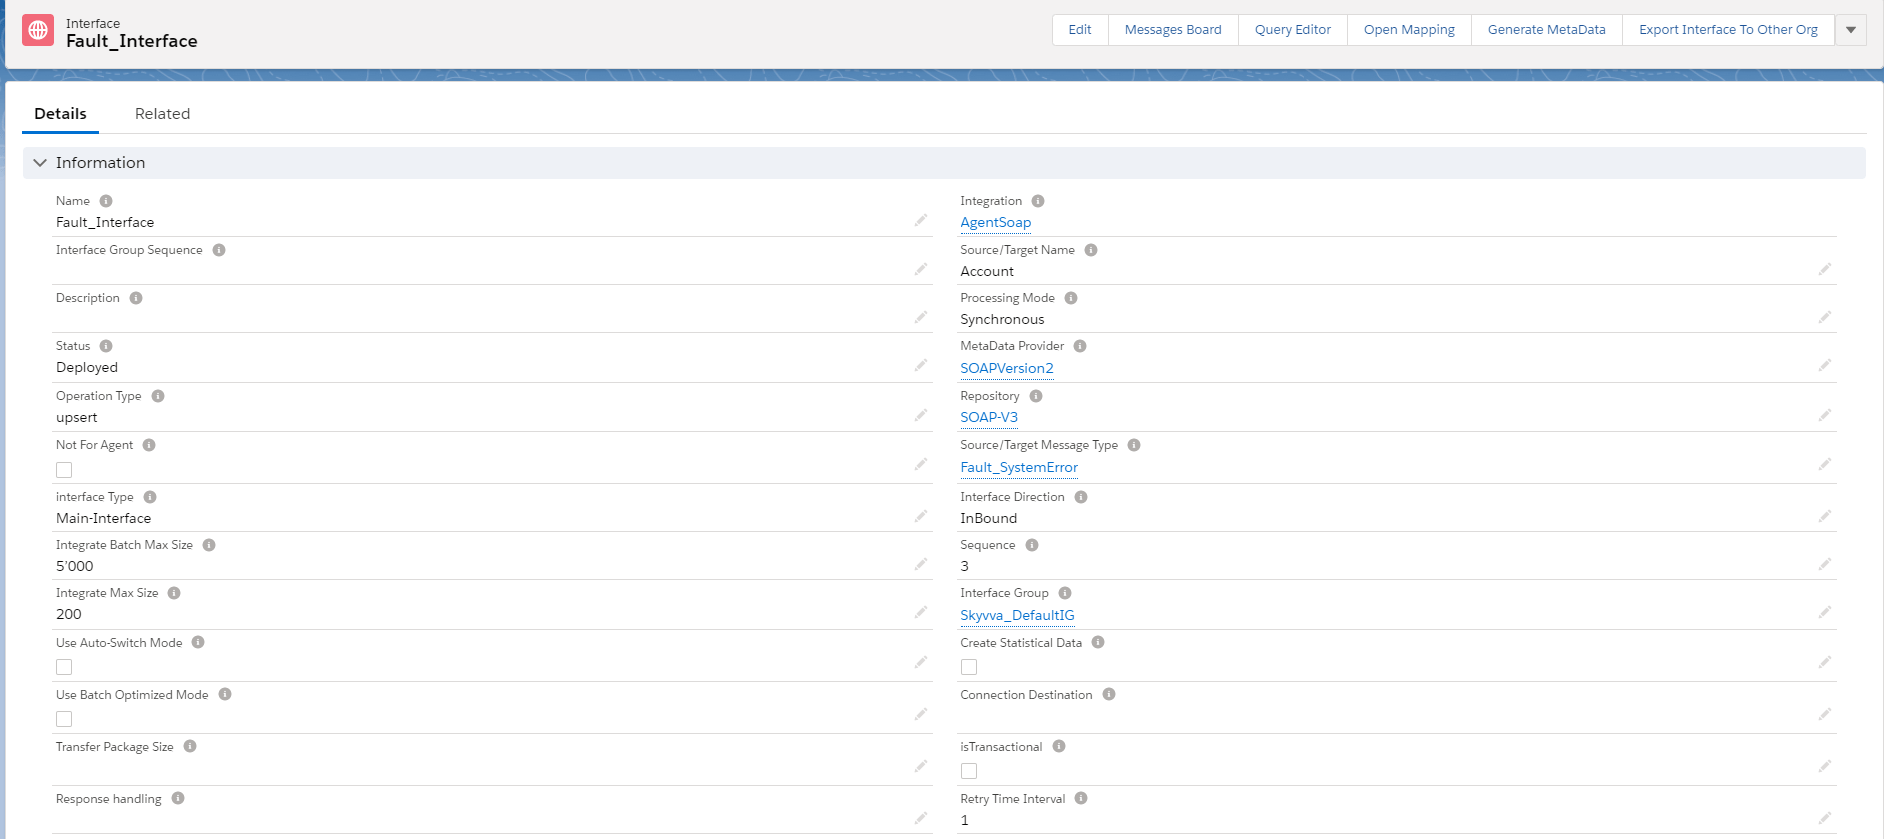
Step1: create Inbound Interface as fault Interface.
- Go to Integration => create Interface.

- Here’s the Inbound fault Interface.
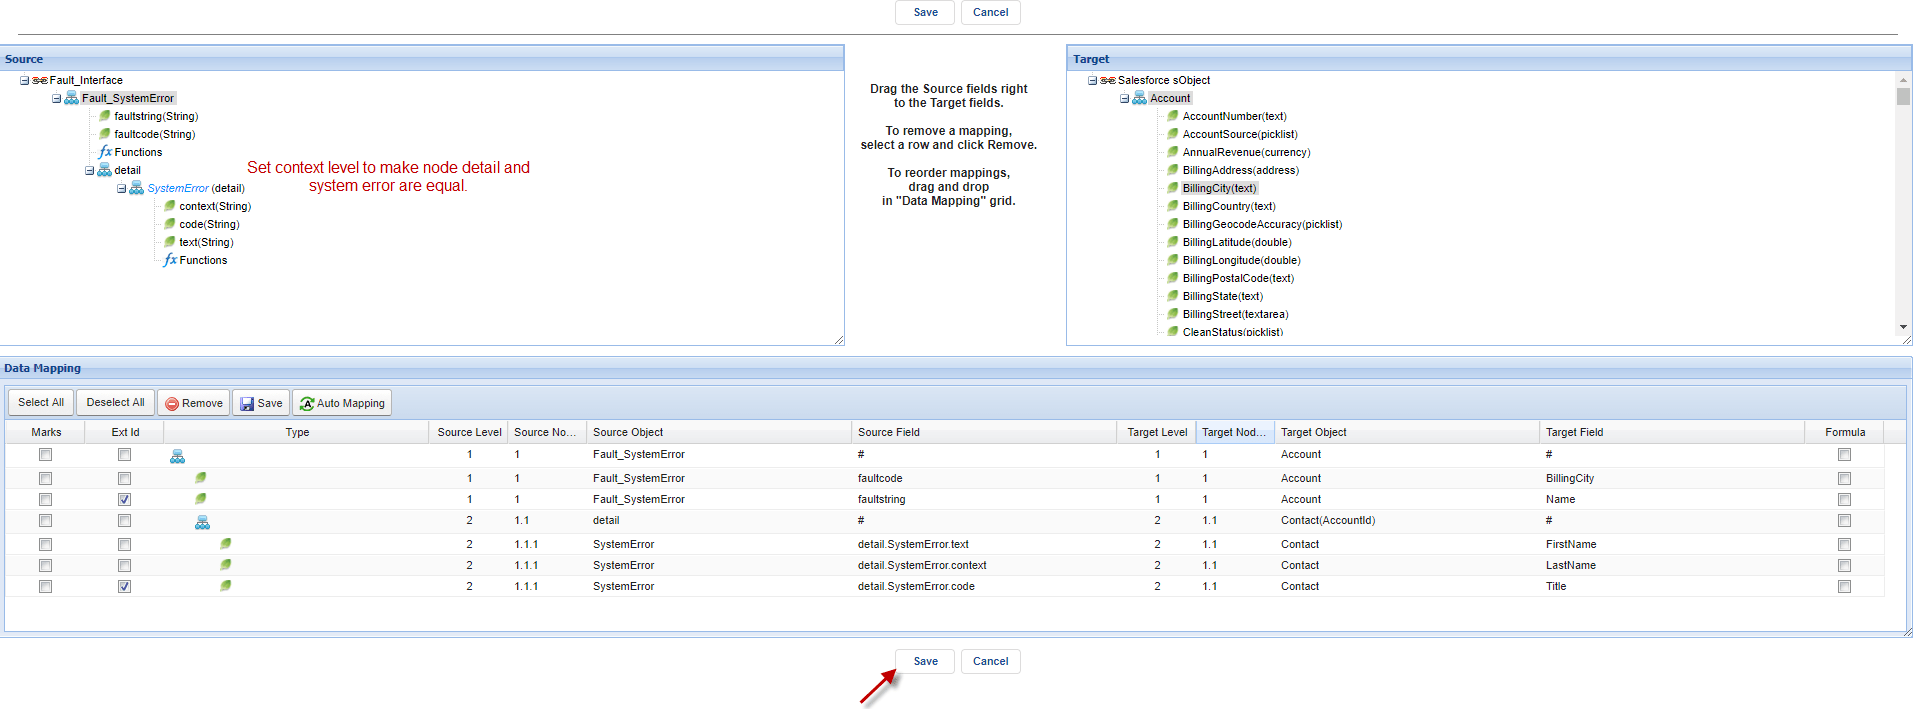
- Do mapping
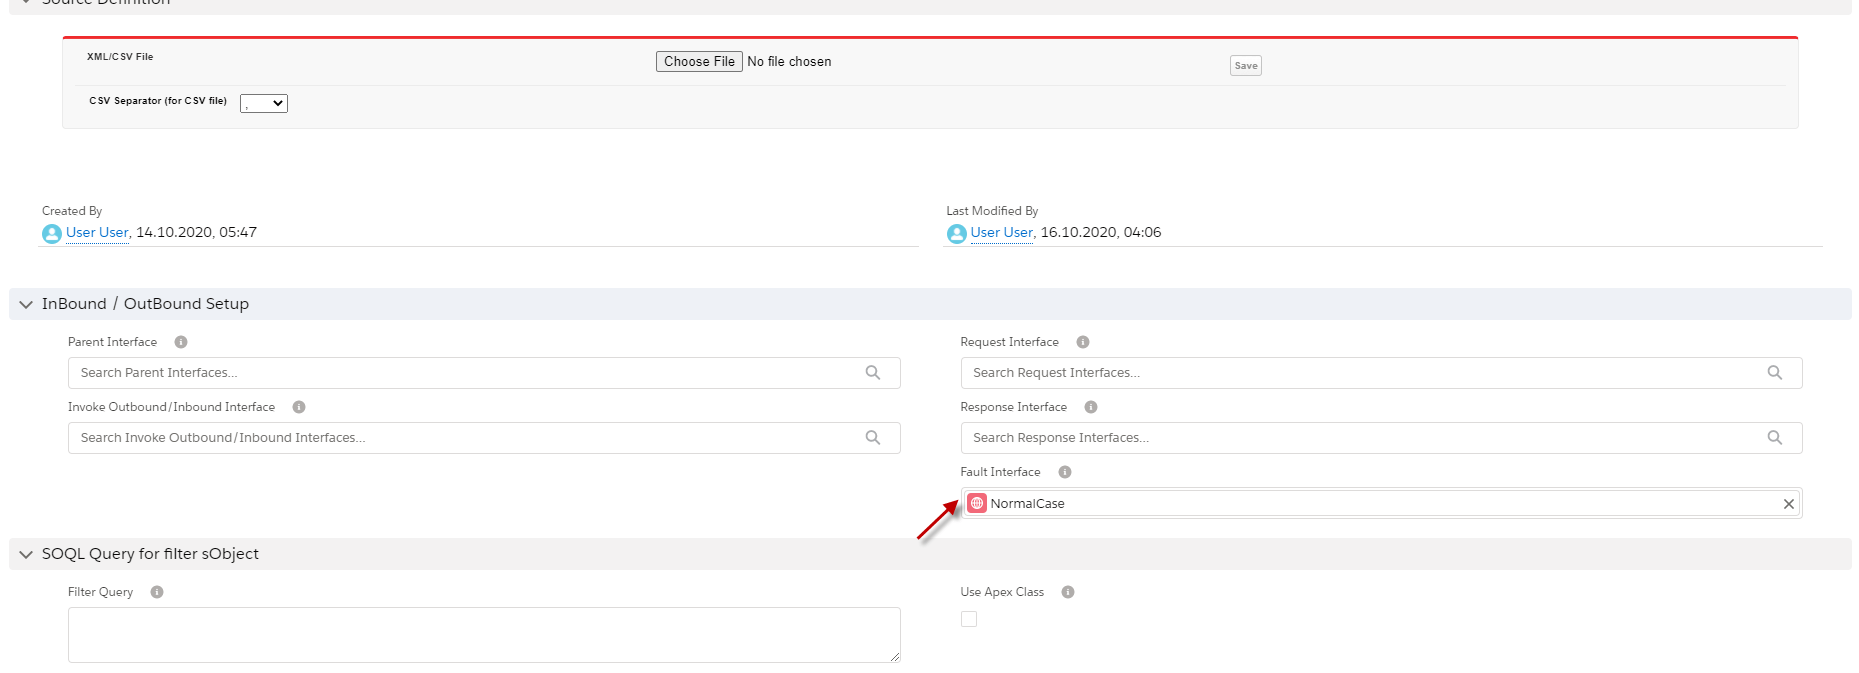
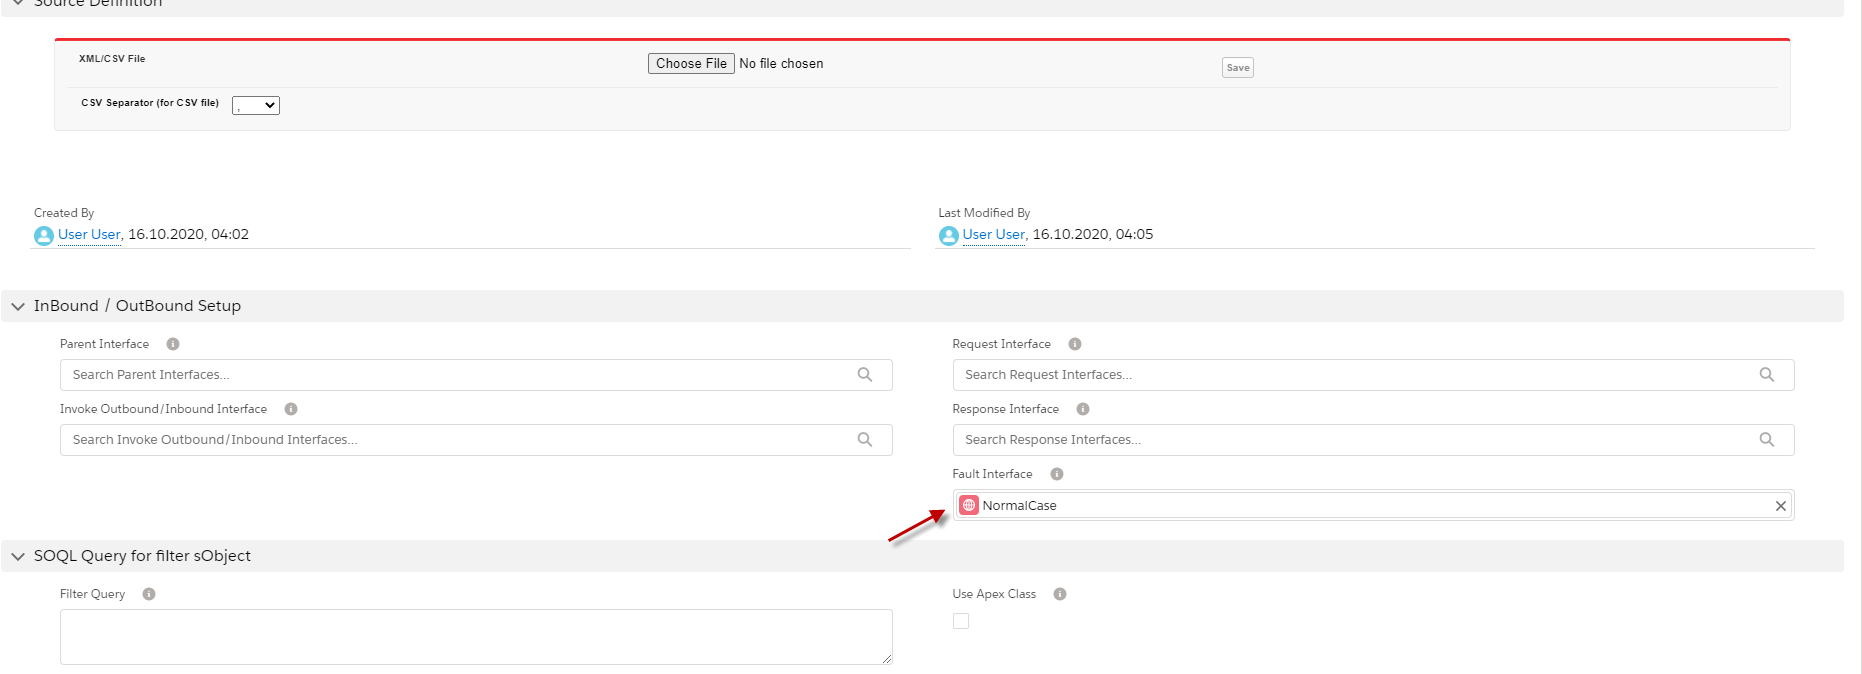
Step 2: put fault interface in request interface.
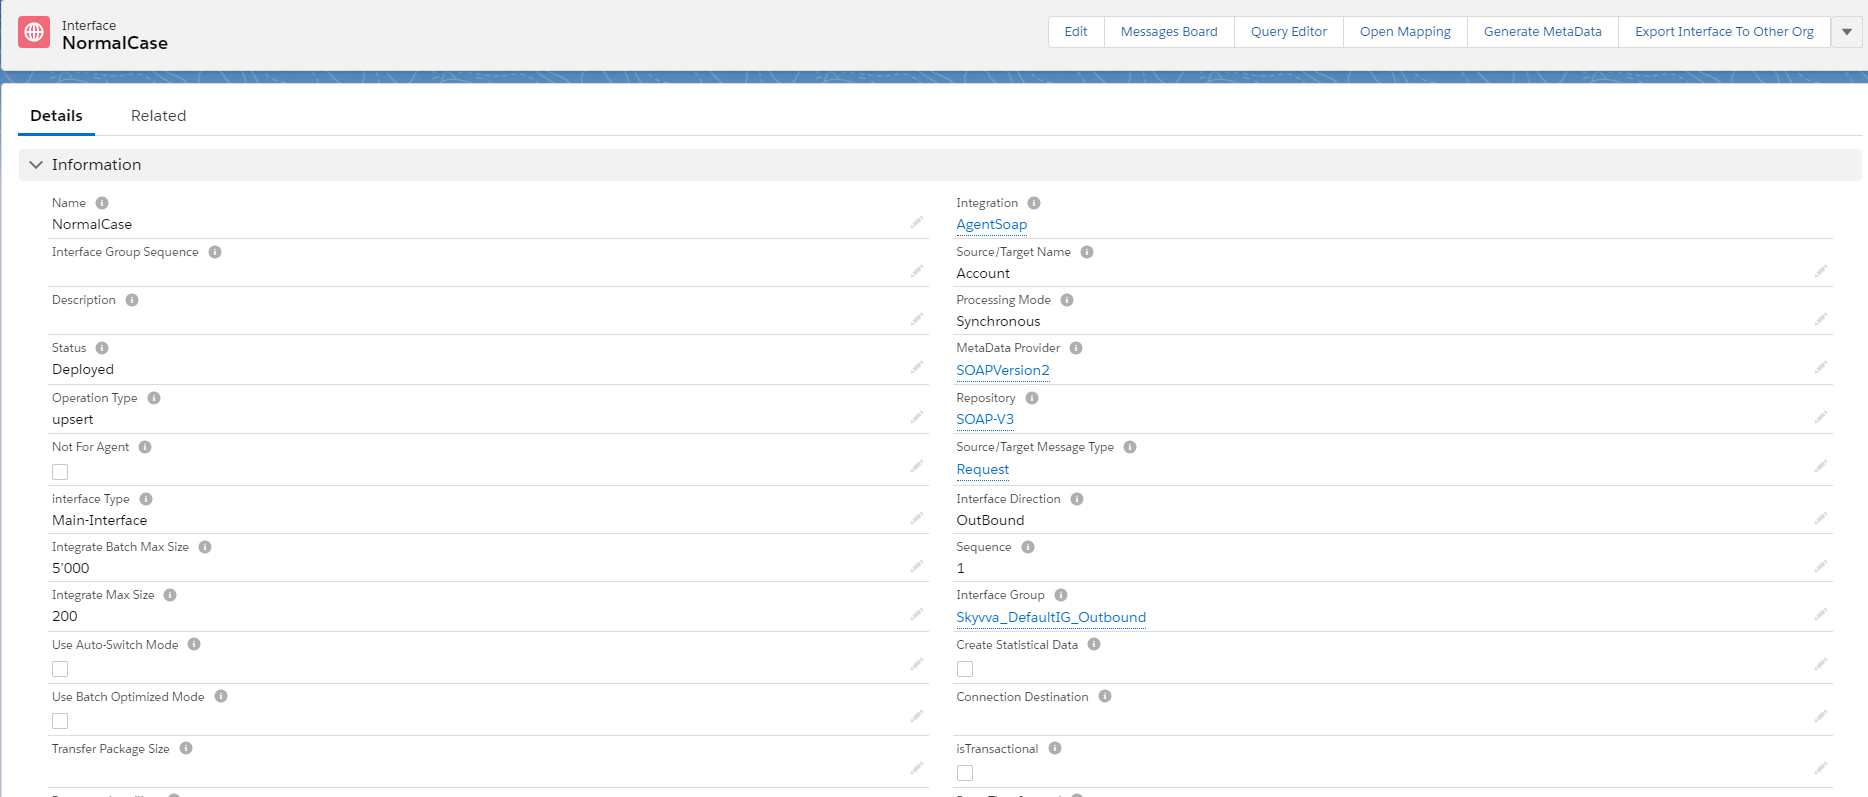
- Go back to request Interface (Normal case)
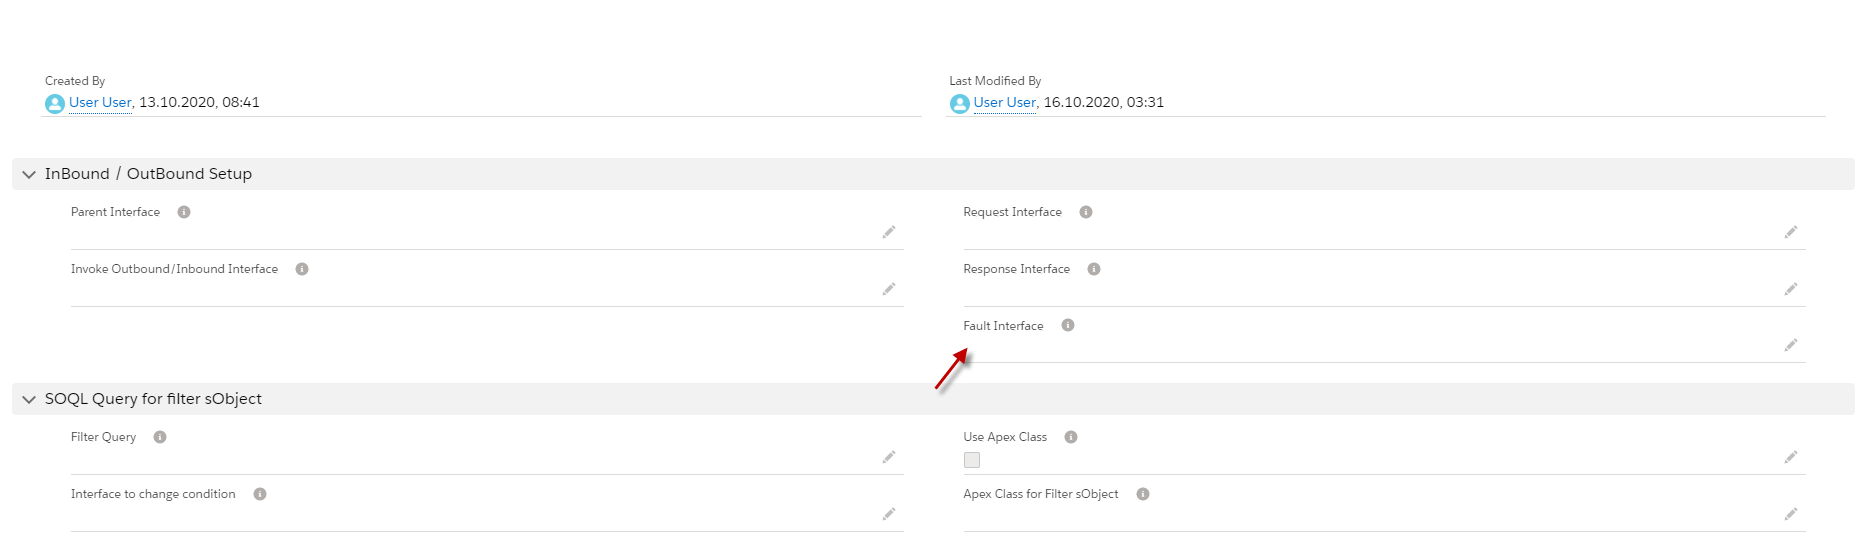
- Scroll down to find the fault Interface field.
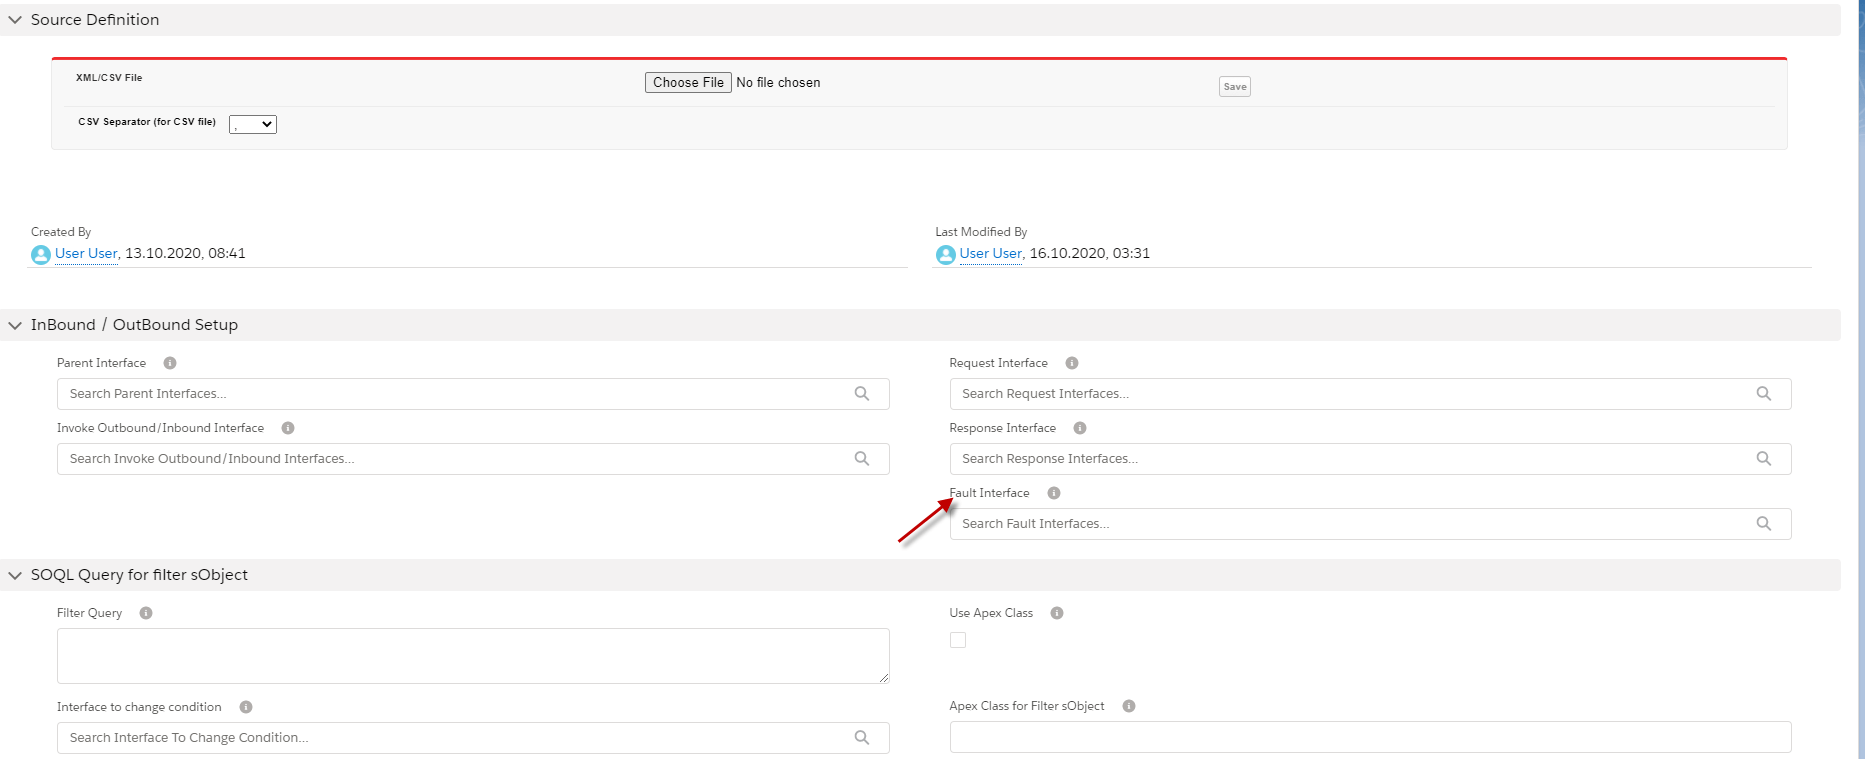
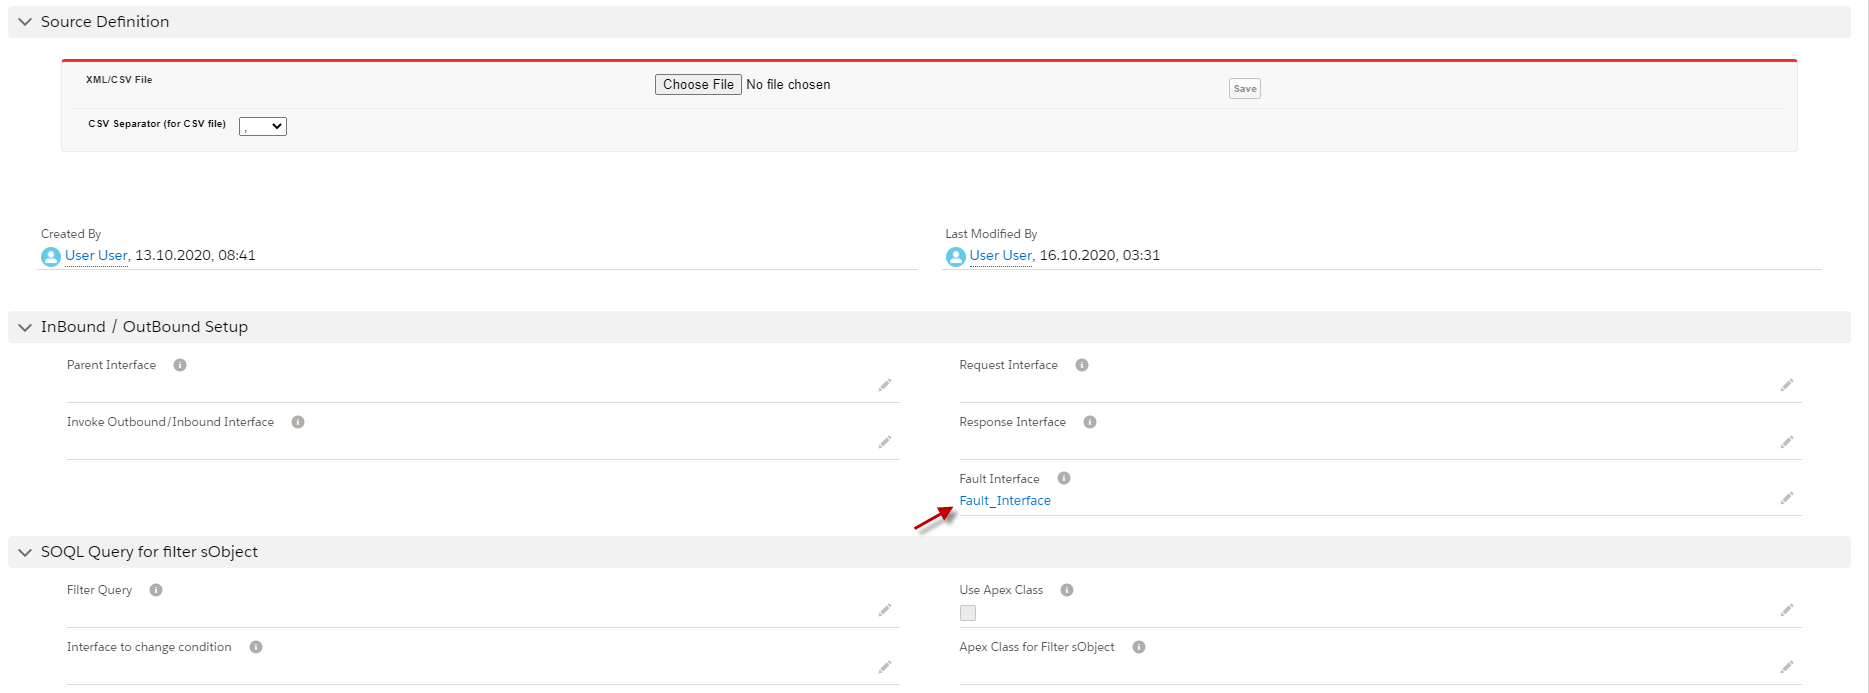
- Put the fault Interface in this field.
Step 3: callout with apex code.
- Here’s an example.

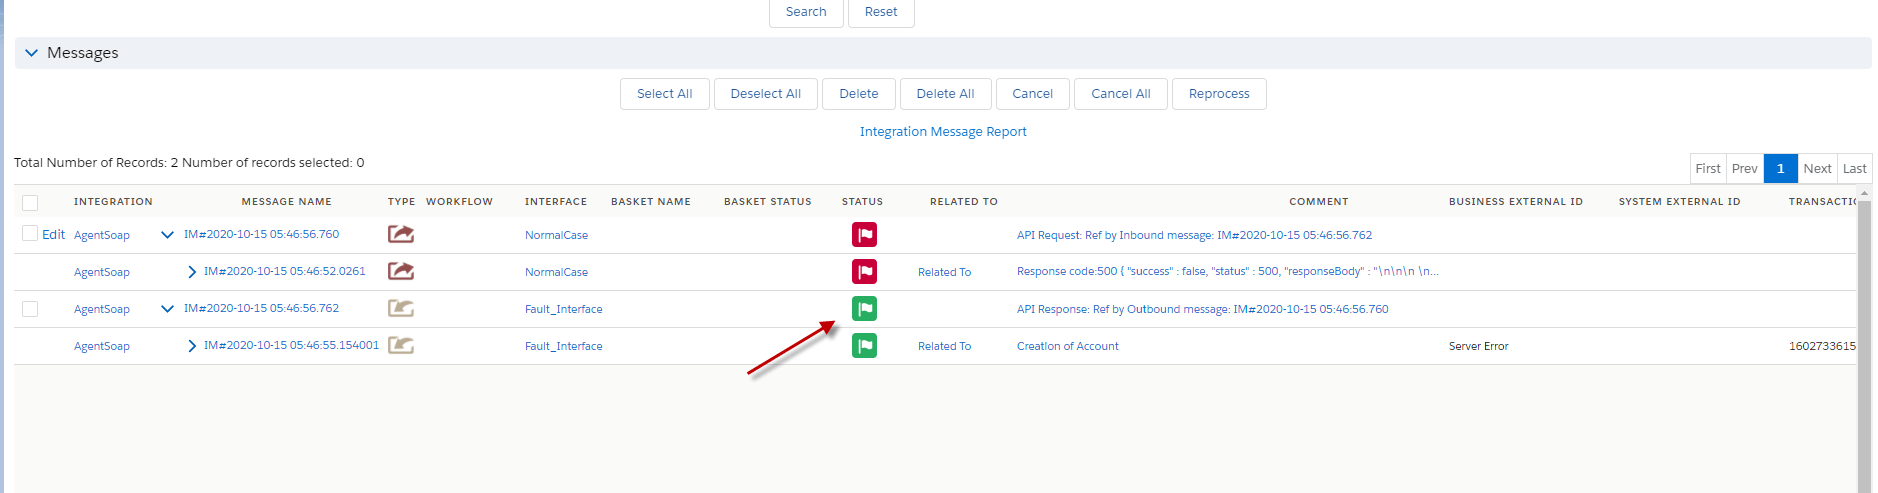
- Go to monitor to check results.
Case 4
Handle multiple different fault messages
[su_box title="Note" box_color="#2a8af0" title_color="#000000"]When we use Multiple different fault messages, we don’t need to put fault Interface in the Request Interface because the field of fault Interface is a priority than related fault Interfaces. If we put Interface in field fault Interface, it will do only with field fault Interface and the related Interface will not do.[/su_box]. Pre-require:
- Create or Upload Message Type SOAP with Fault Message Type. (We have configured in case1)
- Configuration Agent control board. (We have configured in case1)
- Create Adapter Agent SOAP. (We have configured in case1)
- Create Integration and outbound Interface. (We have configured in case1)
- Create two Inbound Interfaces for fault interfaces.
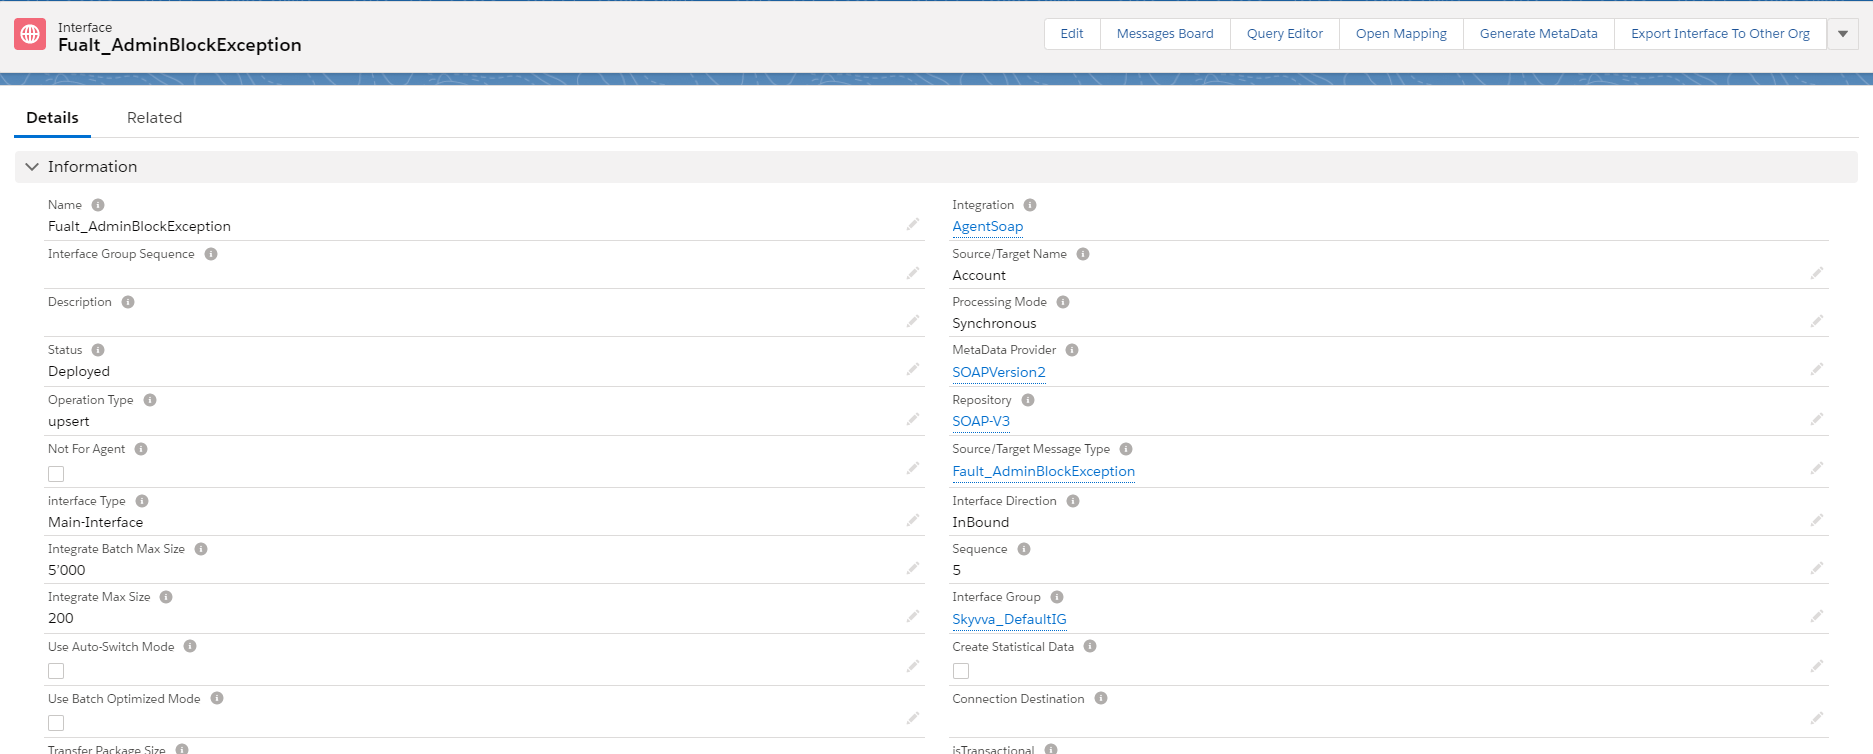
We have created a Fault Interface system error already so now we need to create two more fault Interfaces. Step1: Go to Integration and create Fault interfaces.
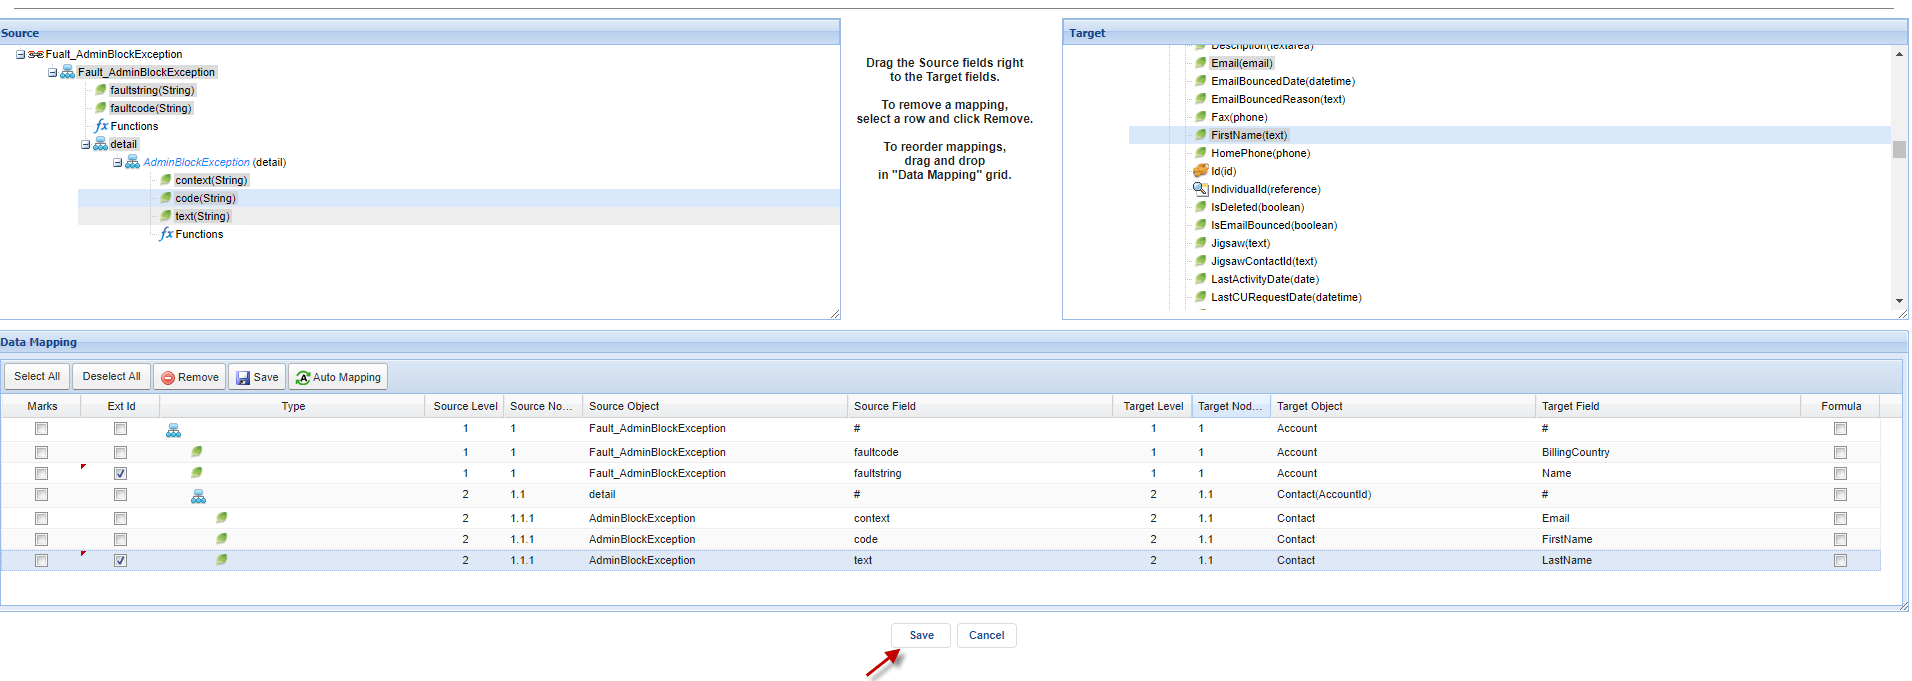
- Create Inbound fault Interface and linked with fault_AdminBlockException and click button save.

- Do mapping.
Step2: Put Outbound Interface Name in fault Interface of Every Response Interfaces.
- Make sure that the request Interface doesn’t have a fault interface in their field.
- Here’s the request Interface.

- Scroll down to make sure that this interface doesn’t have a fault Interface.
- Here’s Response System Error Interface. (That we have created above)
- Scroll down to put request interface in field fault Interface.
We need to other Response fault Interface like the same way.
- Here’s AdminblockException fault Interface.
- Scroll down to put the request interface in the field fault interface.
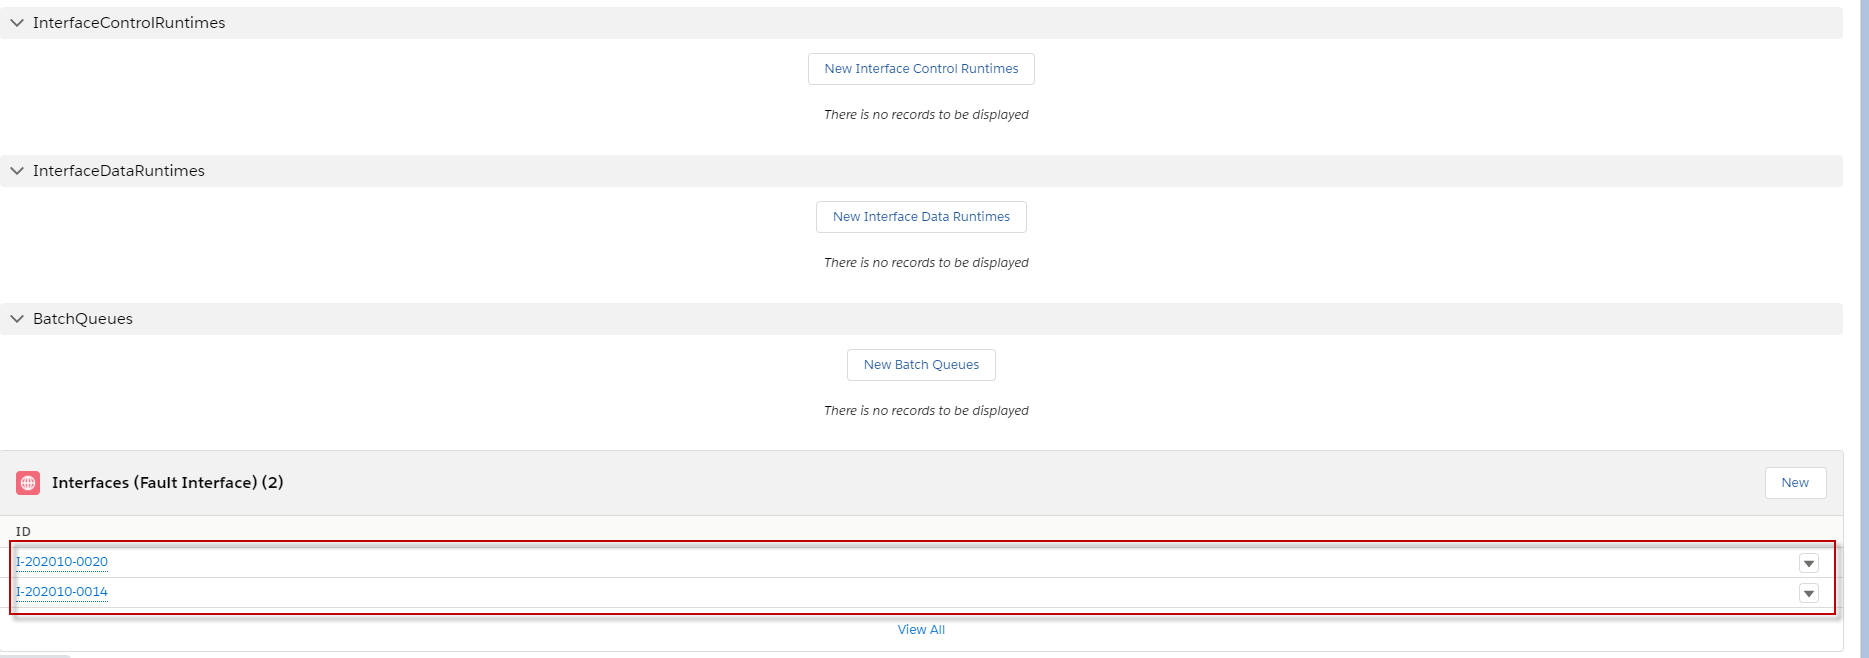
Step 3: Go to Request Interface to see response fault Interfaces related.
- Go to Related Interface of request Interface.
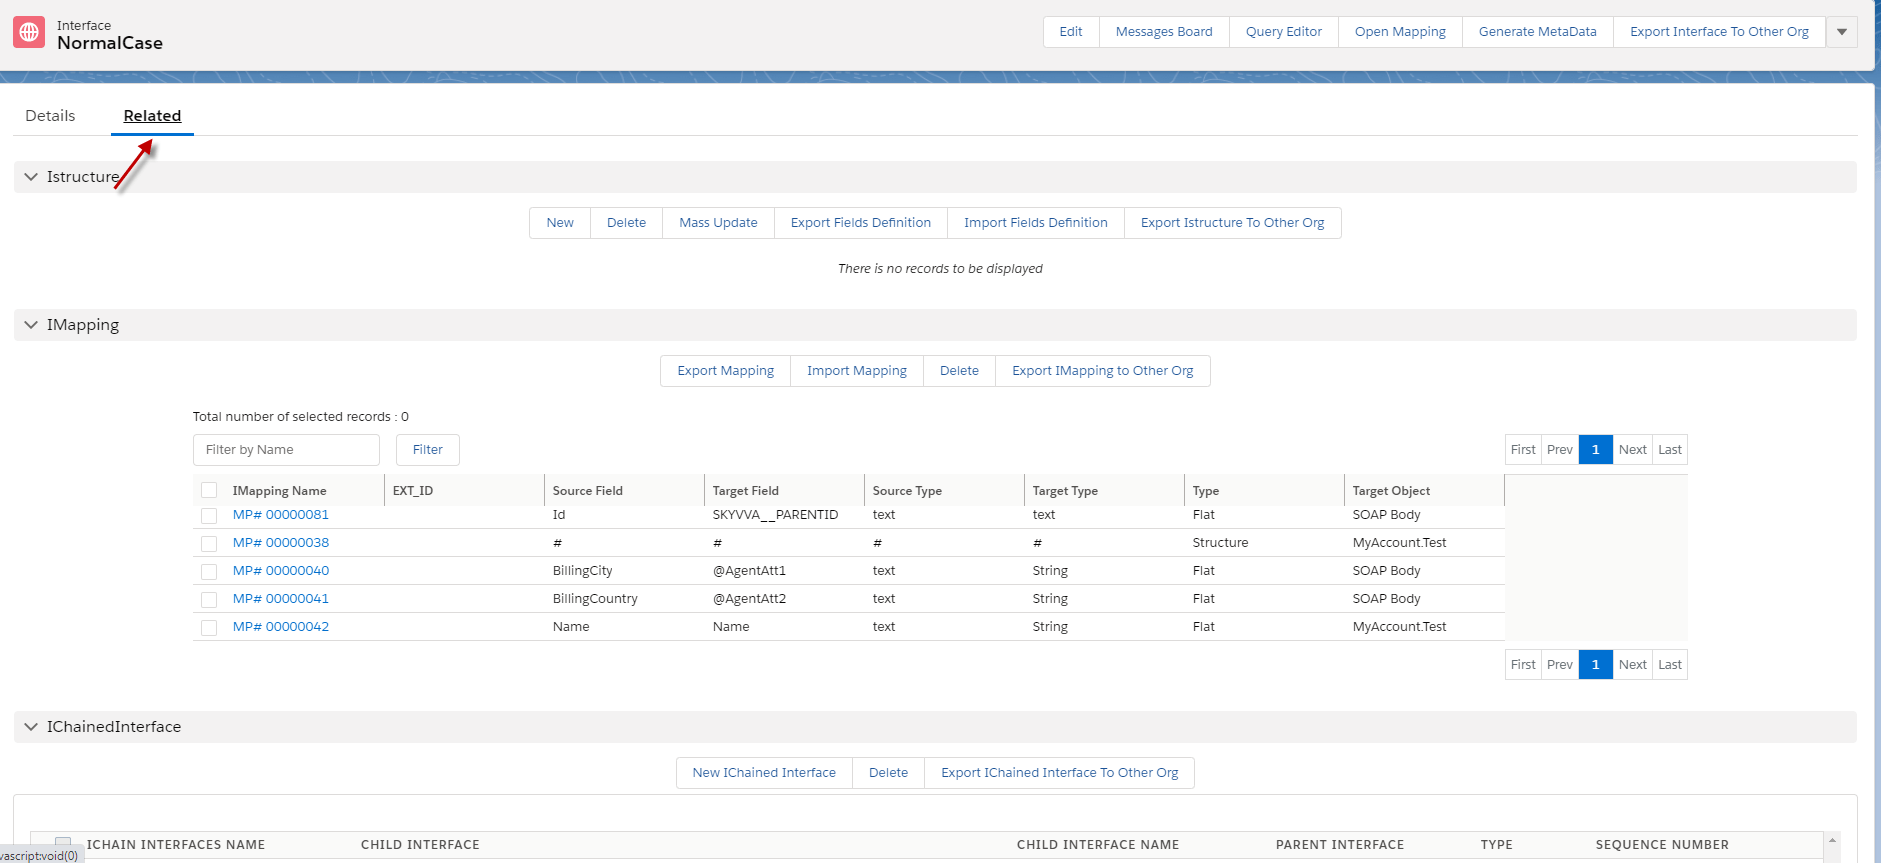
- Scroll down to see both fault Interfaces have related to this request Interface.
Step4: callout with apex code. [su_box title="Note" box_color="#2a8af0" title_color="#000000"] Make sure that API has faults Message.[/su_box]
- Go to the message monitor to check the result.
